![KK Icon.png]](https://knowledge.kidkare.com/hs-fs/hubfs/KK%20Icon.png?width=40&height=40&name=KK%20Icon.png)
Beacon Verify is a command center for managing CACFP claims across your network of providers. Rather than navigating to each provider individually, the dashboard shows claim status, errors, readiness, and estimated reimbursement for your entire organization — all in one place.
With Beacon Verify, you can send bulk notification to providers in your portfolio when they need to complete tasks for their claim, such as gathering new enrollments, recording attendance and meal counts, and more.
💡Where do the messages go?: When you send a message to your sites through Beacon Verify, it appears in the center's Message Center, where they can review it and take action, if necessary.
Send Notifications from the Claims Pipeline
In some situations, you may need to prompt a provider to submit their claim to you. This can be done in-bulk from the Claims Pipeline in Beacon Verify.
- Click the Unsubmitted segment. The Unsubmitted Claims pop-up opens.
- Check the box next to each provider to notify. You can also check the box in the table header to select all providers.
- Click Send Reminder. The Send Reminder pop-up opens.
- Scroll down to the Subject and Message fields. KidKare provides default text based on the missing items identified by Beacon Verify (listed above the message boxes for reference), but you can click each box to customize your subject and your message.
- Click Send Notification.
Send Notifications from Priority Actions
The Priority Actions strip gives you quick access to data regarding four key claim areas: Claim Errors, Enrollment, Attendance, and Forms. Each Priority Action allows you to send bulk notifications to an impacted center list.
- Click View in a Priority Action. For example, click View for the Expired Enrollments action to review impacted sites.
- Check the box next to each provider to notify. All providers listed are checked by default.
- To clear the selection, click the checkbox in the table header. Click it again to select all providers again.
- Use the Search Providers box to search for and select centers to message.
- Use the By Name, By Child Count, and By Amount toggles to adjust the sorting of the provider list.
- Once you have selected the provider(s) to notify, click Notify, in the bottom-right corner.
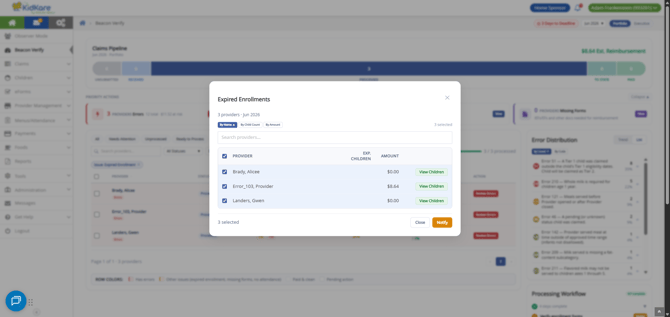
- The Notify Providers pop-up opens and displays the centers you've chosen to message, as well as the message to send. KidKare provides some standard text, but you can customize the messaging yourself before you send it. Simply click the Subject and Message boxes and type your message.
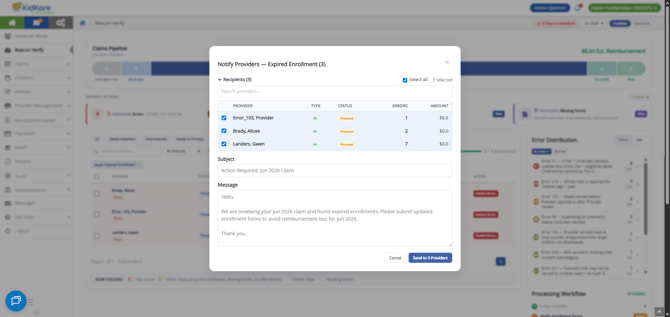
- When finished, click Notify to send your message. The selected providers will receive the message in their Messages Center in KidKare, and you can see the message logged to the Communications widget in Beacon Verify.
Send Notifications from Site Details
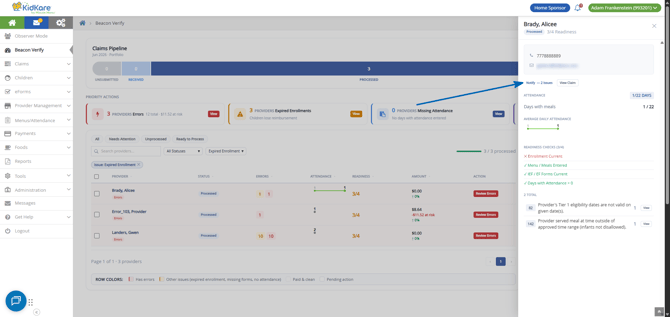
When you are reviewing a providers's claim details for the month, you can reach out directly from the Site Detail Panel.
- Use the filters to filter the table by status or issue. You can also search for a specific provider.
- Click on the individual provider to open the Site Detail Panel.
- Click Notify under the contact card.
- The Contact Provider pop-up opens, with the provider you were viewing selected by default. In this pop-up, you can also see the missing items identified for this provider's claim. These are listed in the messaging below, by default, but you can customize the message however you wish.
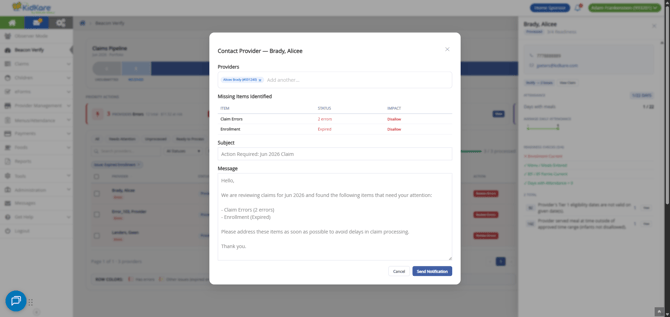
- Click Send Notification to send the message.
Send Notifications from the Communications Widget
For a more generalized approach, you can initiate messaging directly from the Communications widget.
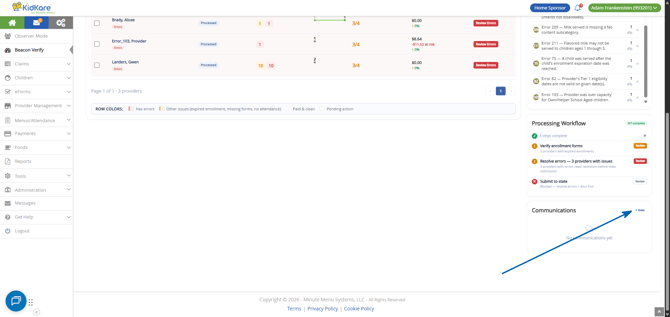
- Click +New to open the Send Notification pop-up.
- Check the box next to each provider to notify. All providers listed are checked by default.
- To clear the selection, click the checkbox in the table header. Click it again to select all providers again.
- Use the Search Providers box to search for and select centers to message.
- Once your providers are selected, scroll down to the Subject and Message fields. KidKare provides default text based on the missing items identified by Beacon Verify (listed above the message boxes for reference), but you can click each box to customize your subject and your message.
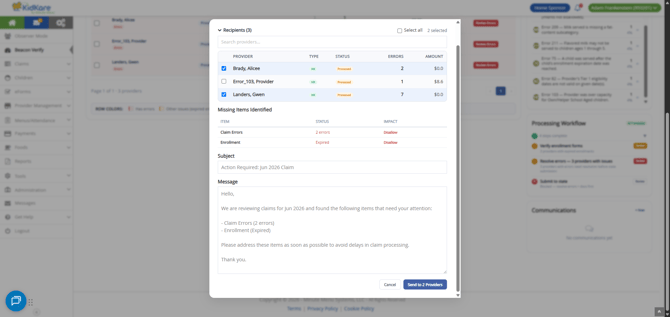
- When finished, click Send to Providers.
Re-Send Reminders
Keep track of all communications sent from Beacon Verify in the Communications widget. This widget lists everything you've sent, who you sent it to, and the subject. This allows you to easily re-send prior notifications to providers who may need the additional message.
- Scroll to the Communications widget on the right-hand side.
- Review the list of messages sent. This widget also indicates if a provider has replied to you.
- Click a message to view details.
- Click Resend next to the provider to whom you need to re-send the message. You can also click Resend All Pending to re-send the message to all providers who have yet to reply.