Customize your KidKare experience on the Settings page. Here, you can change your language settings, specify what page displays when you log in, and specify what participants in your program are called throughout the application.
-
Log in to KidKare.
-
Click
 from the menu to the left. The Settings page opens.
General Settings
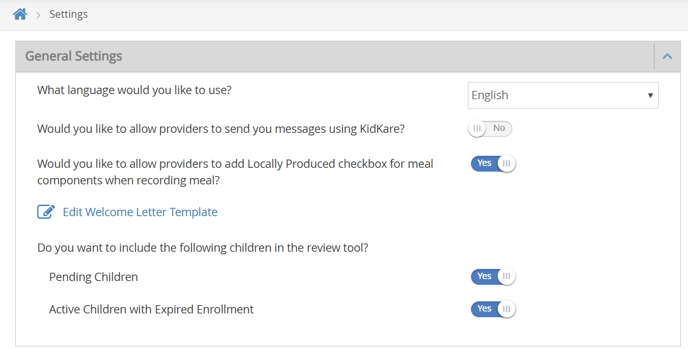
In the General Settings section, you can:
-
-
Use the dropdown to select What language would you like to use?
-
Toggle to Yes if you Would you like to allow providers to send you messages using KidKare?
-
Toggle to Yes if you Would you like to allow providers to add Locally Produced checkbox for meal components when recording meal?
-
Click Edit Welcome Letter Template to edit the email that your homes when you create their new KidKare account.
- Use the toggles for Do you want to include the following children in the Review Tool? to specify whether to include Pending Children and/or Active Children with Expired Enrollment in Reviews.
-
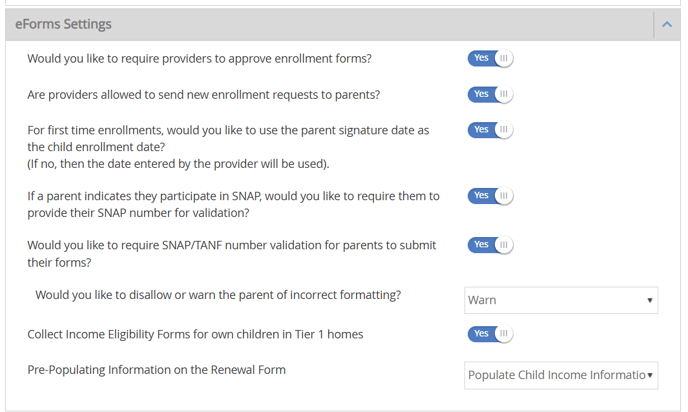
eForms Settings
In the eForms Settings section, click ![]() next to each option to enable it or select an action item in the drop down provided. You can change settings for the following:
next to each option to enable it or select an action item in the drop down provided. You can change settings for the following:
Customize the KidKare Welcome Letter
You can customize the welcome letter sent to your providers when you first enroll them in your sponsorship. By default, this letter contains:
-
A brief, introductory message.
-
A link to allow the provider to log in and reset their password.
-
Get started information. View Introduction to KidKare for Home Providers for more information.
-
A link to the KidKare Knowledge Base for providers.
-
A signature that includes your name and phone number.
To customize the welcome letter:
-
Log in to app.kidkare.com.
-
Click
. The Settings page opens. -
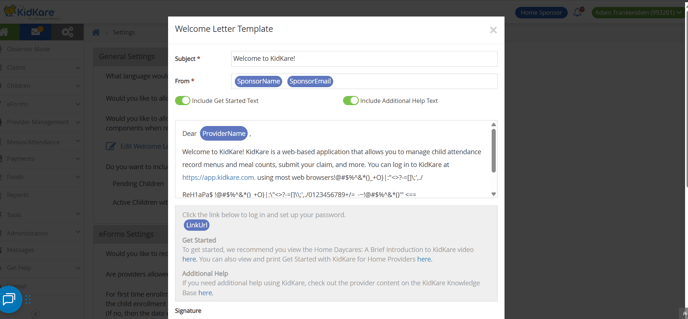
In the General Settings section, click Edit Welcome Letter Template. The Welcome Letter Template pop-up opens.
-
Click Edit.
-
Update the Subject and From boxes, as needed. Variables you can use to fill-in certain information are listed at the bottom of the editor (SponsorName, ProviderPhone, and so on). To add one of these variables to your text, type @ and begin typing the variable to use. A list of available items displays as you type, so you can select the variable you need. For example, to add the provider's name to the Subject, you would type @ProviderName in the Subject box.
-
In the Message section, click the toggle next to Include Get Started Text and/or Include Additional Help Text to remove those sections. The toggle turns red, indicating that the section was removed. Simply click the toggle again to re-add them.
Note: You cannot change the text in these sections. You also cannot remove the log in link.
-
Click the first Message box and customize your messaging. Just as you did in Step 5, you can use variables to complete certain information, such as the provider's name.
-
Click the Signature box to customize your signature.
-
Click Add Attachment to add any attachments needed.
-
When finished, click Save.