You can add food frequency and food combination rules. Watch the video below to learn more, or scroll down for step-by-step instructions.
Adding Food Frequency Rules
-
From the menu to the left, click Foods.
-
Click Food Rules. The Rules page opens.
-
Click New Rule and choose from the following:
-
Limit Foods/Day
-
Limit Foods/Week
-
Limit Foods/Month
-
-
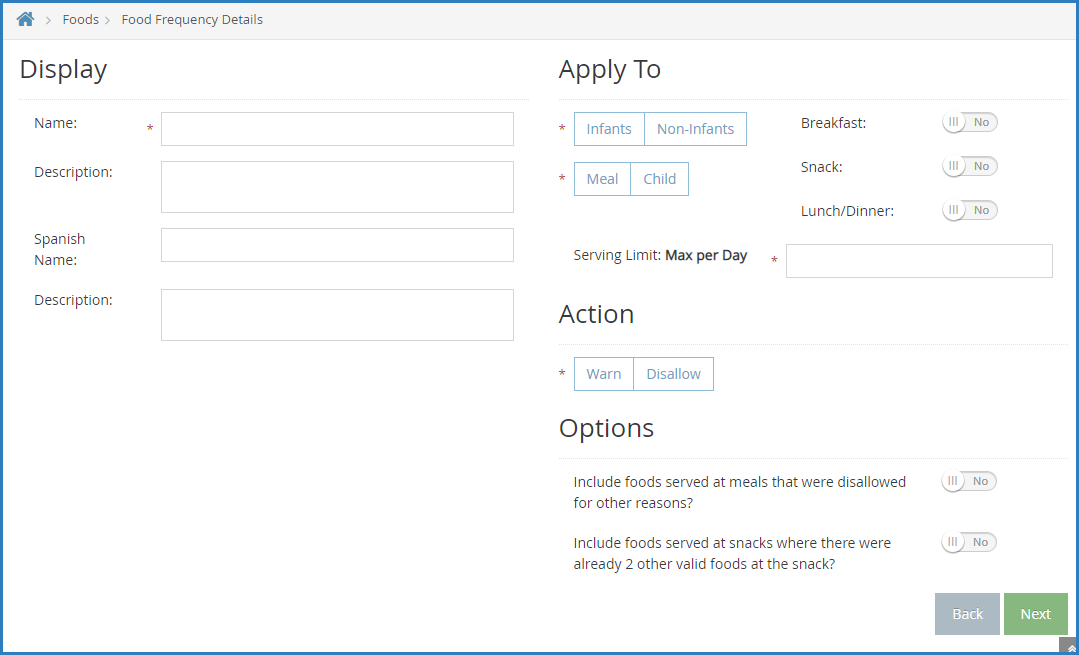
The Food Frequency Details page opens. In the Display section:
-
Click the Name box and enter a name for this rule. This box is required.
-
Enter a description, Spanish name, and Spanish description, if needed.
-
-
In the Apply To section, select the age group and meals to which the rule applies:
-
Click Infants or Non-Infants.
-
Click Meal or Child.
-
Click
 next to each meal to which this rule applies.
 -
Click the Serving Limit box and enter the number of servings of this food allowed for the time period you selected in Step 5.
-
-
In the Action section, select Warn or Disallow.
-
Click Next. The Select Food Restriction page opens.
-
Select a food type, category, or food to restrict.
-
To restrict a food type:
-
Click Food Type.
-
Select the type.
-
-
To restrict a food category:
-
Click Category.
-
Click the category in the first box and drag and drop it into the Selected Items for Rule box. You can click the Type to Search box and enter the category name to filter the categories that display.
-
-
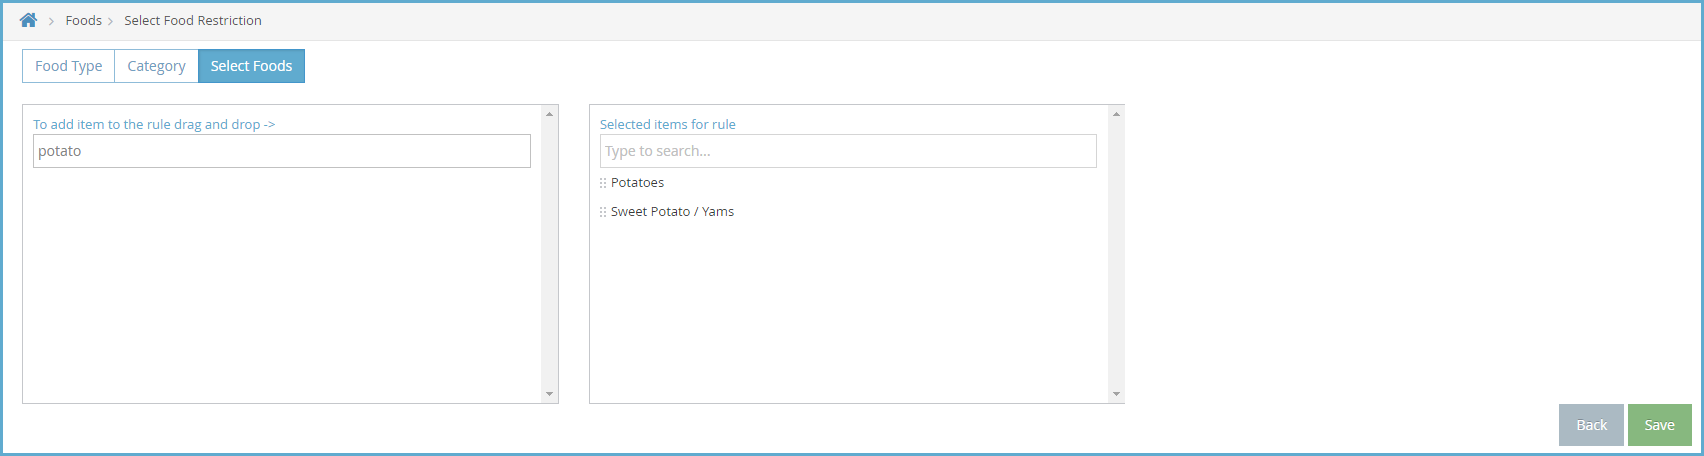
To restrict a specific food:
-
Click Select Foods.
-
Click the food in the first box and drag and drop it into the Selected Items for Rule box. You can click the Type to Search box and enter the food name to filter the foods that display.
-
-
-
Click Save.
Adding Food Combination Rules
-
Click the Administration menu and select Manage Foods. KidKare opens in a browser.
-
Log in using the same credentials you use to access Minute Menu CX.
-
From the menu to the left, click Foods.
-
Click Food Rules. The Rules page opens.
-
Click New Rule and choose from the following:
-
Any 2 Foods: The rule is executed when two specific foods are served together, such as french-fries and mashed potatoes.
-
All Foods: The rule is executed when all foods on the rule are served.
-
-
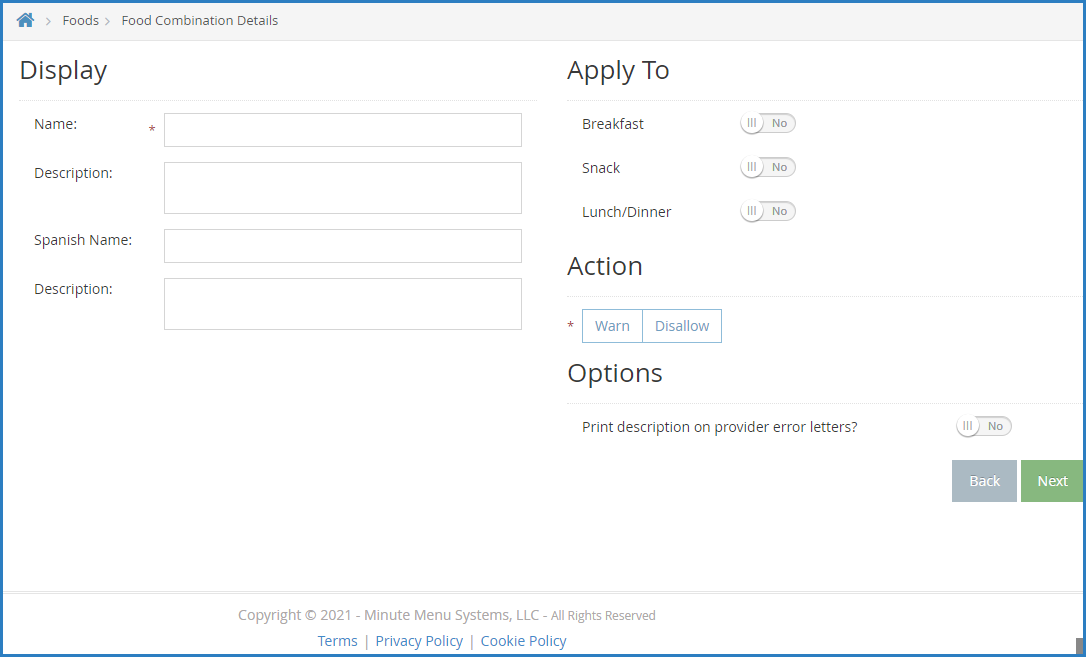
The Food Combination Details page opens. In the Display section:
-
Click the Name box and enter a name for this rule. This box is required.
-
Enter a description, Spanish name, and Spanish description, if needed.
-
-
In the Effective Dates section, set a start and end date for this rule if it is only valid during a certain time period.
-
In the Apply To section, click
next to each meal to which this rule applies. -
In the Action section, select Warn or Disallow.
-
Click Next. The Select Food Restriction page opens.
-
Select a food type, category, or food to restrict.
-
To restrict a food type:
-
Click Food Type.
-
Select the type.
-
-
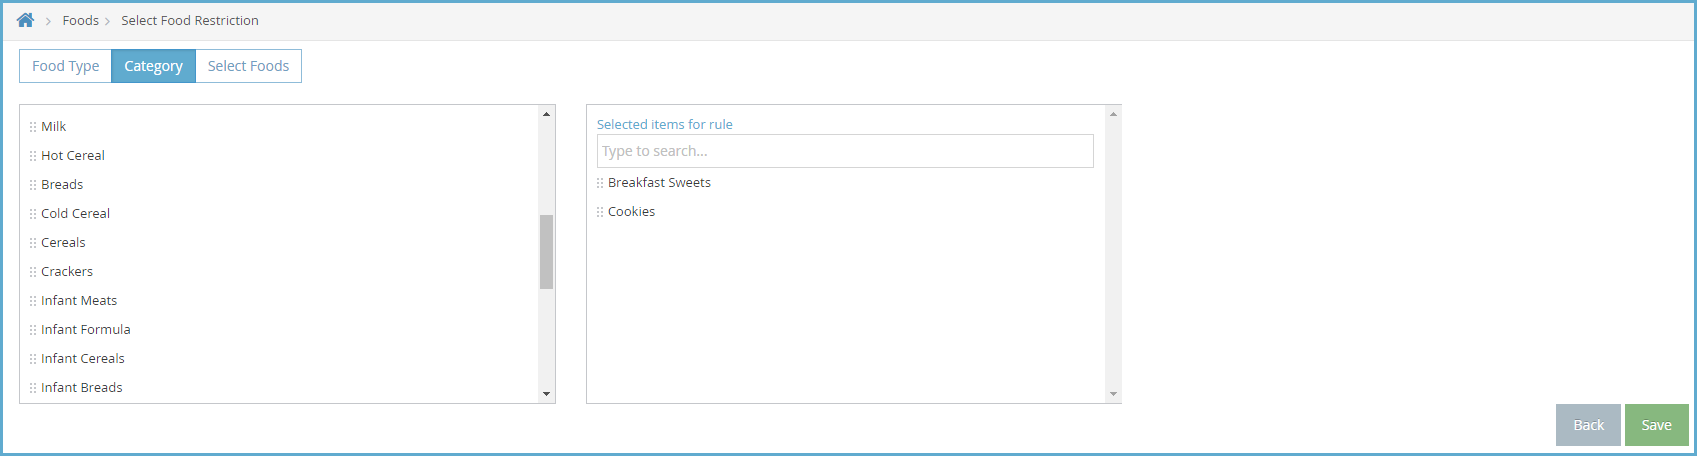
To restrict a food category:
-
Click Category.
-
Click the category in the first box and drag and drop it into the Selected Items for Rule box. You can click the Type to Search box and enter the category name to filter the categories that display.
-
-
To restrict a specific food:
-
Click Select Foods.
-
Click the food in the first box and drag and drop it into the Selected Items for Rule box. You can click the Type to Search box and enter the category name to filter the categories that display.
-
-
-
Click Save.
Limit Juice to Once Day
Juices are limited to once per day for non-infants and not allowed at all for infants. As such, you need to ensure that you do the following:
-
Mark all juices as juice in the food tool.
-
Ensure that all juices are set to Disallow for infants.
-
Ensure that juices are all stored in the Juices category.
To do so:
-
From the menu to the left, click Foods.
-
Click Food List.
-
Click the Name box and type juice to filter to the majority of juices. You may also need to search for cider or any other juice that does not have the word juice in the name later. You can also click Vegetables and Fruit at the top of the page to limit to all foods in those categories, and then search within those categories.
-
Click the juice to update.
-
Click the Category drop-down menu and assign the juice to your Juice category.
-
Ensure that the Food Type is correct. For example, apple juice should be a fruit, and carrot juice should be a vegetable.
-
Click
 next to Juice to mark this as a juice. The Infant 6-11 and Infant 0-5 boxes in the Approvals section are automatically set to Disallow and cannot be changed.
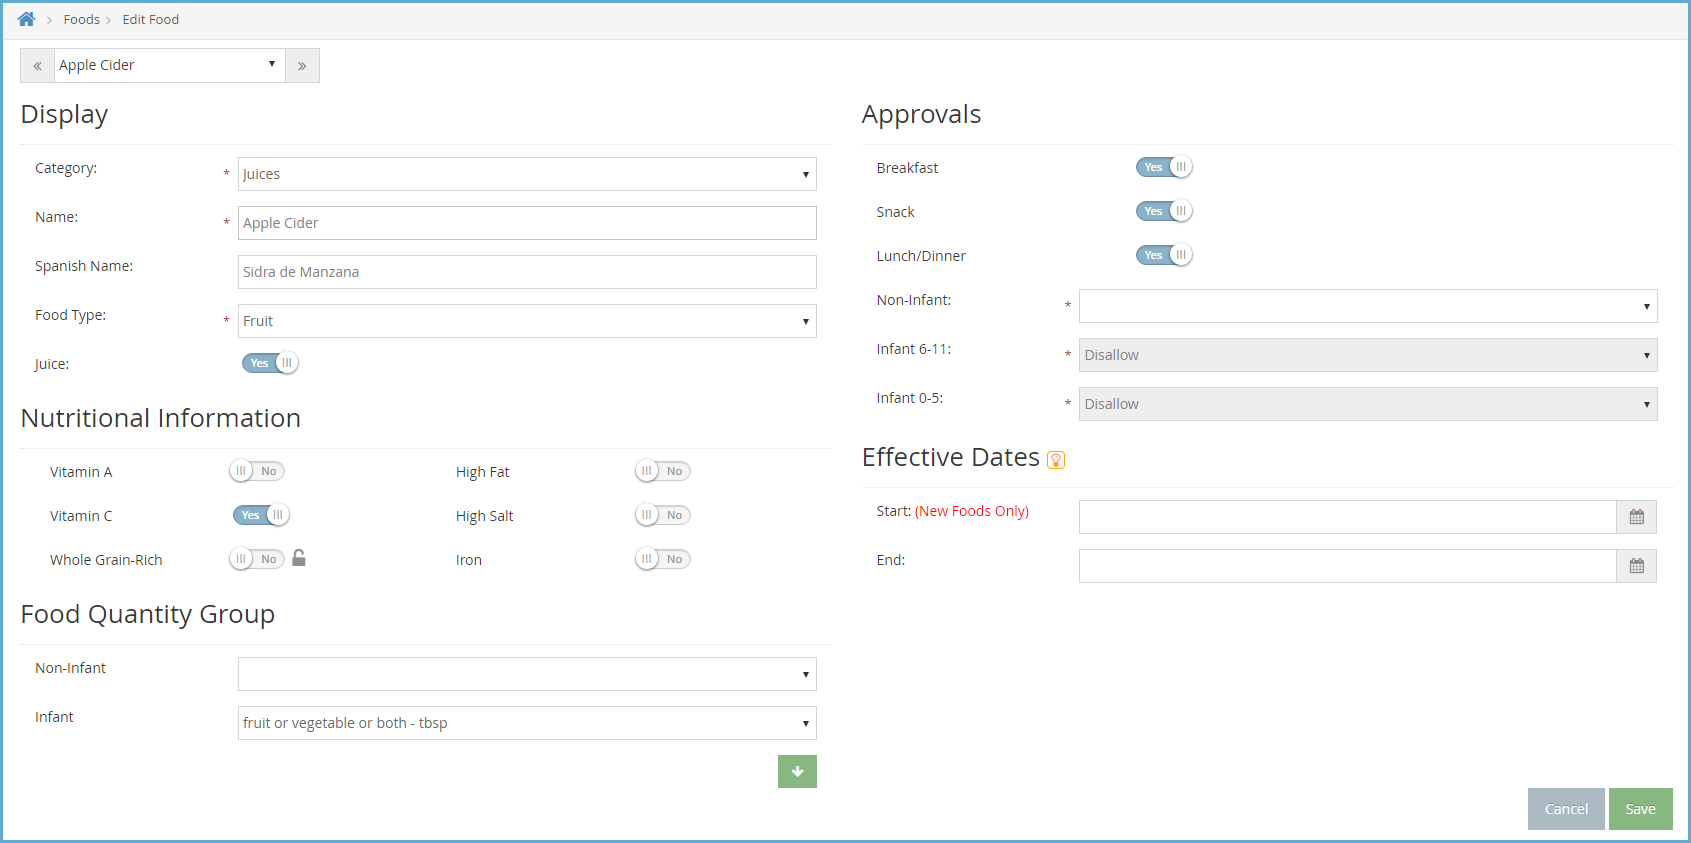
-
Click Save.
-
Click
 to move to the next juice on your list.