Create Export File Outputs
Export files are not standard reports. They are customizable outputs that are generated as XLS files instead of PDFs. You need a program capable of opening spreadsheet files, such as Excel®, to view them. The following export file outputs are available:
-
Provider List Export File
-
Child List Export File
-
Claim List Export File
-
Review List Export File
-
Training List Export File
-
Provider Messages Export File
Each of these export files have a corresponding Mailing Label report. The same steps and filters apply. However, the Mailing Label reports are generated in an Avery 5160 format.
To generate an export file:
-
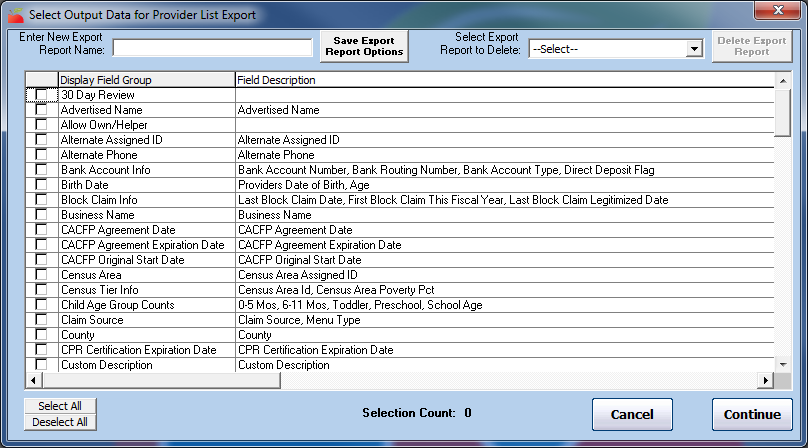
Click the Reports menu, select the appropriate category, and select the file to generate. Depending on the report you select, an filter window (such as the Provider Filter) opens. Set filters and click Continue. The Select Output Data window opens. The Provider List Export File version is shown below.
-
Check the box next to each field to include in the report. You can also click Select All to select all fields.
-
Click Continue. The Save As window opens.
-
Browse to the location in which to save the export file. Export files are saved to C:\Program Files\MMHX\Sponsor folder by default, so we strongly recommend you save the file in a different, easy to access location.
-
Click the File Name box and rename it, if needed. The default name is the current date and time, followed by the export type.
-
Click Save.
Saving List Export File Report Templates
Many Sponsors use the list export files to create the same basic report multiple times a year. To streamline this process, you can save your filter choices and output options as a template, so you do not have to select them again each time you generate the report.
-
Click the Reports menu, select the appropriate category, and select the file to generate. Depending on the report you select, an filter window (such as the Provider Filter) opens. Set filters and click Continue.
-
Check the box next to each field to include in the report. You can also click Select All to select all fields.
-
Click the Enter New Export Report Name box and enter a name for this template.
-
Click Save Export Report Options.
-
Click OK at the confirmation prompt.
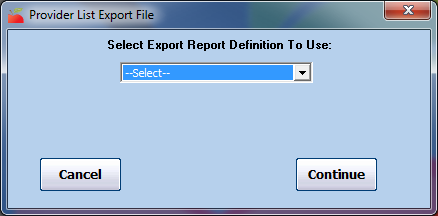
Once you have saved a template, you are prompted to select a template when you select that particular export file. Click the Select Export Report Definition to Use drop-down menu, select the template to use, and click Continue.
To generate a list of all your saved Export File reports, click Reports, select Misc, and click Export Files Reports.
Report Output Windows
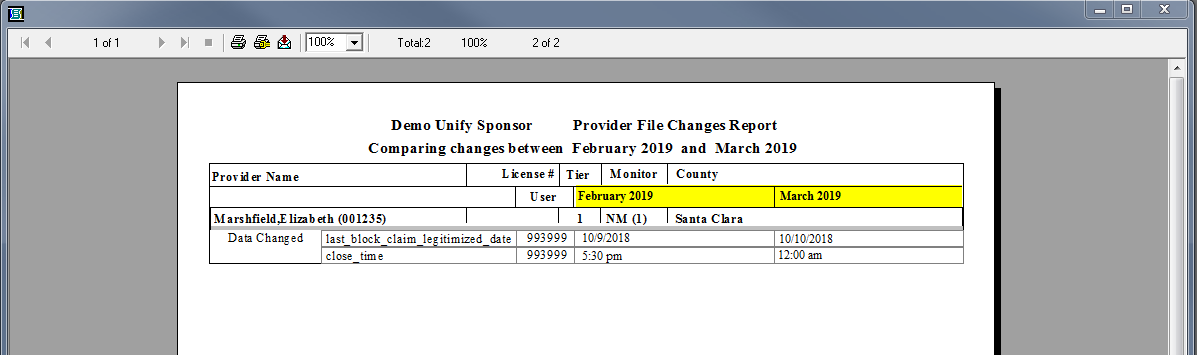
Each time you generate a report in Minute Menu HX, it prints to a Report Output window on-screen. You can review the report in this window, print it, or export it.
-
The total number of pages displays in the top-left corner. Click the arrows to move between pages.
-
To zoom, click the 100% drop-down menu and select the zoom level to view.
-
Click
 to adjust your printer settings.
 -
Click
 to print the report.
 -
Click
 to export the report.
-
Click the Format drop-down menu and select the format to use. Note that the file format you select may skew the report's formatting.
-
Click the Destination drop-down menu and select the location to which to export it.
-
Click OK.
-
When prompted, browse to the location in which to store the report.
-
Print Reports to PDF
We recommend you print reports to PDF whenever possible—especially if you are emailing them to your providers. Note that you must have a PDF creator installed before you can print to PDF. If you do not, you can download and install CutePDF Writer for free here (external link). To change the printer used when printing reports:
-
Generate a report as you normally would. See the bullets and linked articles, above.
-
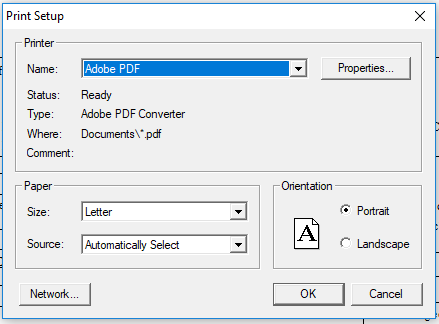
In the Report Viewer, click
 .The Print Setup dialog box opens.
-
Click the Name drop-down menu and select your PDF printer, Adobe PDF, for example.
-
Click OK.
-
Click Print to print the report. Your PDF printer name should display.
-
Click OK.
-
Browse to the location on your computer in which to store the report, and click Save. You can now email the PDF report to your provider, if needed.