Record Other Income
Other income is income not already tracked on your invoices. You can record and track this income on the Other Income page. This could be claim reimbursements, spousal income, grants, registration fees, side business income, and more.
-
From the menu to the left, click Accounting.
-
Click Income.
-
Enter your accounting PIN and click Go.
Note: If you do not have an account PIN set, you are prompted to set one.
-
Click
 and select Other Income. The Other Income page opens.
 -
Click
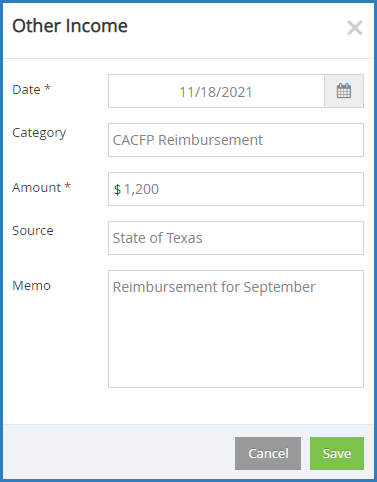
 . The Other Income pop-up opens.
 -
Click the Select a Day box and enter the date on which the income was earned.
-
Click the Category box and enter the income category. This could be food program, donation, grant, and so on.
-
Click the Amount box and enter the dollar amount received.
-
Click the Received From box and enter the name of the person/entity that paid you.
-
Click Save.
View Other Income
Your Other Income entries are listed on the Other Income page. You can set filters to locate specific entries—especially if you need to print only certain entries out of a long list.
-
From the menu to the left, click Accounting.
-
Click Income.
-
Enter your accounting PIN and click Go.
-
Click
 and select Other Income. The Other Income pages opens.
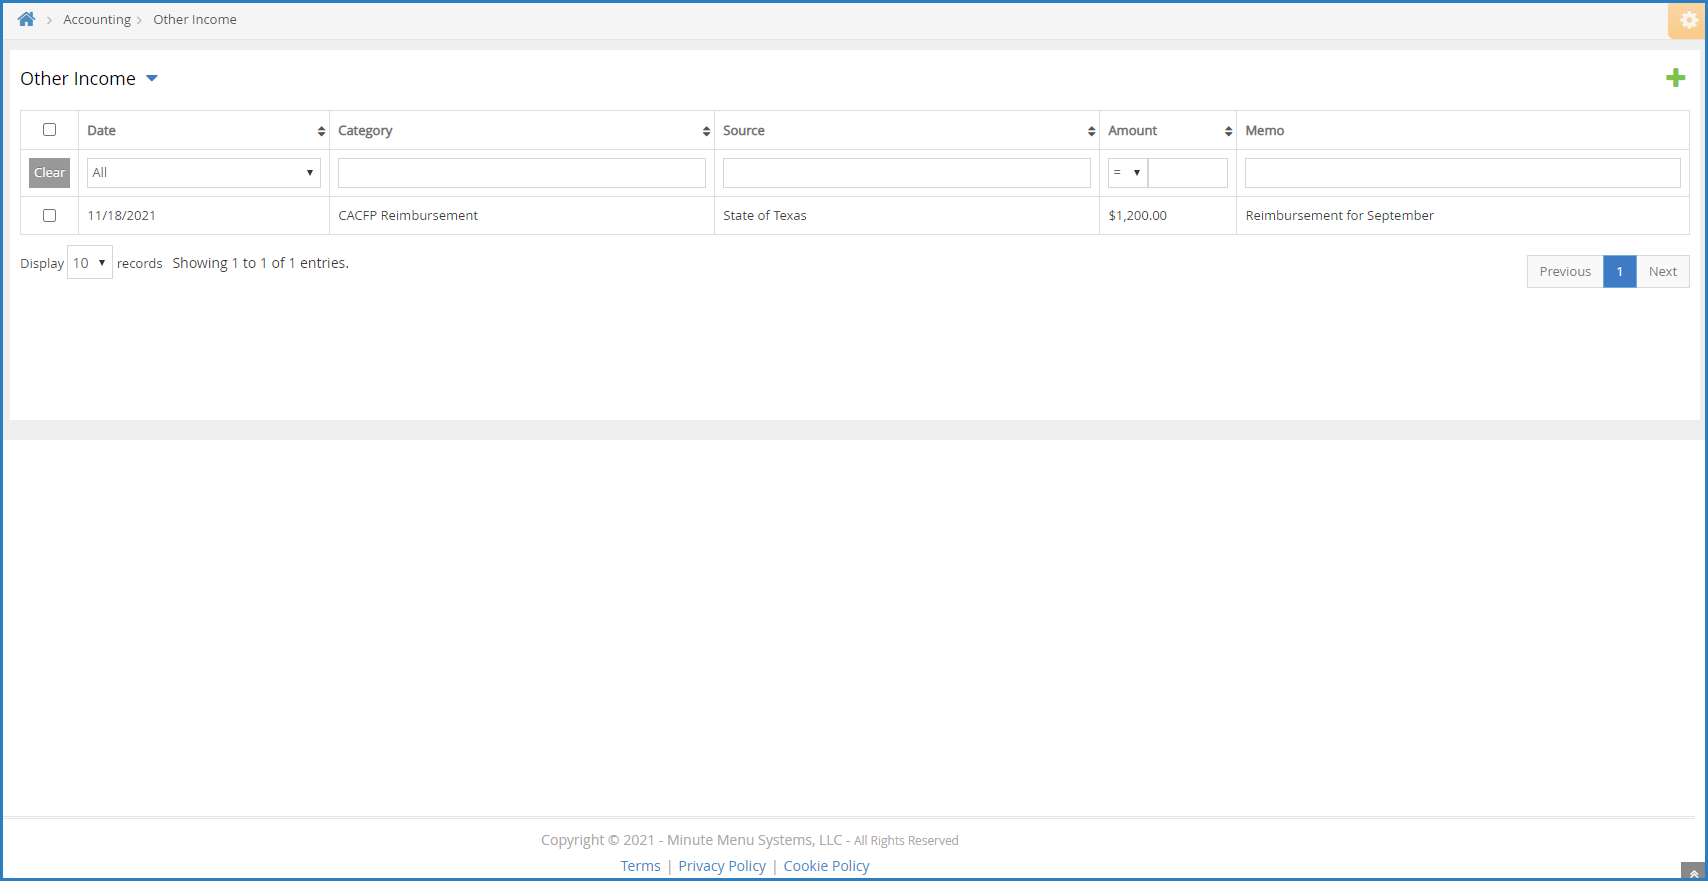 The following information displays for each entry (assuming you provided it):
-
Date: This is the date the income was received.
-
Category: This is the category to which you assigned the income.
-
Source: This is the source of the income you assigned to this entry.
-
Amount: This is the dollar amount of the income.
-
Memo: This displays any notes you entered about the other income entry.
-
-
You can filter by the following:
-
Date: Click the drop-down menu and select the time period to view. To set a custom date range, select Custom and enter start and end dates in the boxes that display.
Note: To clear a custom date filter, click the Date drop-down menu and select a different time period to view, or you can select All to display all entries. You can also click Clear in the far-left column to clear all applied filters.
-
Category: Click the box at the top of this column and begin typing a category name.
-
Source: Click the box at the top of this column and begin typing a source.
-
Amount: Click the drop-down menu and select an operator. You can choose equals (=), greater than (>), . Then, click the corresponding text box and enter an amount. For example, to find all Other Income over $100, you would select > in the first box and then type 100 in the corresponding text box.
-
Memo: Click the box at the top of this column and begin typing a memo.
-
-
To clear any applied filters, click Clear in the far-left column.
-
Click each column header to sort in ascending or descending order.
Edit Other Income
To edit an Other Income entry:
-
From the menu to the left, click Accounting.
-
Click Income.
-
Enter your accounting PIN and click Go.
-
Click
and select Other Income. -
Click the entry to change. The Other Income pop-up opens.
-
Enter new information over the existing information.
-
Click Save.
Delete Other Income
You can delete Other Income entries, when needed. There is no need to zero any amounts before proceeding.
-
From the menu to the left, click Accounting.
-
Click Income.
-
Enter your accounting PIN and click Go.
-
Click
 and select Other Income.
 -
Check the box next to the other income entries to delete. You can also check the box at the top of the table to select all entries.
-
Click
 .
. -
Click OK at the Are You Sure prompt.
Print Other Income
To print your Other Income entries for your records:
-
From the menu to the left, click Accounting.
-
Click Income.
-
Enter your Accounting PIN and click Go.
-
Click
 and select Other Income. The Other Income page opens.
 -
Check the box next to each income entry to print.
-
Click
 . Your browser's printer settings open.
 -
Select your printer and adjust your printing settings, as needed.
-
Click Print.