Set Preferences
Minute Menu HX is designed to be highly customizable to meet a variety of business needs. The Sponsor Preferences window allows you to customize HX and control many aspects of the program, such as edit checks, user preferences, general behavior, and so on. Review your policies to ensure that HX is set up to meet your agency's needs and expectations.
Policies should only be changed by the main decision makers of the company and/or those with the authority to do so. Changes to policies could impact claims. You can control access to policy settings with user permissions and staff types.
-
Click the Administration menu and select Sponsor Preferences. The Sponsor Preferences window opens.
-
Use the Select the Category to Move To drop-down menu and the Select the Error to Move To drop-down menus to jump to a specific setting.
-
Click a setting description to view it in a larger pop-up. Click OK to close it.
-
Check the box next to the setting to change.
-
Click the Select Setting drop-down menu and select the setting to use. For preferences, this is typically Y or N. For edit checks, you can choose from the following:
-
Disallow: The processor automatically deducts meals based on the edit check that was violated. For example, if a child enrollment form has not been received, claiming that child is out of compliance with regulations. HX can automatically disallow reimbursement for any meal in which the child was claimed. These meals an be added back later, if needed. However, if you would disallow most of the time, choose this option.
-
Ignore: The processor does not complete the edit check, and the error is not noted on the OER. For example, if checking to see if a child is claimed on a day or for a meal for which they are not enrolled is not a required edit check, you could set that policy to Ignore.
-
Warn: The error does not deduct from the reimbursement, but should be researched to ensure that proper documentation was received or that procedures were followed. These errors do show on the OER. For example, if a child noted with a special diet is served a meal and the Special Diet Statement has not been marked as received in HX, the processor notes Allow/Warn on the OER for this child's meals. This allows your staff to find out if the Special Diet Statement was received and correct the error in HX or disallow the meals. Note that this warning only shows when the claim is processed—not when the center is recording their claim.
-
-
Click Save.
Click Print List to print a list of your preferences/settings. Click Print Changes to print a list of the preferences that you have changed.
Manage Removed From System Reasons
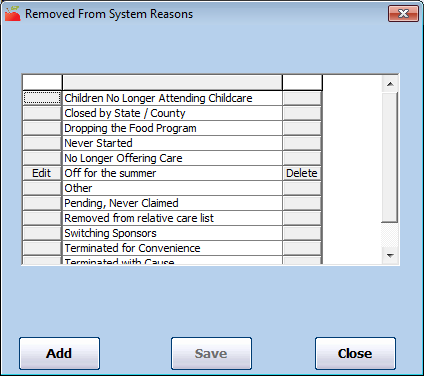
When you remove providers from your system, you must select a removal reason. You set these reasons up in the Removed From System Reasons dialog box.
Adding Removed From System Reasons
-
Click the Tools menu and select Removed From System Reasons. The Removed From System Reasons window opens.
-
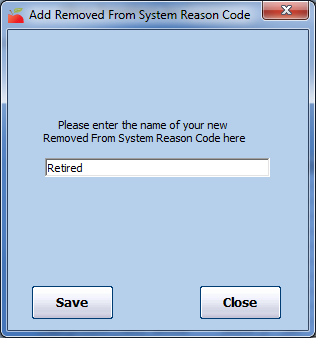
Click Add. The Add Removed From System Reason Code dialog box opens.
-
Click the box and enter the removal reason code.
-
Click Save.
Changing Removed From System Reasons
You can only change reason codes you have added. The default system codes cannot be changed.
- Click the Tools menu and select Removed From System Reasons. The Removed From System Reasons window opens.
- Click Edit next to the reason to change.
- Click the Edit the Code box and update the code text.
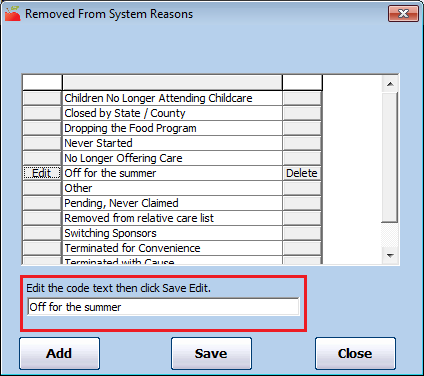
- Click Save.
Deleting Removed From System Reasons
You can only delete reason codes you have added. The default system codes cannot be deleted.
-
Click the Tools menu and select Removed From System Reasons. The Removed From System Reasons window opens.
-
Click Delete next to the reason code to delete.
-
Click OK at the Are You Sure prompt. The reason code is deleted.
Manage Manual Check Adjustment Account Codes
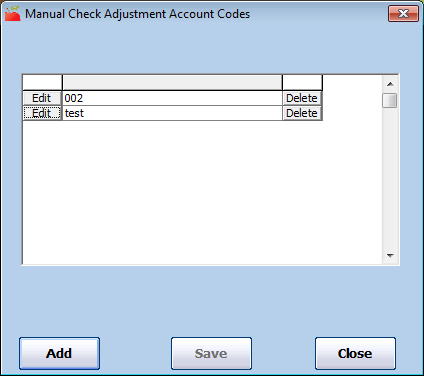
Some sponsors are required to provide an adjustment account code when adjusting provider payments. You add and manage these codes in the Manual Check Adjustment Account Codes window.
To add an adjustment code:
-
Click the Checkbook menu and select Manual Check Adjustment Account Codes. The Manual Check Adjustment Account Codes window opens.
-
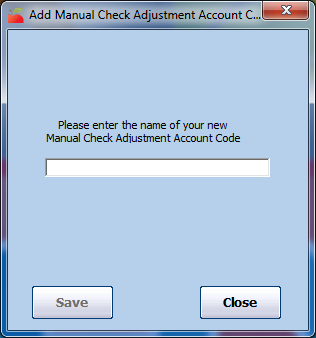
Click Add. The Add dialog box opens.
-
Click the Please Enter the Name of Your New Manual Check Adjustment Account Code box and enter the adjustment code to use.
-
Click Save.
To edit a manual check adjustment code:
-
In the Manual Check Adjustment Account Codes window, click Edit next to the code to change.
-
Click the Edit box and enter the new name of the code.
-
Click Save.
To delete a manual check adjustment code:
-
In the Manual Check Adjustment Account Codes window, click Delete next to the code to remove.
-
At the Are You Sure prompt, click Yes.
You cannot delete any manual check adjustment codes that have been used.