The following Provider reports are available. This list is not comprehensive. To access these reports, click the Reports menu, select Providers, and then select the appropriate report.
-
WV Schedule A - This is the West Virginia Schedule A report. It is formatted according to the state's requirements
-
ME 462 - This report is formatted according to the state of Maine's requirements.
-
Provider Calendar - This report prints a provider's calendar.
-
Provider File Changes - This report lists any changes made to a provider's file.
-
Provider Training Period - This report lists all providers who are currently in training. These are the first months of claiming when you allow them to serve menus that don't meet USDA guidelines and still get paid for their meals.
-
Provider Info Summary - This report lists providers with certain key information, such as meal times and basic licensing information.
-
Provider License Expiration - This report lists all providers whose licenses/registrations/certifications expire within the date range you specify when printing the report. It specifically examines the license end date as found in the Provider Information Licensing tab.
-
Provider List Export File - This is a CSV list of providers and provider details.
-
Provider Mailing Labels - This works the same as the Provider List Export File, only it generates provider mailing addresses in the Avery 5160 format.
-
Provider Messages Export File - This is a CSV list of provider messages.
-
Provider Messages Mailing Labels - This works the same as the Provider List Export File, only it generates provider mailing addresses in the Avery 5160 format.
-
Provider Racial Count Summary - This report provides counts of active providers, broken down by race. This is useful when preparing your annual management plan in compliance with state regulations.
-
Providers Added - This report lists all providers who have been added to the system in the date range you specify. It examines the original CACFP start date listed in the Provider Information General tab.
-
Provider Changing Tiers - This report lists all providers going from Tier 1 to Tier 2 in a specified date range. It also analyzes Tier end dates for income, school, and census qualifying information to determine whether a provider should be listed on this report. Providers who lose Tier 1 by income, but keep Tier 1 by school or census and have their own children enrolled, are also listed.
-
Providers Removed - This report lists all providers who have a removal date within the date range you specify. It also includes the reason for removal.
-
School Tier Comparison - This report lists all providers who were in a school area that is below the minimum poverty percentage originally, but new school data that indicates the school area is now over the 50% threshold has been loaded. Run this report once a year after Minute Menu HX support receives and loads new school area data from your state agency. Note that this report is only useful if you have documented that school area for all of your providers, even those who are not Tier 1.
-
Serious Deficiency Detail - This report lists serious deficiency details for your providers. This is the same information included in the Serious Deficiency List window.
-
Serious Deficiency List - This report lists all of the events associated with your providers' serious deficiencies.
-
Serious Deficiency Export File - This is a CSV list of serious deficiency information.
-
Tier 1 Qualifying Providers Report - This report lists all providers who are Tier 1. You can filter it to list only those providers who qualify for specific reasons (school, income, or census).
Print the Provider File Changes Report
Use the Provider File Changes report to identify data that has changed for a provider from one month to the next. This report only includes data that has actually changed. This data is listed based on its field name in the database. Note that these names may not correspond directly with names used on-screen. Contact Minute Menu HX support for assistance interpreting fields in this report, if needed.
To print this report:
-
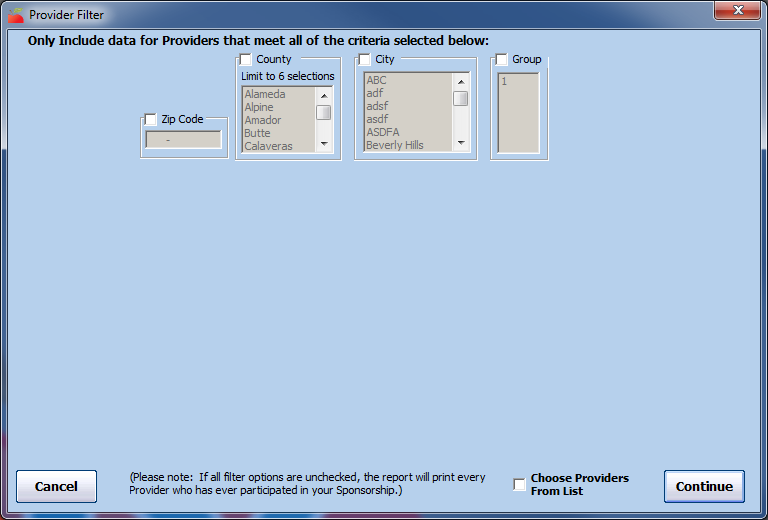
Click the Reports menu, select Providers, and click Provider File Changes Report. The Provider Filter window opens.
-
Check each box and select a filter that applies. If you don't set any filters, all providers are included in this report.
Note: Check the Choose Providers From List box to select individual providers to include. When you click Continue, the Choose Providers window opens. Check the box next to each provider to include in the report and click Continue.
-
Click Continue. The Select Month dialog box opens.
-
Click the Select Month drop-down menu and select the month for which to print this report. Providers whose data changed between the month you selected and the month before it are included on this report.
-
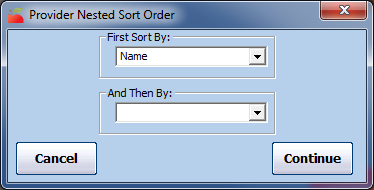
Click Continue. The Provider Nested Sort Order dialog box opens.
-
Click the First Sort By drop-down menu and the And Then By drop-down menu and select the primary and secondary sorts for this report.
-
Click Continue. The report is generated.
Print the Providers Not Claiming Report
The Providers Not Claiming report lists all providers who were active in a given month, but who did not claim or who did not record any meals. It includes the following information:
-
Provider Name
-
Provider ID
-
Provider Phone
-
Child Count
-
Monitor
-
CACFP Original Start Date
-
Last Claim
-
Status
-
Removal Date
Use this report to identify providers who are not actively claiming with you. You can use the resulting list as a contact list to call those providers and find out why they aren't claiming, or you can update their status in HX.
To run this report:
-
Click the Reports menu, Claim Management, and select Providers Not Claiming Report. The Provider Filter window opens.
Note: You can also click Claims and select Track Received Claims. Then, click Providers Not Claiming.
-
Check the Status box, and then check the Active box.
-
Set additional filters, as needed.
-
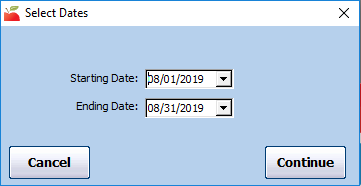
Click Continue. The Select Dates dialog box opens.
-
Click the Starting Date and Ending Date drop-down menus and select dates for which to run the report. If you enter a date range that covers more than one month, it lists providers who did not claim during any of the months within that range.
-
Click Continue. The Meals Recorded Filter dialog box opens.
-
Select No Claim Submitted or No Meals Recorded.
-
Click Continue. The Provider Nested Sort Order dialog box opens.
-
Click the First Sort By drop-down menu and the And Then By drop-down menu and select the primary and secondary sorts for this report.
-
Click Continue. The report is generated.
Print Provider Calendar Entries
All calendar entries that affect claims processing automatically print at the end of the Office Error Report (OER) so you know exactly what was in Minute Menu HX that might affect the claim. However, you can also print calendar entries independently, if needed.
This report does not print child-level calendar information, sponsor-wide holidays, or school out days. It is designed to just provide information relevant to providers (excluding child information).
You can print this report through the Reports menu, or by clicking Print in the Provider Calendar window. This article provides instructions for printing the report through Reports.
-
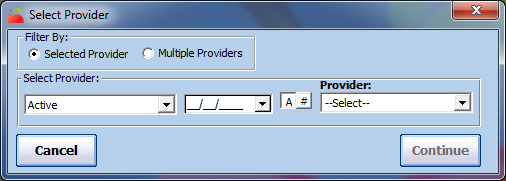
Click the Reports menu, select Providers, and click Provider Calendar Report. The Select Provider dialog box opens.
-
In the Filter By section, click Selected Provider or Multiple Providers. If you selected Multiple Providers, go to Step 4.
-
If you chose the Selected Provider option, click the Provider drop-down menu and select the provider.
-
Click Continue. If you selected one provider, go to Step 6. If you selected the Multiple Providers option, the Provider filter window opens.
-
Set filters for the providers to include in the report:
-
Check the box next to each filter to use, then select the appropriate value. For example, check the County box and then select the county to include.
-
Check the Choose Providers From List box and click to select providers from a list. Then, in the Choose Provider List, check the box next to each provider to include.
-
-
Click Continue. The Select Date dialog box opens.
-
Click the Starting Date and Ending Date boxes and enter a date range for this report.
-
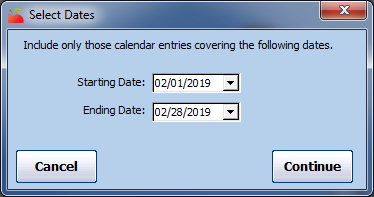
Click Continue. The Select Date Range box opens.
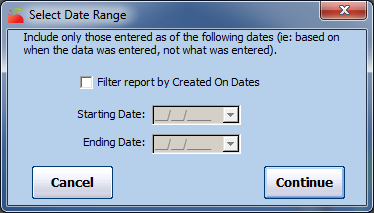
-
Check the Filter Report by Created On Dates box to filter this report by the dates on which calendar entries were created. Then, enter starting and ending dates.
-
Click Continue. The Select Provider Calendar Options dialog box opens.
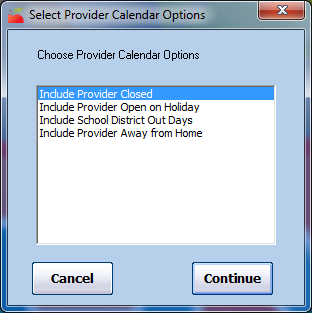
-
Select each provider calendar type to include: Closed, Open on Holiday, School District Out Days, and/or Away From Home. You can select as many as needed. Click Continue. The Provider Nested Sort Order dialog box opens.
-
Click the First Sort By drop-down menu and select the first value on which to sort. The default is Name. Then, click the And Then By drop-down menu and select an additional sort, if needed.
-
Click Continue. The PDF report is generated.
Provider Messages Export File
The Message List Export File lists the messages you have recorded for your providers in Minute Menu HX. You can filter the providers and the messages that are included in the export. Note that you must have a program capable of opening spreadsheet files (such as Excel®) to view this export.
-
Click the Reports menu, select Providers, and click Providers Messages Export File. The Provider Filter window opens.
-
Set filters for the providers to include in the export.
-
Check the box next to each filter to use and then select the filter to apply. For example, to limit to providers in a specific county, check the County box and select the counties to include.
-
Check Choose Providers From List box to select providers from a list.
-
-
Click Continue.
-
If you did not check Choose Providers From List, the Message Filter window opens. Go to Step 5.
-
If you checked Choose Provider From List, the Choose Providers dialog box opens.
-
-
Check the box next to each provider to include. Click Continue. The Message Filter window opens.
-
Set filters for the messages to include.
-
Check the Message Categories box and select the categories to include in the export. You can select as many categories as needed.
-
Check the Message Date Range box and select the Start Date/Start Time and End Date/End Time to include in the export.
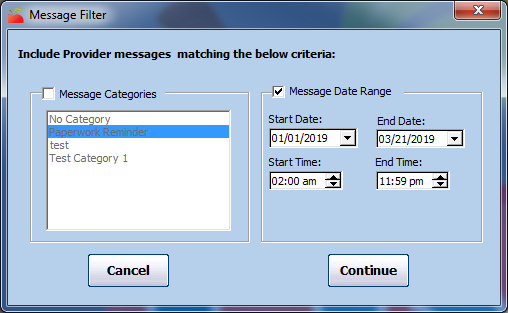
Note: Click Continue without setting any filters to include all provider messages in the export.
-
-
Click Continue. The Select Output Data for Provider Message List Export window opens.
-
Check the box next to each field to include in the export. You can also click Select All to select all fields.
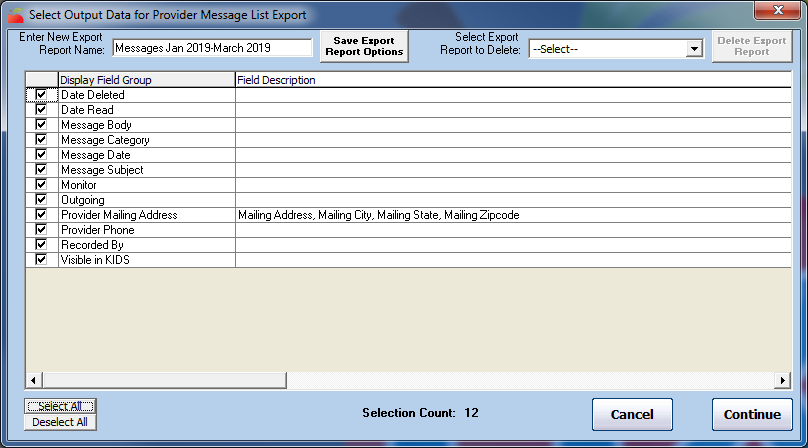
-
To save your settings for future exports:
-
Click the Enter New Export Report Name box and enter a new name for the export.
-
Click Save Export Report Options.
-
-
Click Continue. The Save As window opens.
-
Select the location in which to save the file.
-
Click Save.
-
The Provider Messages Export File Saved Successfully Message displays. Click OK. The spreadsheet opens.
Provider Tax Report
The Provider Tax report is a summary of a provider's food program income and estimated expense for the calendar year. This report is to be used as an aid for income tax preparation. You can run this report for your providers in Minute Menu HX and in KidKare.
Run the Provider Tax Report in Minute Menu HX
-
Click the Reports menu, select Payments, and click Provider Tax Report. The Select Provider dialog box opens.
-
Click the Provider drop-down menu and select the provider for whom to run this report.
-
Click Continue. The Select Tax Year dialog box opens.
-
Click the Tax Year drop-down menu and select the tax year for which to run this report.
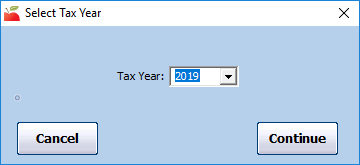
-
Click Continue. The report is generated.
Run the Provider Tax Report in KidKare
-
Log in to app.kidkare.com. Use the same credentials you use to access Minute Menu HX.
-
Click a provider from the list to view their account in Observer Mode. For more information about Observer Mode, see Access Observer Mode.
-
From the menu to the left, click Reports. The Reports page opens.
-
Click the Select a Category drop-down menu and select Claim Statements.
-
Click the Select a Report drop-down menu and select Tax Report.
-
Click the Select Year box and select the tax year for which to run the report.
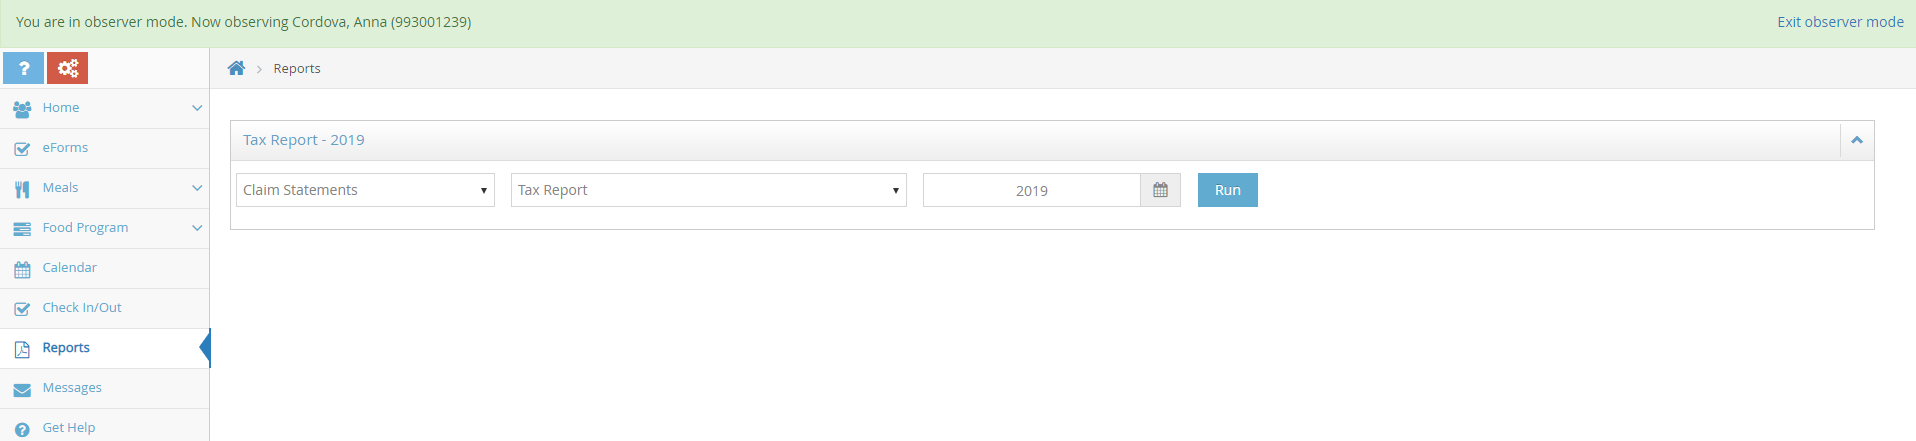
-
Click Run. A PDF report downloads.
How to Read the Provider Tax Report
The Provider Tax report includes the following sections:
-
Taxable Income
-
Deductible Food Expense
-
Monthly Payment History
We'll discuss each section in detail, below.
Taxable Income
The Taxable Income section gives a total dollar amount paid to the provider through Minute Menu HX.
-
Total of All Payments Received: This is the total dollar amount of all payments made via the Issue Payments function in HX. If you use an outside accounting system to issue reimbursement to providers, you must record these payments with Issue Payments to use this report.
-
Non-Claim Payment Adjustments: These are any adjustments made through the Adjust Provider Payments function in HX. These amounts are not included in the Total Taxable Income amount.
-
Own Child Reimbursement: This is the amount of reimbursement made to a provider's own children. This amount is also not included in the Total Taxable Income Amount.
Deductible Food Expense
The Deductible Food Expense section gives the amount of the provider's standard tax deduction for child care food expenses. This number is based on the meals the provider claimed for the calendar year with KidKare. The paragraph at the top of this report explains this standard food deduction.
Additionally, the IRS has developed a standard food deduction for individuals who operate a child care business. This standard deduction is based on the Tier 1 rates in effect at the beginning of the calendar year, but it includes ALL meals you served, not just those meals that were creditable as part of the Food Program. Based on the information submitted on your minute Menu paperwork, the line titled “Total deductible Food Expense” is our estimate of your standard tax deduction for child care food expenses. If you actually fed more meals than you noted on your Minute Menu paperwork, then you may need to adjust this figure before you record it on your taxes.
If you have any questions about how to handle Food Program payments or child care food expenses on you taxes, please do not contact the Food Program for that tax information, instead consult your tax preparer for the best advice.
Notes about this section of the report:
-
The reimbursement rates used to calculate the standard food deduction are the Tier 1 rates in effect a the beginning of the calendar year, per the IRS. This means that, for the purpose of this expense section, the same rate is used for the entire year—even if the reimbursement rate may have changed in July.
-
The Tier 1 Rates in Effect at the Beginning of the Calendar Year rates are always used to calculate this food expense estimate, regardless of the provider's Tier status.
-
Any meals the provider recorded that were disallowed during claims processing are added back.
-
Meals served to the provider's own children are not included.
-
The meal totals are for any meals claimed in the calendar year (January 1 - December 31).
-
The meal counts in this section are calculated when the claim is processed. So, for accurate data, reference this report only after the December claim has been processed.
-
Since provider reimbursements are usually made in the month following the claim (e.g. January meals are reimbursed in February, and so on), the meal totals in this section will typically never match the meal totals in the income section.
Monthly Payment History
The Monthly Payment History section at the bottom of this report itemizes all payments made in the calendar year.
Training Reports
The following Training reports are available. This list is not comprehensive. To access these reports, click the Reports menu, select Training, and then select the appropriate report.
-
Provider Training Hours Summary: This report lists the total number of training hours for a provider.
-
Providers Not Trained: This report lists all providers who have not been given training within the date range specified. For more information, see Providers Not Trained Report.
-
Training List Export File: This is a CSV file that lists all provider training sessions you've recorded. For more information, see Training List Export File.
-
Training List Mailing Labels: This works the same as the Training List Export File, only it generates provider mailing addresses in the Avery 5160 format.
Providers Not Trained Report
You can generate a list of all providers that did not receive a particular type of training (or any training) during a certain time period.
-
Click Reports, select Training, and click Providers Not Trained Report. The Provider Filter window opens.
-
Set filters for the providers to include in the export.
-
Check the box next to each filter to use and then select the filter to apply. For example, to limit to providers in a specific county, check the County box and select the counties to include.
-
Check Choose Providers From List box to select providers from a list.
-
-
Click Continue.
-
If you did not check Choose Providers From List, the Message Filter window opens. Go to Step 5.
-
If you checked Choose Provider From List, the Choose Providers dialog box opens.
-
-
Check the box next to each provider to include. Click Continue. The Select Training Type dialog box opens.
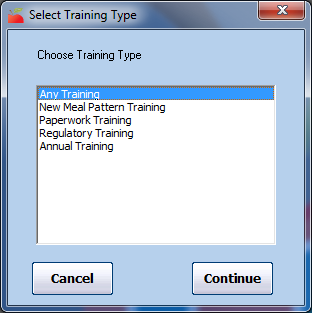
-
Click the training type(s) to include. To include all types, select Any Training.
-
Click Continue. The Select Dates dialog box opens.
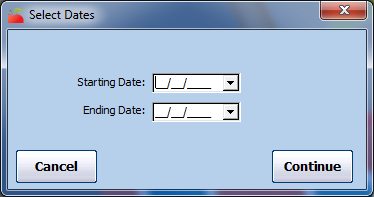
-
Click the Starting Date and Ending Date boxes and enter a date range for this report.
-
Click Continue. The Provider Nested Sort Order dialog box opens.
-
Click the First Sort By drop-down menu and select a primary sort. You can choose from the following: Name, ID, County, or Monitor. Providers on the report will be sorted by this value first.
-
Click the And Then By drop-down menu and select a secondary sort, if needed. You can choose from the following: Name, ID, County, or Monitor. Providers on the report will be sorted by this value first.
-
Click Continue. The Providers Not Trained Report dialog box opens.
-
Check the Include Providers with Less Than the Training Hours Below box. Then, click the Hours of Training Required box and enter the minimum required hours of training.
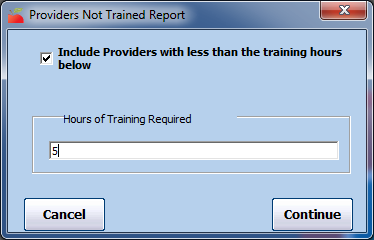
-
Click Continue. The report is generated.
Training List Export File
The Training List Export file lists all provider training sessions you have recorded. You can filter this list to include only the information you need. Note that you must have a program capable of opening spreadsheet files (such as Excel®) to view this export.
-
Click the Reports menu, select Training, and click Training List Export File. The Provider Filter window opens.
-
Set filters for the providers to include in the export.
-
Check the box next to each filter to use and then select the filter to apply. For example, to limit to providers in a specific county, check the County box and select the counties to include.
-
Check Choose Providers From List box to select providers from a list.
-
-
Click Continue.
-
If you did not check Choose Providers From List, the Message Filter window opens. Go to Step 5.
-
If you checked Choose Provider From List, the Choose Providers dialog box opens.
-
-
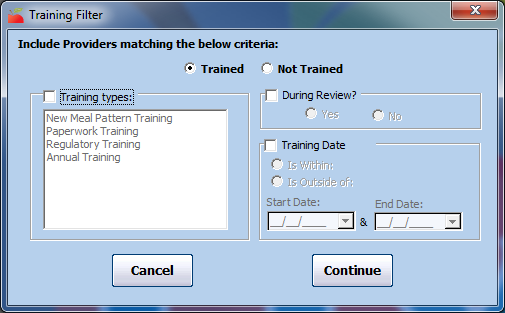
Check the box next to each provider to include. Click Continue. The Training Filter window opens.
-
Set filters for the messages to include.
-
Select the Trained or Not Trained option.
-
Check the Training Types box and select the training type(s) to include.
-
Check the During Review box to limit the file to training offered (or not offered) during a review.
-
Check the Training Date box to include training offered (or not offered) between a certain date range. Then, select the Is Within option or the Is Outside Of option, and enter a start and end date.
-
-
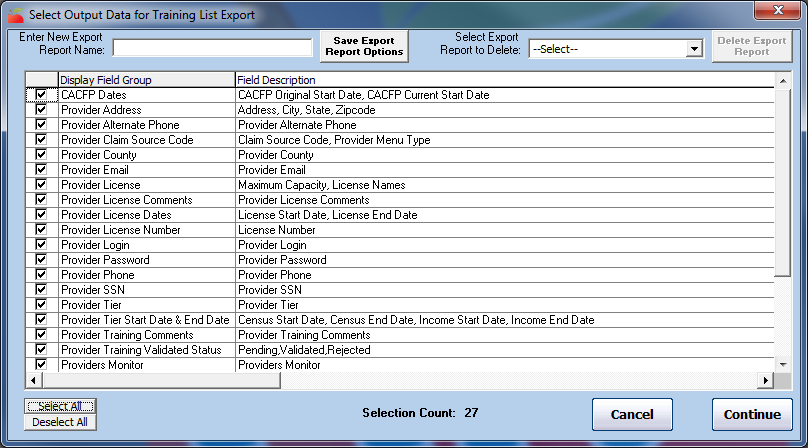
Click Continue. The Select Output Data for Training List Export window opens.
-
Check the box next to each field to include in the export. You can also click Select All to select all fields.
-
To save your settings for future exports:
-
Click the Enter New Export Report Name box and enter a new name for the export.
-
Click Save Export Report Options.
-
-
Click Continue. The Save As window opens.
-
Select the location in which to save the file.
-
Click Save.
-
Click OK at the confirmation prompt.
About the Training Session Total Duration Field
The Training Session Total Duration field in the Training List Export File adds the total hours for all provider training sessions that were offered to each provider as listed in the export file.
This means that if you have five (5) providers listed in the output, and each of those providers has three (3) different training listed in the report (based on the filters you selected), this column adds the training type for each of the three training sessions together. This gives you a picture of the total hours during the period for each provider. This way, if you filter to include all training dates within the last 12 months, the Training Session Total Duration column displays the total hours of training that each provider received in the last 12 months.
Additional Training Reporting
You can include training information on the following reports:
-
Provider Training Hours Summary: This report shows the total number of training hours received by the provider.
-
Sponsor Review Worksheet: This report shows the last 12 months worth of training offered to a given provider.
-
CIF: You can configure the CIF to display the provider's standard meal times and last year's training in the bottom-right corner instead of the Legend.
Homes CACFP Participation Statistics
You can use several reports in Minute Menu HX to retrieve the number of homes and children served by the CACFP program under your sponsorship. You can also pull the number of meals served over a defined period of time, such as last calendar year, current fiscal year, and so on.
Number of Providers Participating: Active, Pending, Hold, or Removed Status
-
Click the Reports menu, select Providers, and click Provider List Export File. The Provider Filter window opens.
-
Set the following filters:
-
Status: Check the Hold and Pending boxes.
-
Removed Date: Check the Removed Date box, and select the After option. Enter the day before the first day of the reporting period. For example, if you are looking at statistics for 2018, you would select December 31, 2017.
-
CACFP Original Start Date: Check the CACFP Original Start Date box, and select the Before option. Enter the day after the last day of the reporting period. For example, if you are looking at statistics for 2018, enter January 1, 2019.
-
-
When finished, click Continue. The Select Output Data or Provider List Export File window opens.
-
Check the box next to each output option to include in the file. We recommend you check the Provider Status, Removal Date, and CACFP Original Start Date boxes. These will help you ensure your filters are working properly.
-
When finished, click Continue. You are prompted to save the export file.
Number of Children: Enrolled, Pending, Withdrawn
-
Click the Reports menu, select Children, and click Child List Export File. The Provider Filter window opens.
-
Set the following filters:
-
Status: Check the Hold and Pending boxes.
-
Removed Date: Check the Removed Date box, and select the After option. Enter the day before the first day of the reporting period. For example, if you are looking at statistics for 2018, you would select December 31, 2017.
-
CACFP Original Start Date: Check the CACFP Original Start Date box, and select the Before option. Enter the day after the last day of the reporting period. For example, if you are looking at statistics for 2018, enter January 1, 2019.
-
-
Click Continue. The Child Filter Dialog window opens.
-
Set the following filters:
-
Status: Check the Enrolled, Pending, and Withdrawn boxes.
-
Withdrawn Date: Check the Withdrawn Date box, and select the After option. Then, enter the day before the first day of the reporting period.
-
Enrollment Date: Check the Enrollment Date box, and select the Before option. For example, if you are looking at statistics for 2018, enter January 1, 2019.
Note: If you have already enrolled for the current year and you assign a new enrollment date to children during that process, do not use this filter. You must review the final report and remove children you know were enrolled after your reporting period end date.
-
-
Click Continue. The Select Output Data for Child List Export.
-
Check the box next to each output option to include in the file. We recommend you check the Child Status, Withdrawn Date, and Enrollment Date boxes. These will help you ensure your filters are working properly.
-
When finished, click Continue. You are prompted to save the export file.
Re-enrollment may skew some of the numbers, because the Current Enrollment Date is updated when re-enrollment is completed. So, if you have completed re-enrollment between the date these reports are generated and the reporting period, you cannot accurate determine which children have come on to the program at the end of the program, because the Child List Export File filter does not include a setting to look at the Original Enrollment Form Date.
For example, if you are looking at January - December of last year, and you re-enroll children as of July 1st, you should run these reports for last year before July. Once you re-enroll children in July, the Current Enrollment Date will have changed for everyone, it it will no longer be possible to limit the export file to remove children who are new to the program since the end of December. However, you can include the Original Enrollment Form Date as an output option for the file, sort the resulting spreadsheet by that column, and delete children whose date places them outside of the reporting period you want.
Meals Claimed
-
Click the Reports menu, select Claim Management, and click Claim List Export File. The Provider Filter window opens.
-
Leave all boxes blank, and click Continue. The Claim Filter window opens.
-
Check the Claim Month box.
-
Click the Starting Month drop-down menu and select the first month of your reporting period.
-
Click the Ending Month drop-down menu and select the last month of your reporting period.
-
Click Continue. The Select Output Data for Claim List Export window opens.
-
Check the Meal Counts box.
-
Check the box next to any additional outputs needed.
-
When finished, click Continue. You are prompted to save the export file.