Schedule Menus in Advance
You can schedule menus for infants and non-infants in advance on the Meals Calendar.
-
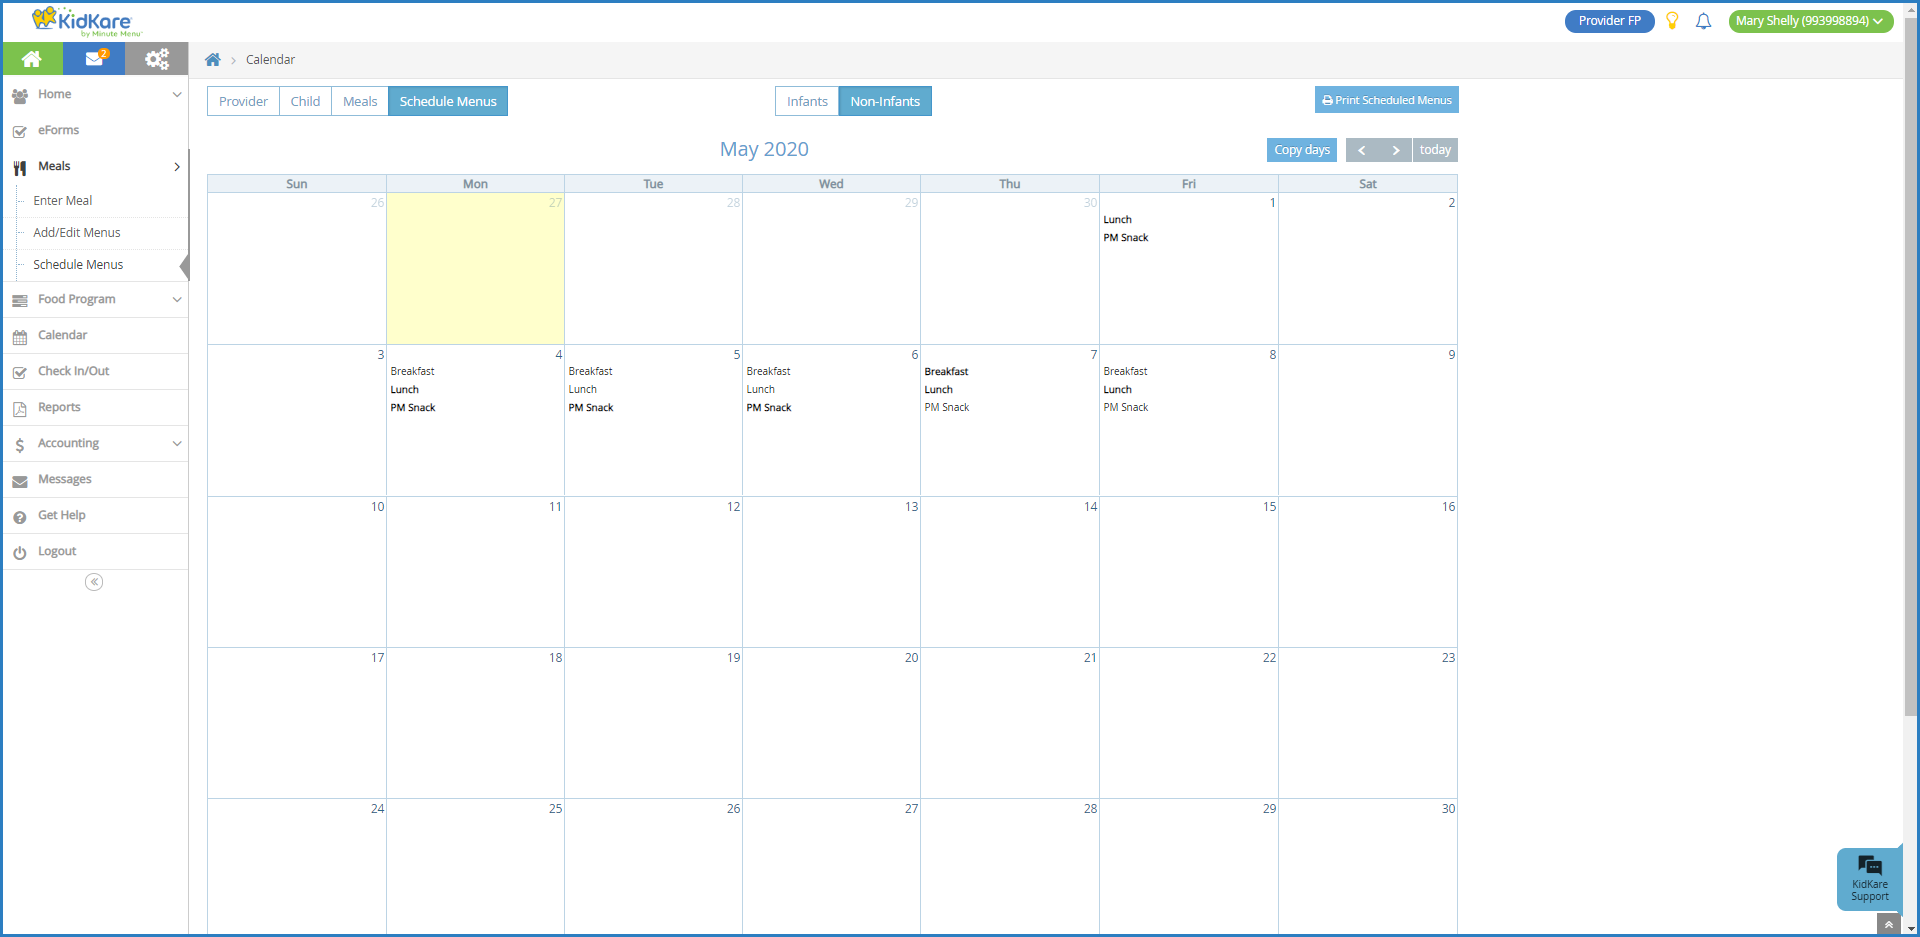
From the menu to the left, click Food Program.
-
Click Calendar. Note that any meals you have already scheduled display on the calendar.
-
Click Schedule Menus.
-
Select Infants or Non-Infants.
-
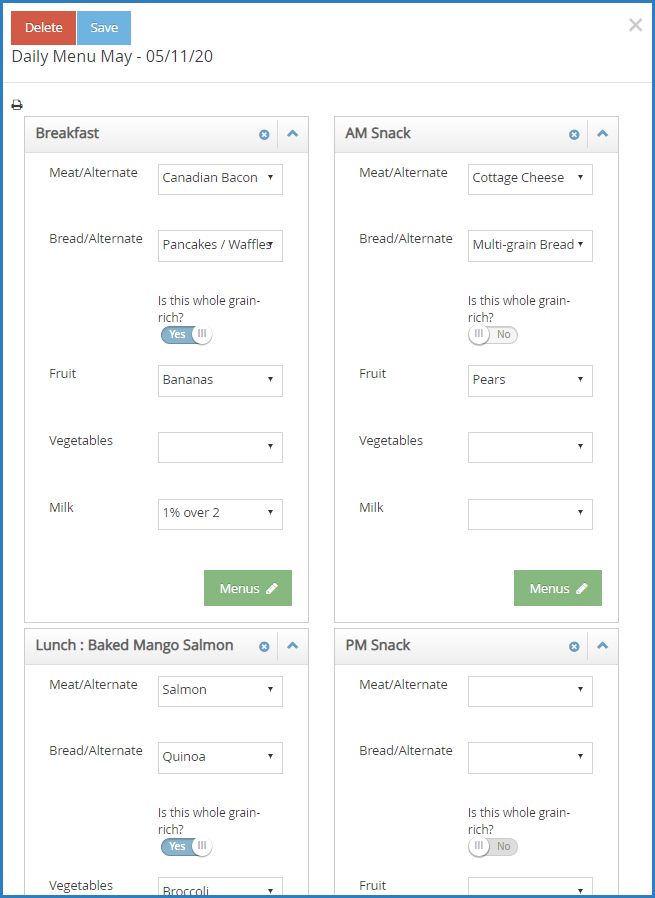
Click the date for which to schedule menus. The Daily Menu pop-up opens.
-
Use the drop-down menus to select the components for each listed meal. you can also click Menus to select a saved menu.
-
When finished, click Save. The meal automatically displays on the Enter Meal page for that day when you select a meal time.
Meals shown in bold on the Menu Calendar were created using one of your menu templates. This could be a template you created, or a Master Menu your food program sponsor created. Any meals that are not show in bold were created by selecting individual food components. For more information about menu templates, see Add/Edit Menus.
Copy and Paste a Month of Menus
If your meals follow a set schedule, you can easily copy and paste a month's worth of scheduled meals from one month to another.
-
From the menu on the left, click Meals.
-
Click Schedule Menus. The Calendar page opens to the Schedule Menus tab.
Note: You can also click Calendar from the menu to the left and then click Schedule Menus at the top of the Calendar page.
-
Click
 and
and  to navigate to the month to copy, if needed.
 -
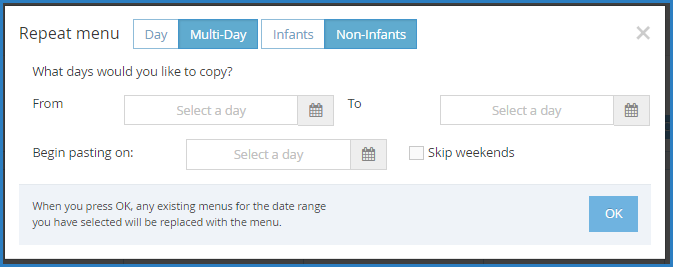
Click Copy Days. The Repeat Menu pop-up opens.
-
Select Multi-Day.
-
Select Infants or Non-Infants.
-
In the What Days Would You Like to Copy section, click the From and To boxes and select the start and end dates to copy. If you are copying meals for Monday through Friday, begin your copy on a Monday, and end it on a Friday.
-
Click the Begin Pasting On box and enter the date on which to begin copying menus. Following our example above, you would begin your paste on a Monday.
-
Leave the Skip Weekends box blank unless you serve weekend meals and do not want to copy them. If you do not serve weekend meals, you do not need to use this option.
-
Click OK. The meals are copied.
Print Scheduled Menus from Calendar
You can print scheduled menus directly from the Calendars page. Menus print for the age group you've selected on the calendar.
-
From the menu to the left, click Calendar.
-
Click Schedule Menus.
-
Click Print Scheduled Menus.
-
Select Infants or Non-Infants.
-
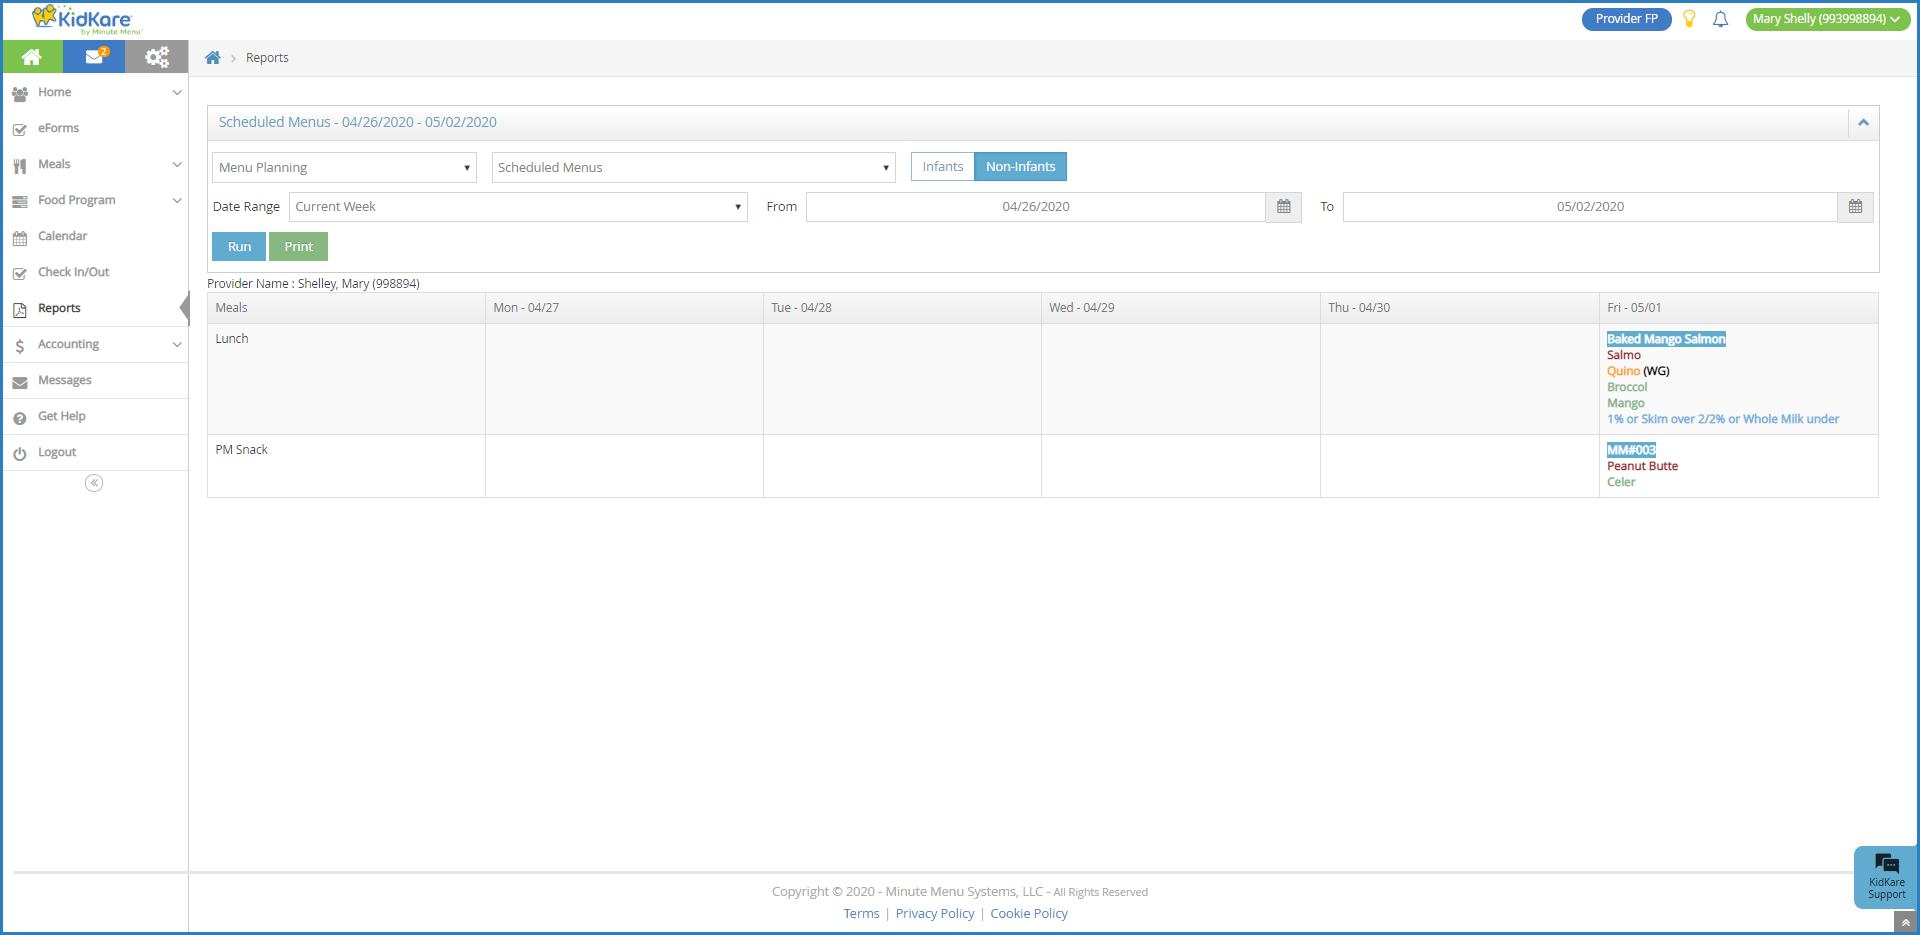
Click the Date Range drop-down menu and select the time period to view. For example, you can print scheduled menus for the current month. To set a custom range, select Custom and use the From and To boxes to select the dates for which to run the report.
-
Click Run. The scheduled menus for the age group and date range you selected display.
-
Click Print. Your browser's printer options open.
-
Adjust your print settings, as needed, and click Print.