Send eForms Invitations

Table of Contents

In This Article


Send eForms

  1. Log in to app.kidkare.com using the same credentials you use to access Minute Menu HX.

  2. From the menu to the left, click eForms.

  3. Click Send Invitations.

  4. Set filters for the providers/children to include.

    1. Click the State drop-down menu and select the state(s) to view. This option is only available if you are set up for multiple states.

    2. Click the Providers drop-down menu and select the specific center(s) to view.

    3. Click the Children Expired and Expiring Within drop-down menu and select 30 Days, 60 Days, 90 Days, or Custom Date. If you select Custom Date, set a date range in the From/To boxes.

    4. Click  next to Hide Invitations That Are Currently Open to hide open invitations. This is set to No by default.

    5. In the What Forms Would You Like to See section, click elect Enrollment, Income Form, or both.

    6. Click Go.

  5. Check the box next to the child/provider to which to send an invitation. You can also check the box at the top of the column to select all displayed records.
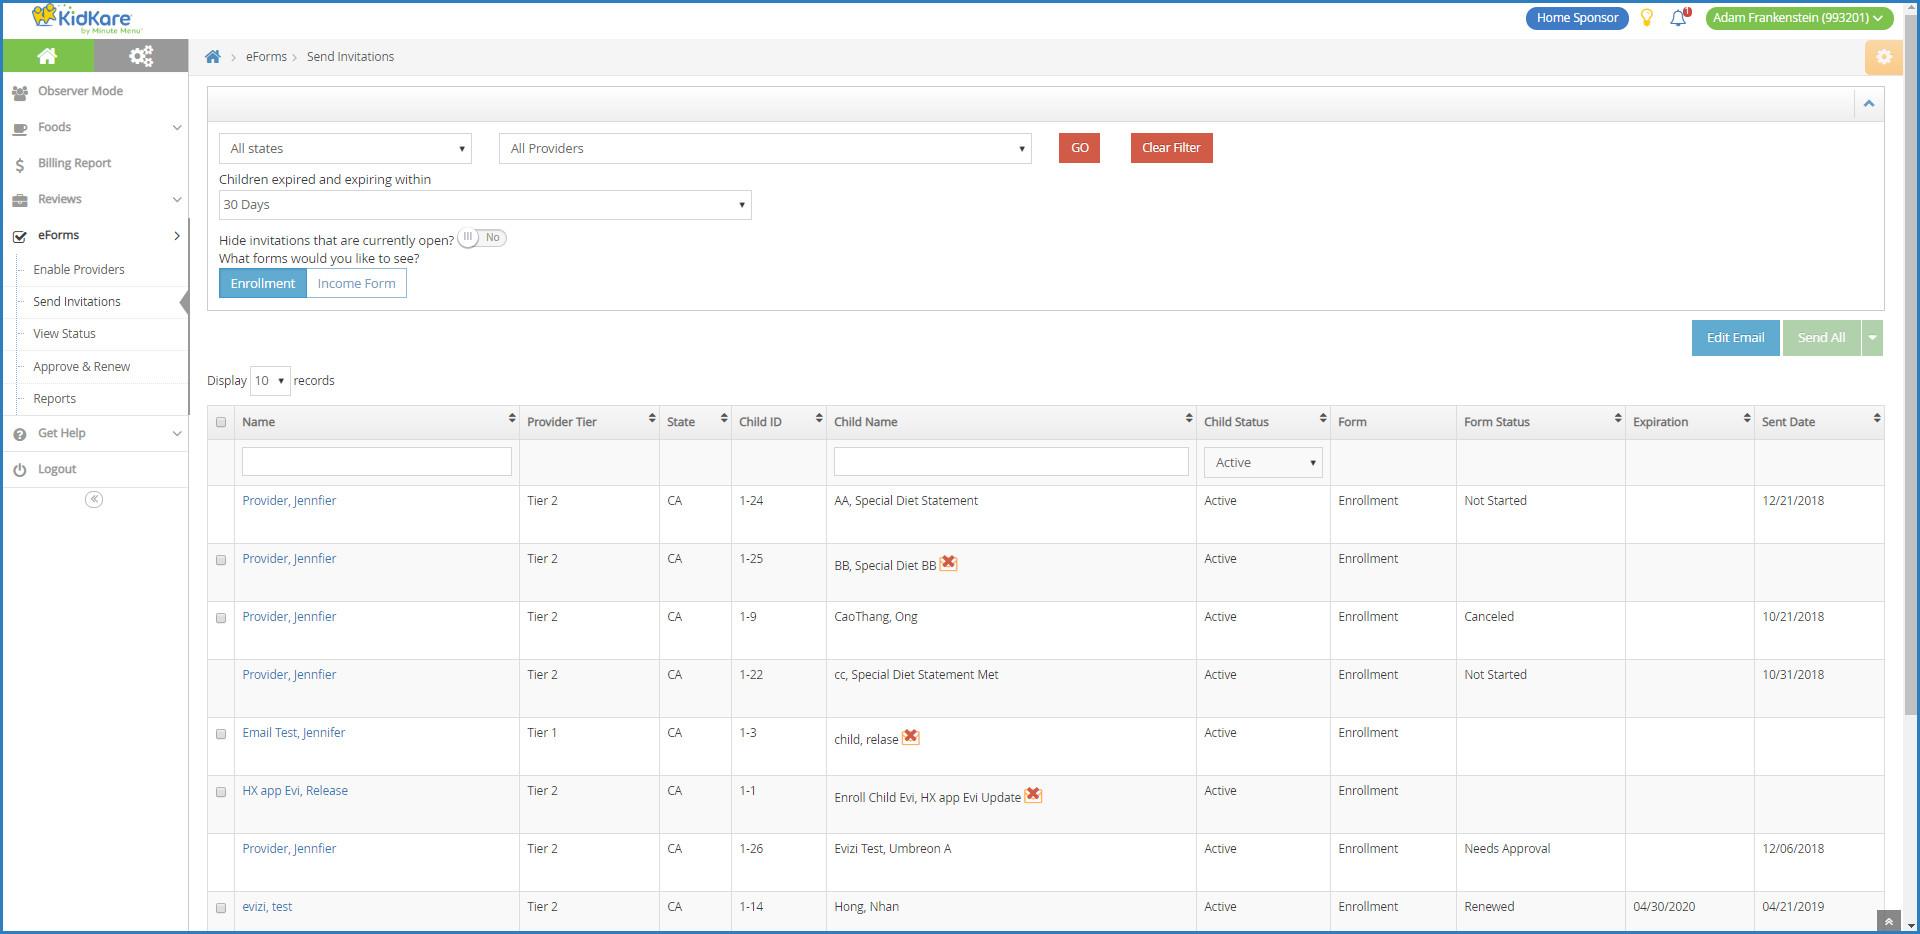
  6. Click  and select All, EF, or IEF. Parents with an email address are emailed directly.  displays next to children for whom there is no email address on file.


View Invitation Status

The View Status page provides an overview of your providers' invitation statuses. You can see how many invitations have been sent, how many are complete, and so on.

  1. Log in to app.kidkare.com using the same ID and password you use to access Minute Menu HX.

  2. From the menu to the left, click eForms.

  3. Click View Status.

  4. Set filters for the information to view.

    1. Click the State drop-down menu and select the state(s) to view. This option is only available if you are set up for multiple states.

    2. Click the Providers drop-down menu and select the specific provider(s) to view.

    3. Select EFIEF, or both.

    4. Click the Invitation Sent Date drop-down menu and select 30 Days, 60 Days, 90 Days, or Custom Date. If you select Custom Date, set a date range in the From/To boxes.

    5. Click Go.

  5. Click each column to sort information in ascending or descending order.

  6. Click a provider name to view that provider in Observer Mode.

  7. Click  next to Export, and select View or All to export eForms status information.

    • Export View: This exports the information displayed on the View Status page.

    • Export All: This exports complete invitation status details.


Customizing the View Status Page

Click Filters in the top-right corner to choose which columns to display. You can also filter by access to the eForms feature. Possible columns include:

  • Name

  • Number

  • State

  • Total Sent

  • Not Started

  • In Progress

  • Needs Approval

  • Submitted

  • Sponsor Approved

  • Manually Completed

  • Renewed

  • Canceled

Invitation Statuses

Status Definition
Not Started The parents have not started filling out the form yet.
In Progress The parents have started filling out the form, but have not yet finished.
Needs Approval The form needs to be approved (by you or the provider).
Submitted The parent or provider has submitted the form to you.
Sponsor Approved You have approved the forms.
Manually Completed The parent completed a paper form.
Renewed You have updated the system with the new date.
Canceled The invitation was canceled.