Send Messages
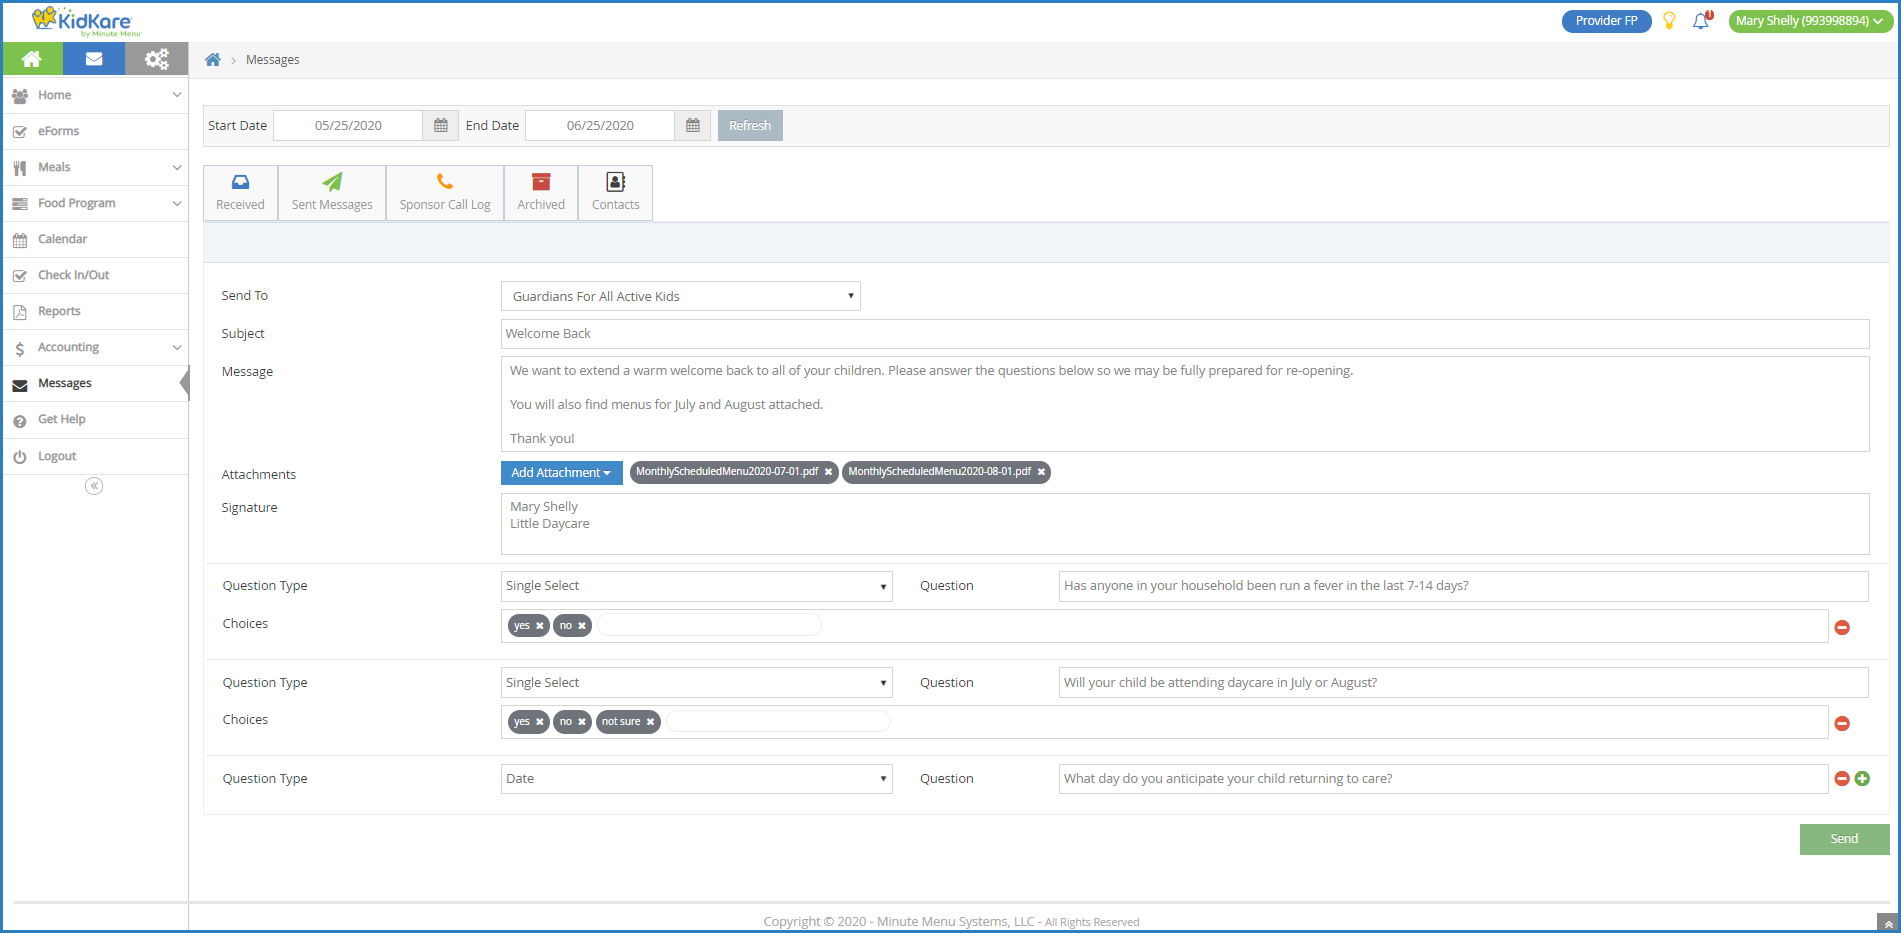
KidKare's messaging feature allows you to send messages directly to your sponsor (if they enable it) and to guardians of participants enrolled in your home daycare. You can message guardians individually, in small groups, or you can send one message to all guardians for active participants at the same time. When messaging guardians, you also have the option to attach planned menus and include a survey to which guardians can respond. These surveys can be used to plan attendance, screen for COVID-19 symptoms, or gather any other information you need from parents.
The survey option is only available when messaging guardians. You cannot include surveys in messages sent to your sponsor. Your sponsor must enable sponsor messaging before you can message them via KidKare.
To send messages:
-
Click
 . The Messages page opens.
 -
Click Send Message. The Message Editor opens.

-
Click the Send To drop-down menu and select the people you are messaging:
-
To send a message to your sponsor, select Sponsor.
-
To send a message to one or more guardians, click each guardian name to include in the message. You can use the Search box in this menu to search for specific contacts.
-
To message all guardians, select Guardians for All Active Participants.
Note: According to your display settings, this may read something else, such as Guardians for All Active Kids. For more information, see Set Display Settings.
-
-
Click the Subject box and enter a subject for your message.
-
Click the Message box and enter your message content.
-
To attach a menu:
-
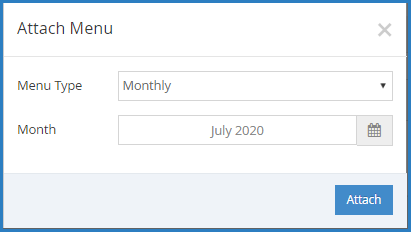
Click Add Attachment and select Menu. The Attach Menu pop-up opens.
-
Click the Menu Type drop-down menu and select Monthly, Weekly, or Custom.
-
Select the date for which to send the month. The available options vary according to the menu type you selected.
-
Monthly: Click the Select Month box and select the month for which to send menus.
-
Weekly: Click the Select Day box and select a day in the week to send. Menus for dates in the same week are attached.
-
Custom: Click the From box and enter the first date in the range to send. Then, click the To box and enter the last date of the range to send.
-
-
Click Attach. The Scheduled Menus report for the month or the week is attached to the message.
-
-
Click Add Attachment and select File to add any additional attachments to this message. For example, you could attach a PDF newsletter.
-
Click the Signature box and enter your email signature. If you are messaging your sponsor, go to Step 10.
-
To add a survey:
-
Click the Question Type drop-down menu and select the question type to include on the survey. You can choose from the following:
-
Single Select: The guardian can select one answer only.
-
Multi-Select: The guardian can select multiple answers.
-
Date: The guardian must select a date.
-
Text: The guardian can type any answer.
-
-
Click the Question box and enter the question. If you selected Date or Text, go to Step 9d.
-
Click the Choices box and enter the responses from which the parent can choose. Press Enter or Tab between choices. To remove a choice, click X or press Backspace.

-
Click
 to add a new question to your survey. Repeat Steps 9a - 9c to add as many questions, as needed.
 -
Click
 to remove questions from your survey.
-
-
When finished, click Send.
View Sent Messages
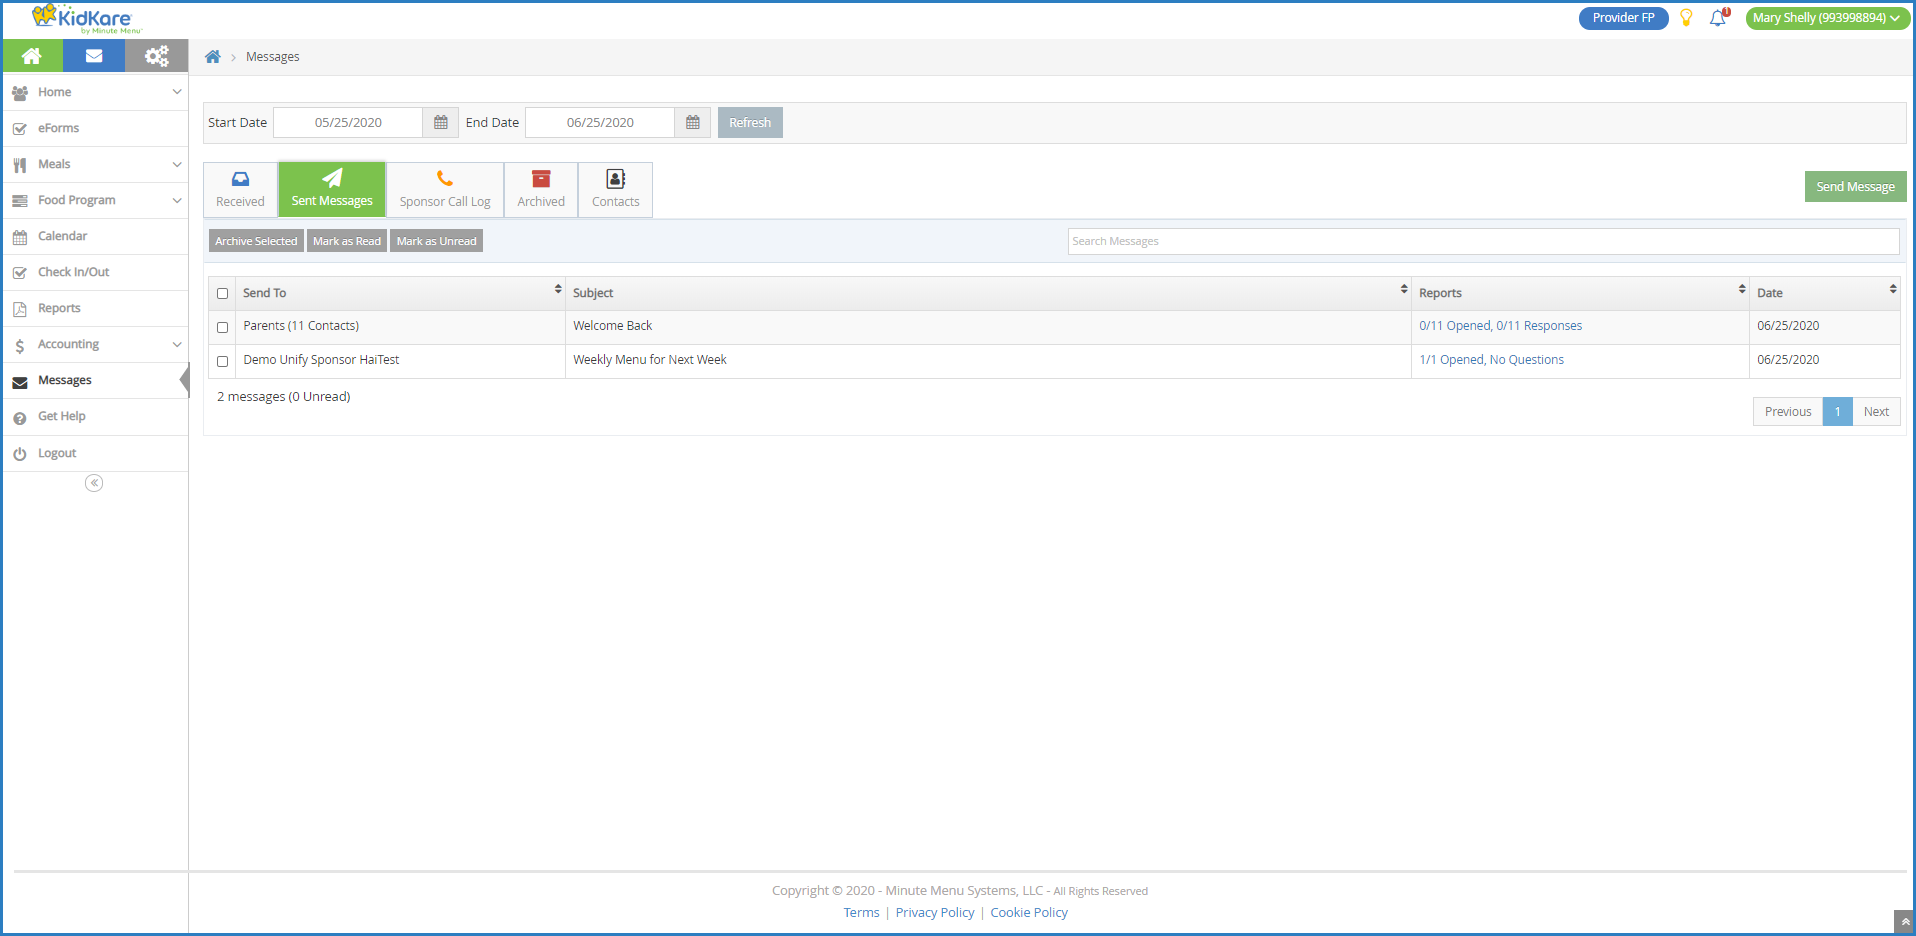
You can view messages you have sent in the Sent Messages tab. Like the Received tab, the Sent Messages tab is divided into the following columns: Sent To, Subject, Reports, and Date. The total number of messages and unread reports display at the bottom of the table.
-
Click
 . The Messages page opens.
 -
Click the Sent Messages tab.
-
To mark sent messages as read/unread:
-
Check the box next to the message(s). Check the box at the top of the column to select all messages.
-
Click Mark as Read or Mark as Unread.
-
-
To archive messages:
-
Check the box next to the message(s) to archive. Check the box at the top of the column to select all messages.
-
Click Archive Selected. The messages are moved to the Archived tab.
-
-
To view message reports, click the link in the Reports column. For more information about message reports, see View Message Reports.
View Received Messages
The Received tab displays automatically when you access the Messages page. This is where all correspondence you receive from guardians or your sponsor displays. It is divided into the following columns:
-
Received From
-
Subject
-
Date
The total number of messages and total number of unread messages display at the bottom of the page.
-
Click
 . The Messages page opens and displays the Received tab by default. Your messages display in a table. Unread messages display in bold.
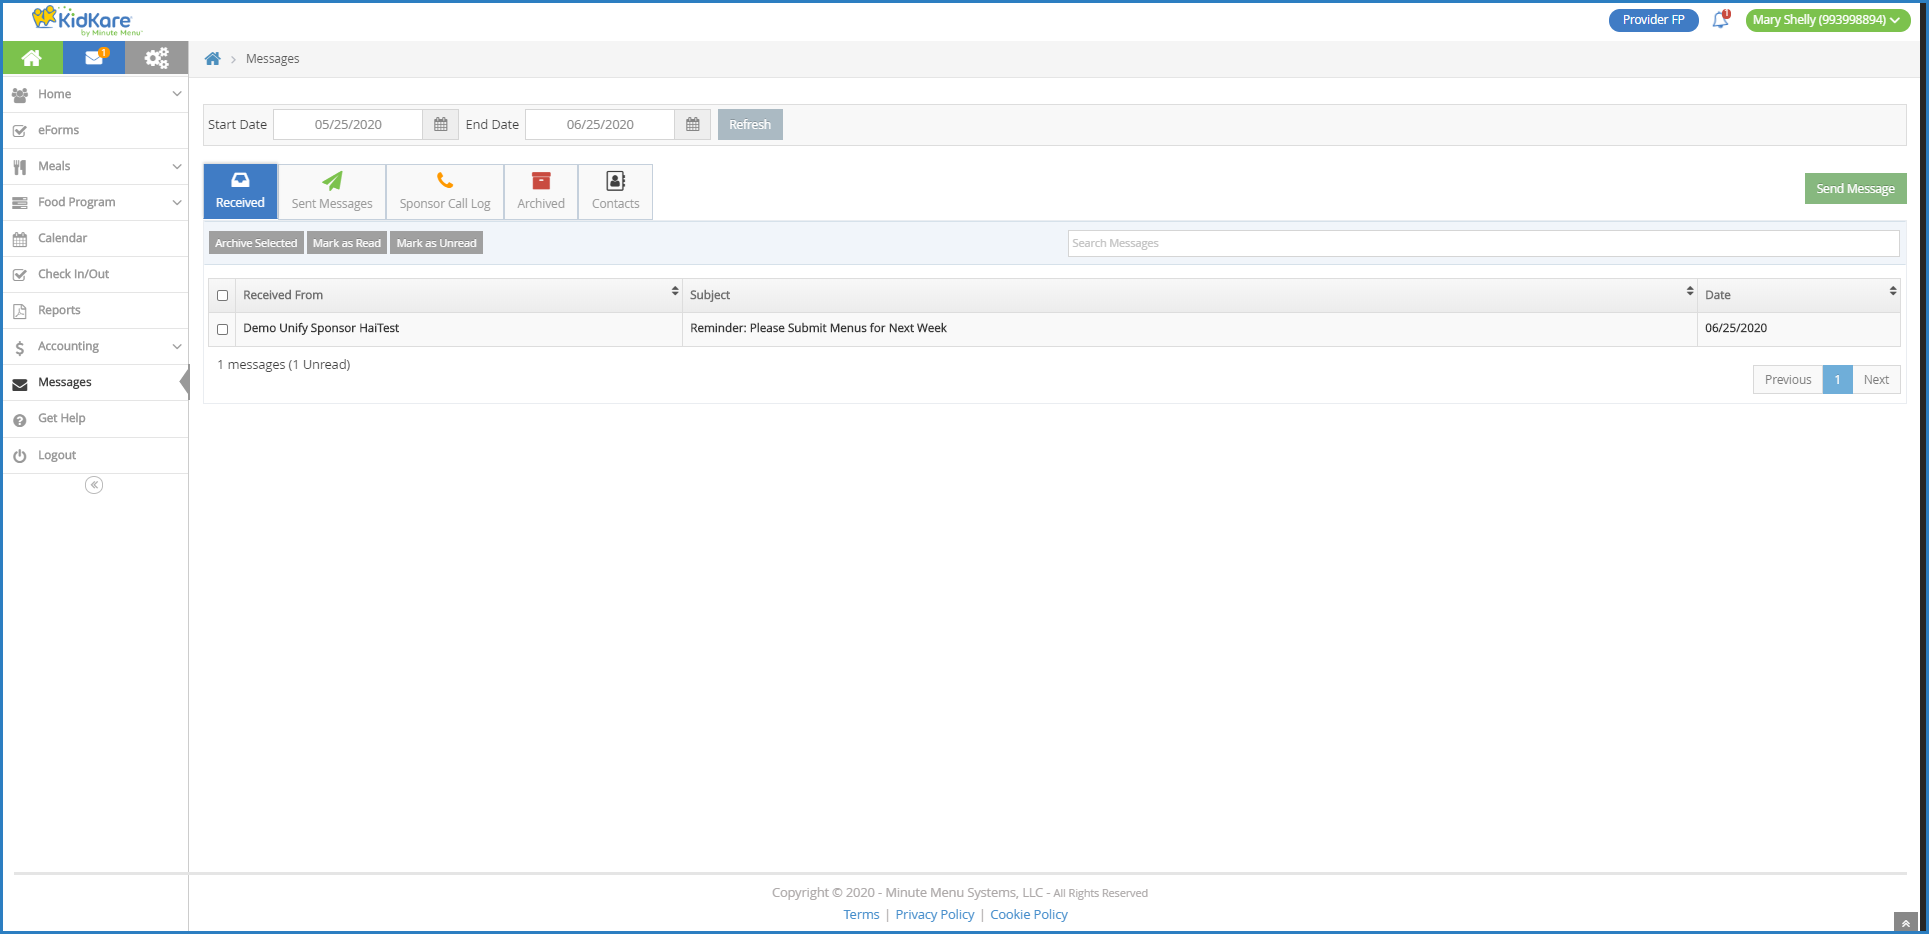
-
Use the Search Messages box to filter the messages that display. The message list is updated as you type.
-
Click a message to view the message content.

-
If your sponsor or a guardian included any attachments, click the file name in the Attachments section to view it.
-
When finished, click Back to return to the Received tab.
-
To mark messages as read/unread:
-
Check the box next to the messages to mark as read/unread. You can also check the box at the top of the column to select all messages.
-
Click Mark as Read or Mark as Unread.
-
-
To archive messages:
-
Check the box next to the messages to archive. You can also check the box at the top of the column to select all messages.
-
Click Archive Selected. The messages you selected are moved to the Archived tab.
-