Mark Claims as Submitted
Mark claims as submitted in Minute Menu HX once you have actually sent your claim paperwork to the State. Before proceeding, confirm that you do not need to make any claim changes and that the information in Minute Menu HX accurately represents what you need to use for your state claim.
Print and review the Provider Claim Totals report and the Claim Summary report shown in the image below before proceeding.
To mark a claim as submitted:
-
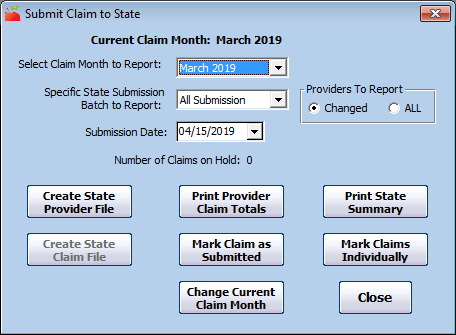
Click the Claims menu and select Submit Claims to State. The Submit Claim to State window opens.
-
Click the Select Claim Month to Report drop-down menu and select the claim month you are submitting.
-
Click the Specific State Submission Batch to Report drop-down menu and select All Submission or Current.
-
In the Providers to Report section, select Changed or All.
-
Click the Submission Date box and select the submission date. This defaults to the current date.
-
Click Mark Claim as Submitted. All un-submitted claim records within the claim month you selected are marked as submitted and flagged with the date you set in Step 5. These records are locked and can no longer be changed. This excludes any claim records that are currently on hold. The Number of Claims on Hold field notes how many claims are on hold for the selected claim month.
If you must later re-process claims included in a submitted batch, an adjustment record is created for the affected claim. The counts on this record are equal to the difference between the original processed counts and the counts when it is re-processed. For more information, see Change/Adjust Claims.
You can also mark individual claims as submitted, rather than marking them as part of a batch. You would typically do this if there are a few claims that should not be marked as submitted, but you don't want to put them on hold.
-
In the Submit Claim to State window, click Mark Claims Individually. The Mark Claims Individually to Submit window opens.

-
Click the Submission Date box and select the submission date. This defaults to the current date.
-
Check the box next to each claim to submit.
-
Click Submit.
Unsubmit a Claim Batch
If you marked a batch of claims as submitted and should not have, you can unsubmit the claim batch. Exercise caution when performing this function. You should only use the submission batch that corresponds precisely with what you submitted to your State on your claim reports or uploaded claim files.
WARNING: Un-submitting claims can make your state claim reports incorrect. Be absolutely sure that you need to un-submit claims before proceeding.
-
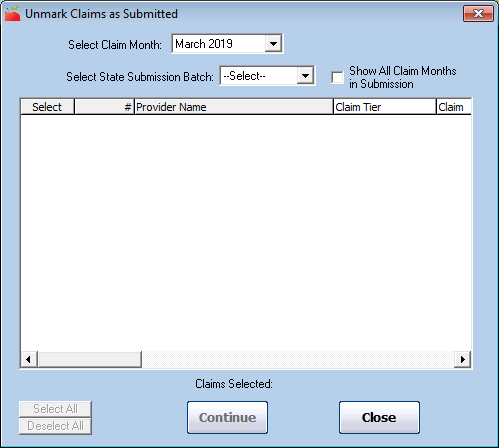
Click the Administration menu and select Unmark Claims as Submitted. The Unmark Claims as Submitted window opens.
-
Click the Select Claim Month drop-down menu and select the claim month.
-
Click the Select Date Submission Batch and select the appropriate submitted date. The submitted claims display.
-
Check the Show All Claim Months in Submission box to display the Claim Mon column. This can help you locate the appropriate claim to un-submit.
-
Check the box next to each claim to un-submit.
-
Click Continue.
-
Click OK at the warning prompt.
Use Electronic Claim Transfer Files
If you claim with the State of New York, see Export the NY CIPS File below.
In most states, you must fax or mail-in handwritten or typed forms that contain your claim summary information. However, some states have automated, Internet-based claim management systems that require you to generate specially formatted claim files that you then upload to the State.
If you are in one of these states, you generate this file in the Submit Claims to State window.
-
Click the Claims menu and select Submit Claims to State. The Submit Claim to State window opens.
-
Depending on your state, click one of the following options:
-
Create State Claim File: This generates a claim information file you can send to your State. Claims that are on-hold are excluded from this file.
-
Create State Provider File: This generates a provider information file that you can send to your State.
-
-
Select the location in which to save the file.
-
Click Save.
These functions merely create the file on your hard-drive. You must still transmit this file to your State agency. Contact your State agency for more details.
Export the NY CIPS File
We have worked with the State of New York to create a file that maps to the CACFP Information and Payment System (CIPS). This allows New York sponsors to export their child data from Minute Menu HX and upload it directly to the state CIPS website.
For more information about this feature, see the CIPS Manual and the State of New York's Release Notes.
Before You Begin
To use this feature, you must do the following:
-
Enable the G.011 Alternate Child ID preference.
-
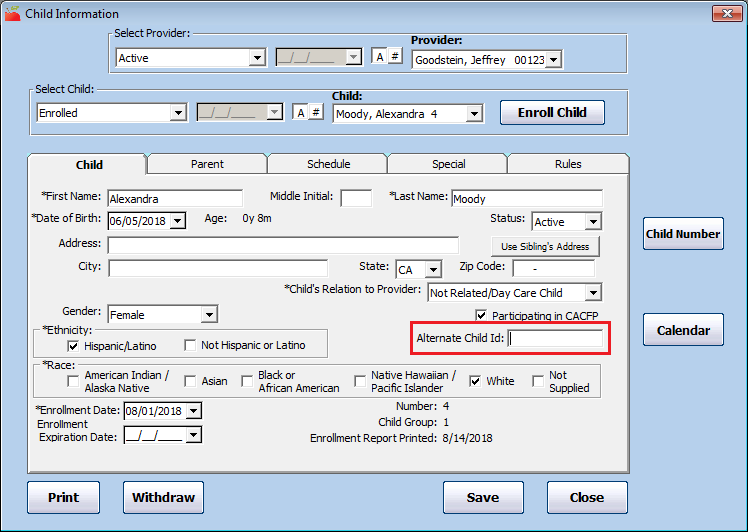
Enter the CIPS Participant ID into the Alternate Child ID box in the Child Information window.
Enabling the G.011 Alternate Child ID Preference
If you do not enable this preference, the Alternate Child ID box does not display in the Child Information window.
-
Click the Administration menu and select Sponsor Preferences. The Sponsor Preferences window opens.
-
Click the Select the Category to Move To drop-down menu and select G. Child Info - Child Tab.
-
Check the box next to 011 Display Alternate Child ID. This is the last preference under the G. Child Info - Child Tab heading.
-
Click the Select Setting drop-down menu, and select Y.
-
Click Save.
Entering the CIPS Participant ID Into the Alternate Child ID Box
Now, enter the child's CIPS Participant ID in the Alternate Child ID box in the Child Information window.
-
Click the Providers menu and select Child Information. The Child Information window opens.
-
Click the Provider drop-down menu and select a provider.
-
Click the Child drop-down menu and select the child to edit.
-
In the Child tab, click the Alternate Child Id box and enter the child's CIPS Participant ID.
-
Click Save.
Double-check the child's name before exiting this window. If the child's name does not match their name in CIPS exactly (even if it is a middle initial that is not in CIPS), a duplicate record will be created. Correct any errors you find.
Preparing to Export
Once you are ready to export the CIPS file, do the following before exporting to avoid errors:
- Ensure all child names in HX match the child names in CIPS exactly. If a name does not match and you upload the file without correcting it, a duplicate is created. Correct any errors you find.
- Double-check that all Alternate Child IDs match the appropriate CIPS Participant IDs.
- Withdraw any inactive children.
Exporting the CIPS File
We recommend that you export the CIPS file and upload it to CIPS monthly, as well as whenever child data changes. This ensures that your claim data matches CIPS records. Note that child data in CIPS is overwritten by the data uploaded from the CIPS file.
The exported file saves to the C:\MMHX\Sponsor\Export\ folder.
-
Click the Claims menu and select Submit Claims to the State. The Submit Claim to State dialog box opens.
-
Make sure that the correct claim month is selected in the Select Claim Month to Report box.
-
Adjust the remaining settings, as needed.
-
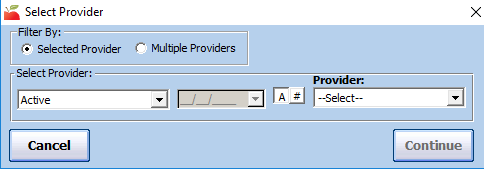
Click Export CIPS Child File. The Select Provider dialog box opens. There are three ways to export provider information:
-
To export a single provider, go to Step 5.
-
To export multiple providers, go to Step 6.
-
To select providers from a list, go to Step 7.
-
-
To export a single provider:
-
Select the Selected Provider option.
-
Click the Provider drop-down menu and select the provider to export.
-
Click Continue. The report is generated. Go to Step 8.
-
-
To export multiple providers:
-
Select the Multiple Providers option.
-
Click Continue. The Provider Filter window opens.

-
Set filters for the providers to include in the export. If you do not set any filters, all providers will be exported.
-
Click Continue. The file is generated. Go to Step 8.
-
-
To select providers from a list:
-
Select the Multiple Providers option.
-
Click Continue.
-
Set filters, if needed.
-
Check the Choose Providers From List box.
-
Click Continue. The Choose Providers dialog box opens.

-
Check the box next to each provider to include in the export. You can use the #, Move to Provider, and Quick Select boxes to find specific providers.
-
Click Continue. The file is generated.
-
-
Upload the file to CIPS. For instructions, see the CIPS Manual.