You must have the Claims permission enabled on your account to view and work with claims. Sponsored centers do not have access to this feature.
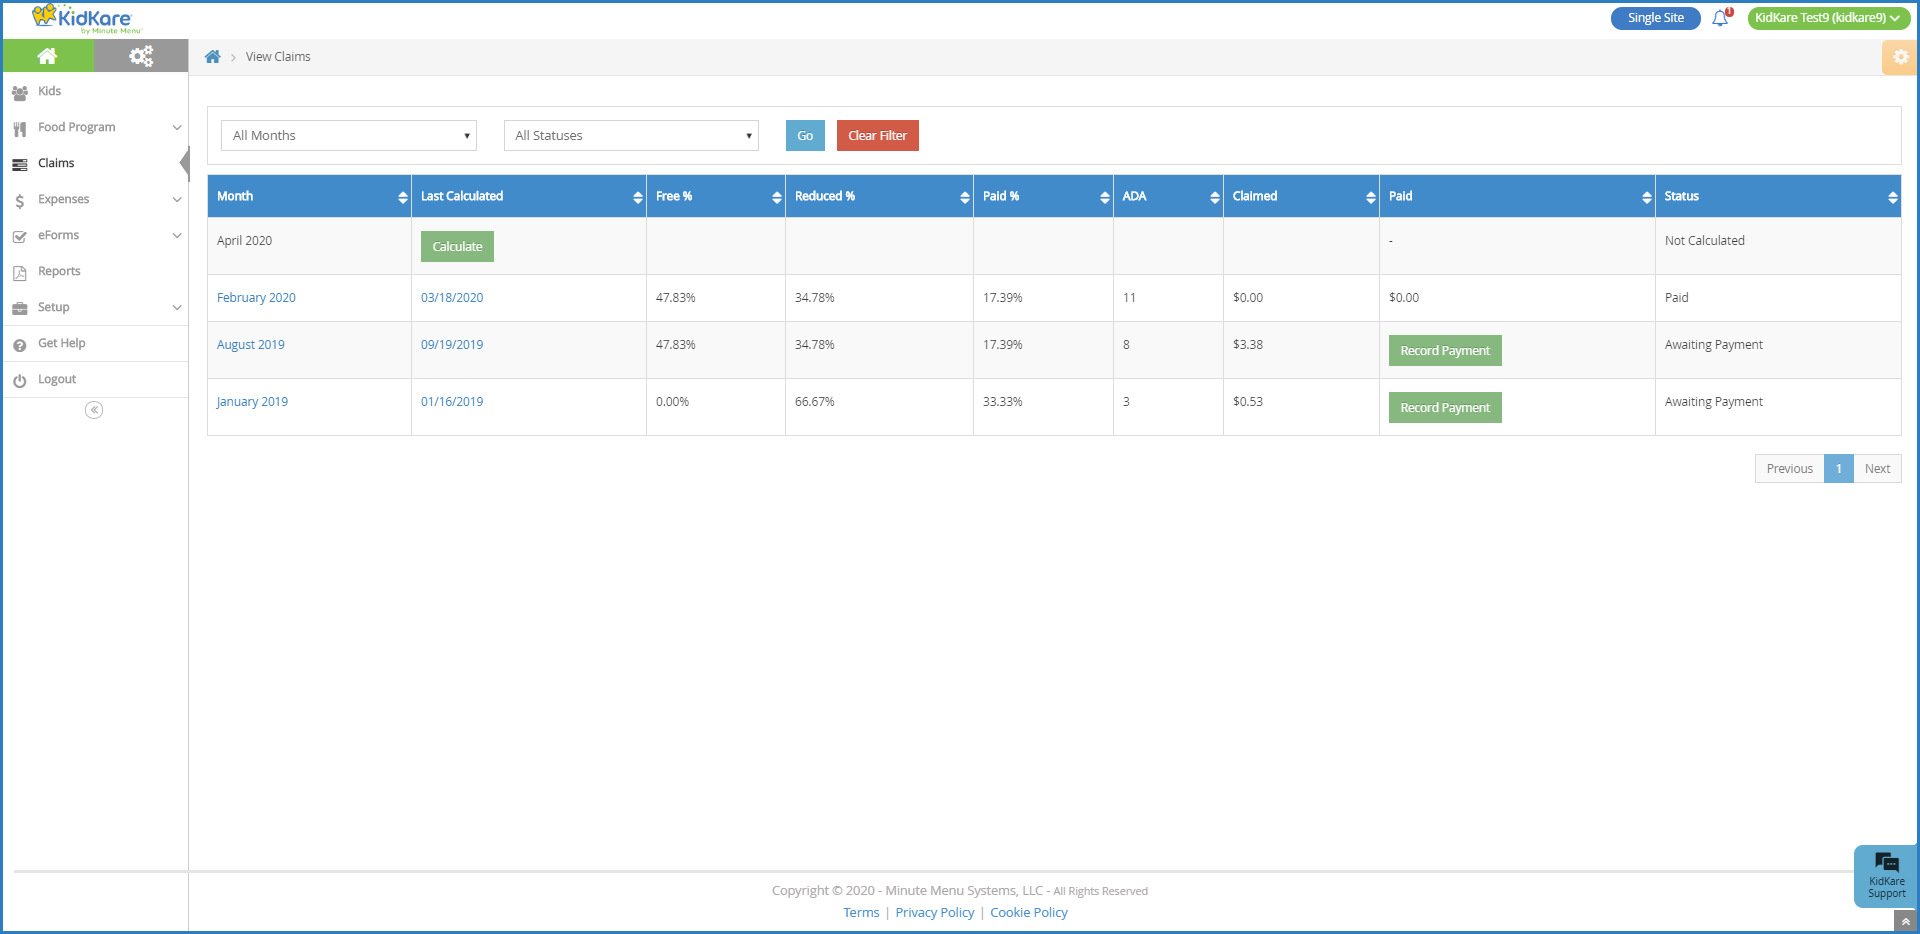
The option to calculate a claim displays on the View Claims page for those months in which there are meals/attendance recorded, but you have not yet calculated the claim. This option appears in the Last Calculated column.
Calculate Claims
-
From the menu to the left, click Claims, then List Claims. The View Claims page opens.
-
Click Calculate on the row to calculate. The claim is calculated.
If one claim is produced by the calculation, the Claim Detail page opens and displays the claim information. If multiple claims are produced (such as for regular and At-Risk meals), the View Claims page refreshes. click the month or calculated date to open the associated claim.
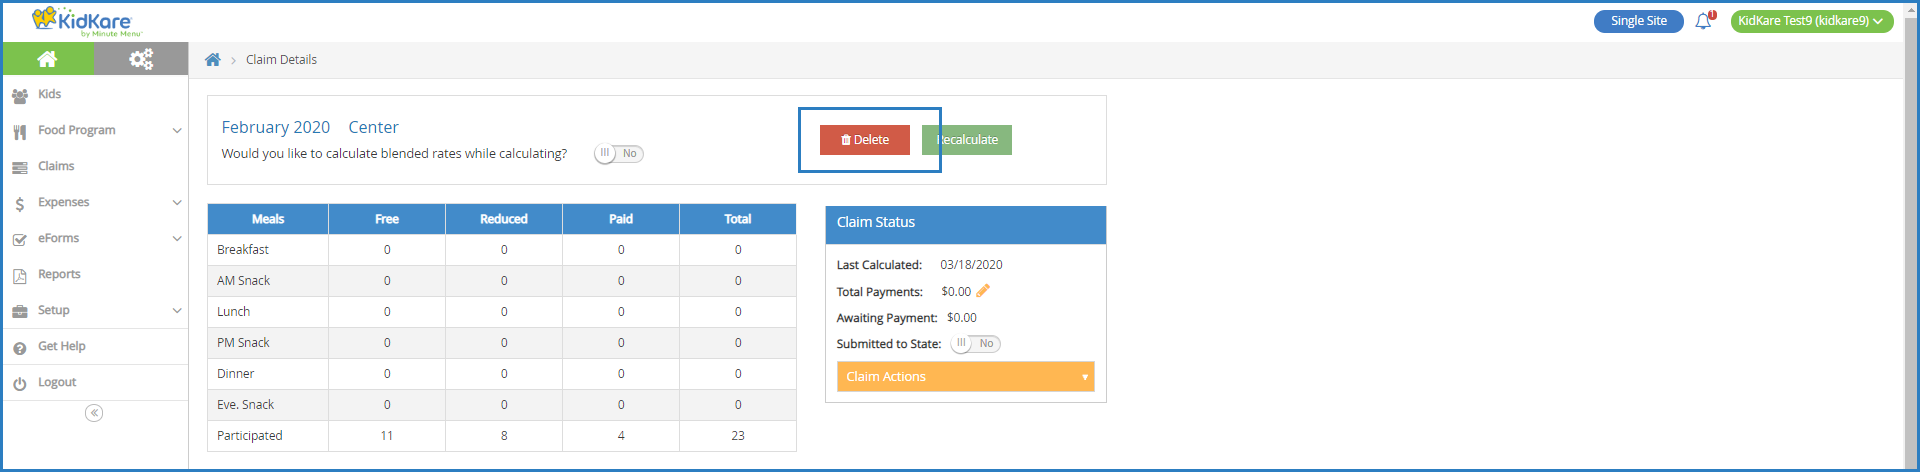
Recalculate Claims
Before you submit your claim to the state, you can recalculate it to account for any manual changes made after initial claim calculation. For example, you may have corrected an error listed in the Claims Error List and need to calculate the claim again.
You can only re-calculate claims that you have not marked as submitted to the State. If you need to recalculate a claim that you marked as submitted, you must clear the submitted flag before proceeding.
-
From the menu to the left, click Claims.
-
Select List Claims.
-
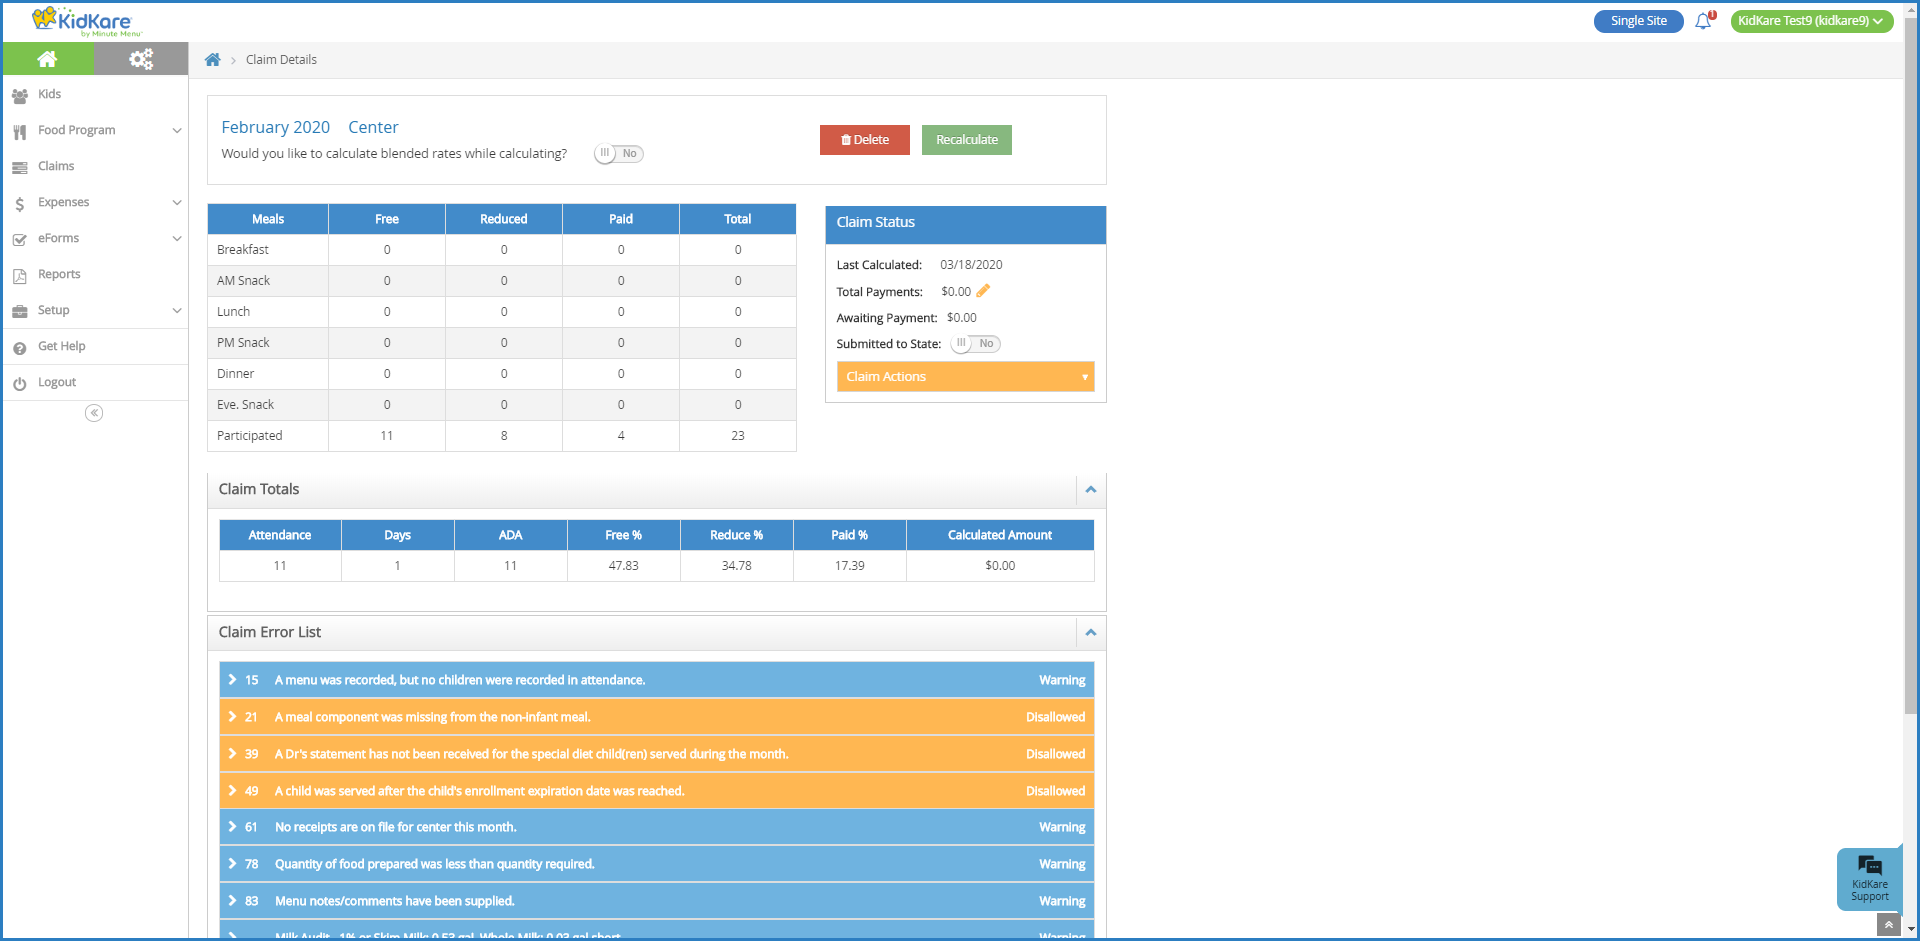
Click the claim to recalculate. The claim details open.
-
Click
 next to Would You Like to Calculate Blended Rates While Calculating to use blended rates while recalculating the claim. This option only displays if you are set to use split meal counts and blended meal rates.
-
This defaults to the selection you made on the previous month's claim.
-
If this is your first claim in KidKare, it defaults to No.
-
-
Click Recalculate. The claim is recalculated, and the Calculated Date in the Claim Status section is updated. Review the Claim Error List section to ensure that all errors are resolved.
Claim Error List
The Claim Error List section displays any disallowed and warned meals each time a claim is calculated or recalculated. Each error results in a Warning or Disallowed message. Errors that result in disallowance are deducted from the reimbursement. Warning notifications do not deduct from the reimbursement, but you should still research and correct the cause. To review a detailed list of all possible errors, go to the Claim Error Codes article.

You can filter the Claim Error List to a specific error type. To do so, click the Filters in the top-right corner and select the filter to apply to the Claim Error List. You can show Allow/Warn errors, Disallowed errors, or both errors.
Adjust Claim Counts
You can manually adjust your claim counts on the Adjust Claim Counts page. From this page, you can add or subtract from the pre-adjustment totals, which results in a recalculation and adjustment to the claim. Each adjustment you make is stored in the Claim Change Log at the bottom of the page.
- From the menu to the left, click Claims.
- Select List Claims.
- Click the claim to adjust. The Claim Details page opens.
- In the Claim Status section, click the Claim Actions drop-down menu and select Adjust Claim Counts. The Adjust Claim Counts page opens.
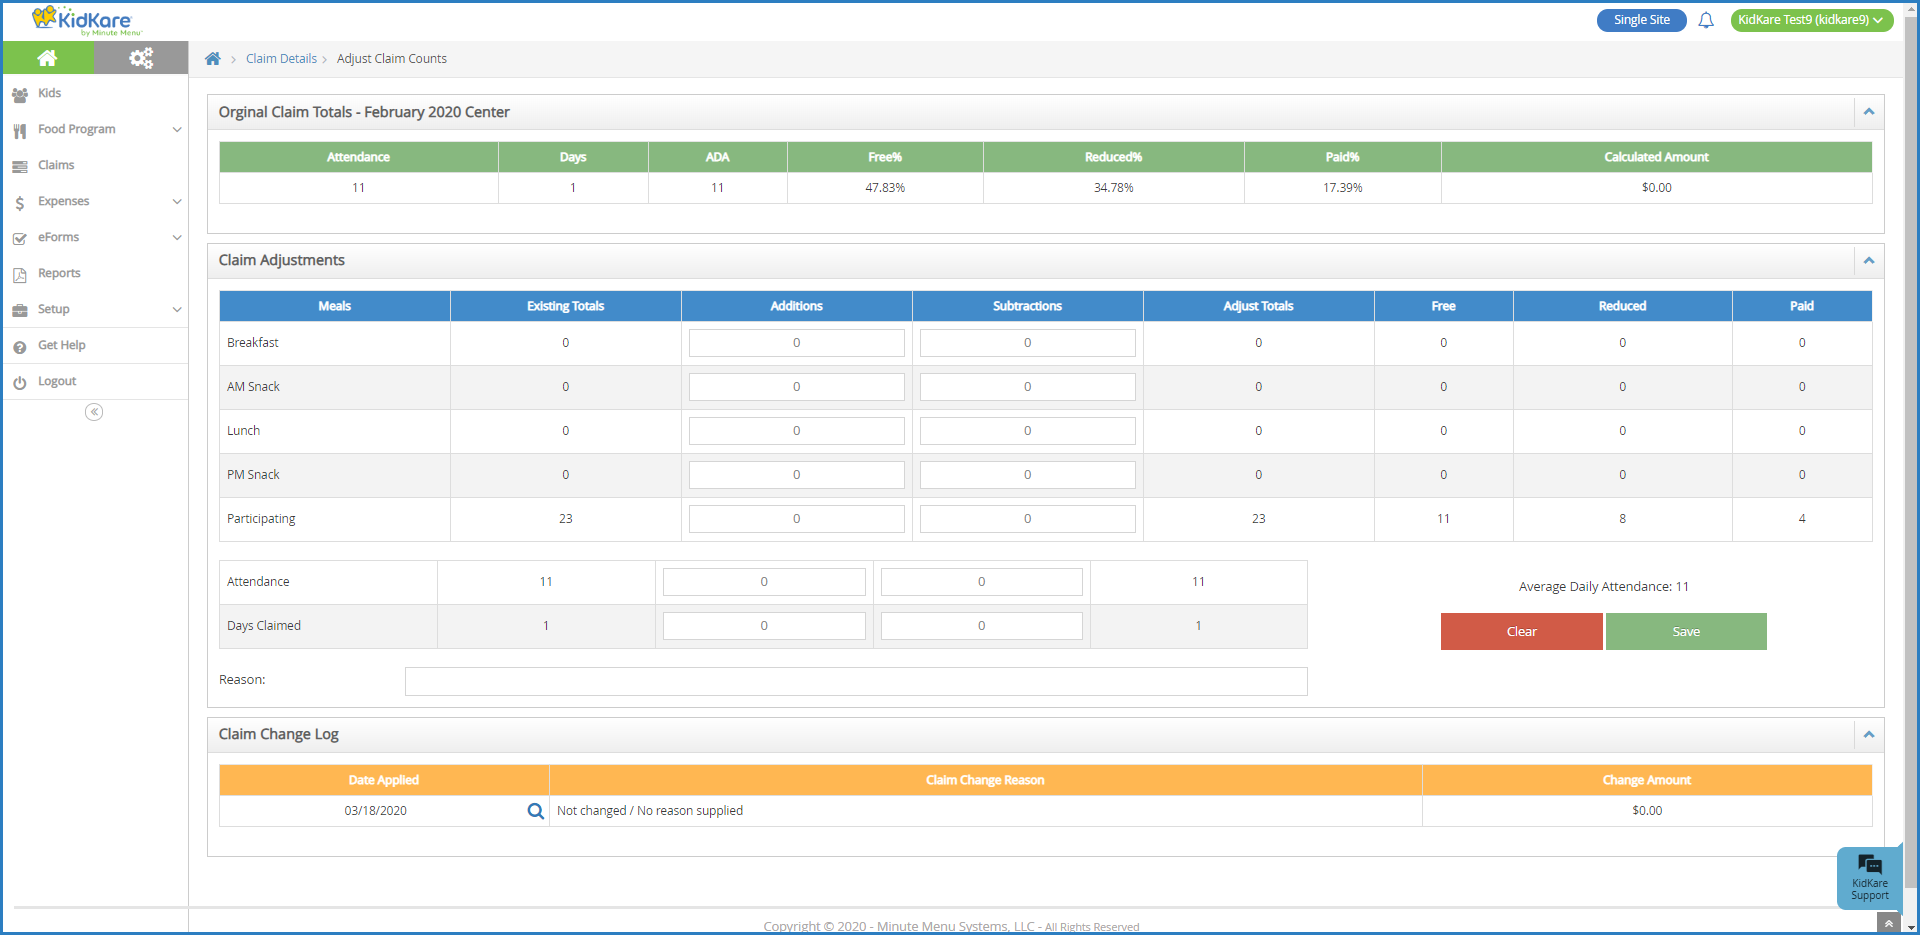
- Add adjustments for meals, attendance, and days claimed, as needed.
- Click the Additions box for the appropriate row and enter the amount to add.
- Click the Subtractions box for the appropriate row and enter the amount to subtract.
- Click the Reasons box and enter a reason for this change.
- Click Save. The adjustment is added to the Claim Change Log and the Additions and Subtractions boxes are cleared.
- Click Claim Details to return to the Claim Details page.
Mark Claims as Submitted
When a claim has just been filed or is about to be filed with your state agency, mark the claim as Submitted in KidKare.
- From the menu to the left, click Claims.
- Select List Claims.
- Click the claim to view. The Claim Details page opens.
- In the Status section, click
 next to Have You Submitted Your Claim to the State.
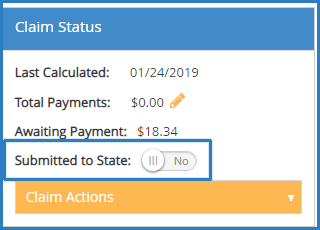
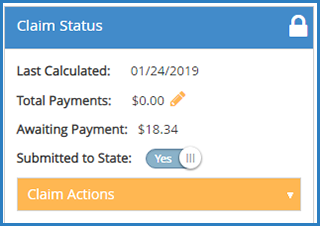
Once you mark a claim as submitted, the claim records are locked and you cannot make changes to the claim. To unlock the claim for editing again, change the Have You Submitted Your Claim to the State flag back to No.
View the Claim Change Log
Each adjustment you make is stored in the Claim Change Log at the bottom of the Adjust Claim Counts page.
- From the menu to the left, click Claims.
- Select List Claims.
- Click the claim to adjust. The Claim Details page opens.
- In the Claim Status section, click the Claim Actions drop-down menu and select Adjust Claim Counts. The Adjust Claim Counts page opens.
- Scroll to the Claim Change Log section at the bottom of the page. The following information displays:
- Date Applied
- Claim Change Reason
- Change Amount
- Click the magnifying glass to view additional details about a particular change.
![]()
Record Payments from the State
- From the menu to the left, click Claims.
- Select List Claims.
- In the Paid column, click Record Payment. The Record Payment pop-up opens.
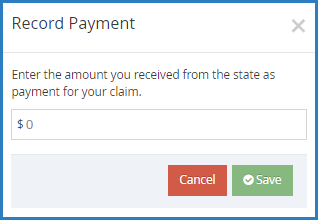
- Click the $ box and enter the amount you received from the State.
- Click Save.
Recording Payments on the Claim Details Page
- From the menu to the left, click Claims.
- Click the claim for which to record payment. The Claim Details page opens.
- In the Status section, click
 next to Total Payments. You can also click the Claim Actions drop-down menu and select Enter Payment Amount. The Record Payment pop-up opens.
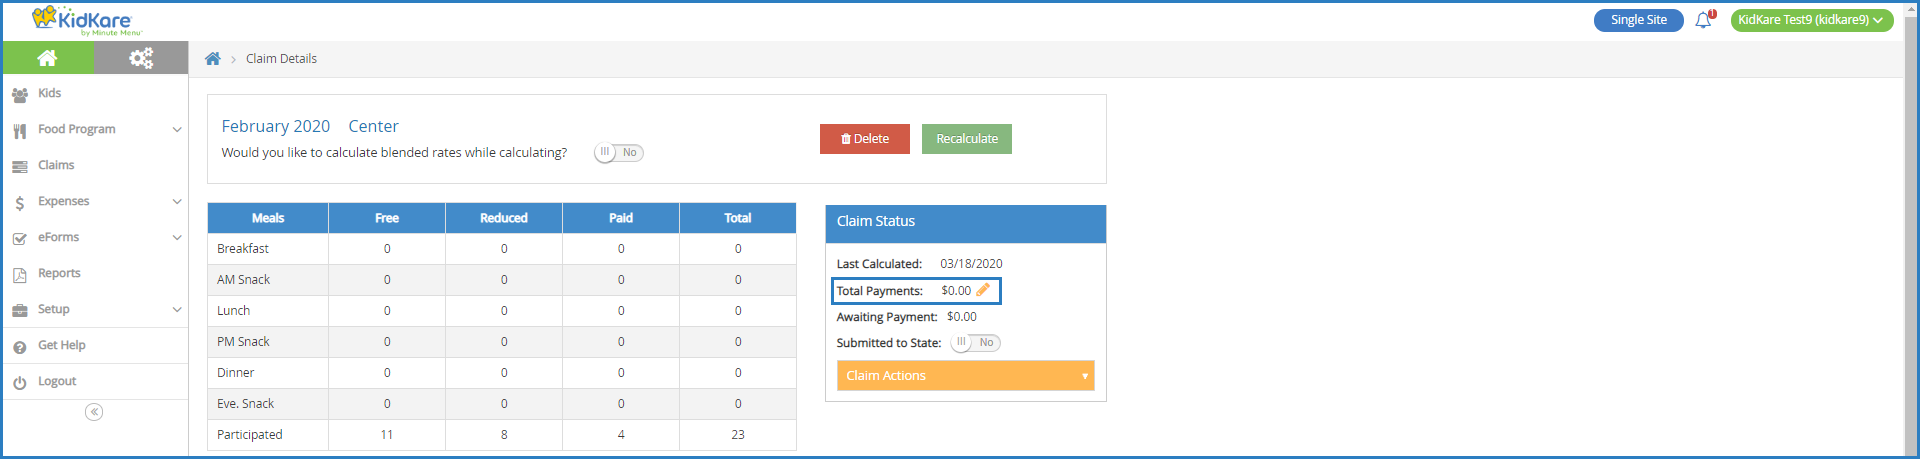
- Click the $ box and enter the amount you received from the State.
- Click Save.
Delete Claims
You can delete claim data for a given month so you can process or re-process your claims.
- From the menu to the left, click Claims.
- Select List Claims.
- Click the claim to delete. The Claim Details page opens.
- Click Delete.
- At the Are You Sure prompt, click Delete.
If you delete a claim that contains both At-Risk and Regular meals where the claim is represented in two rows on the View Claims page, both claims are deleted. In this case, the Are You Sure prompt reads: Are You Sure You Want to Delete All Claims for the License Type [LICENSE] for the Month? Click Delete to delete both the At-Risk and Regular claim.
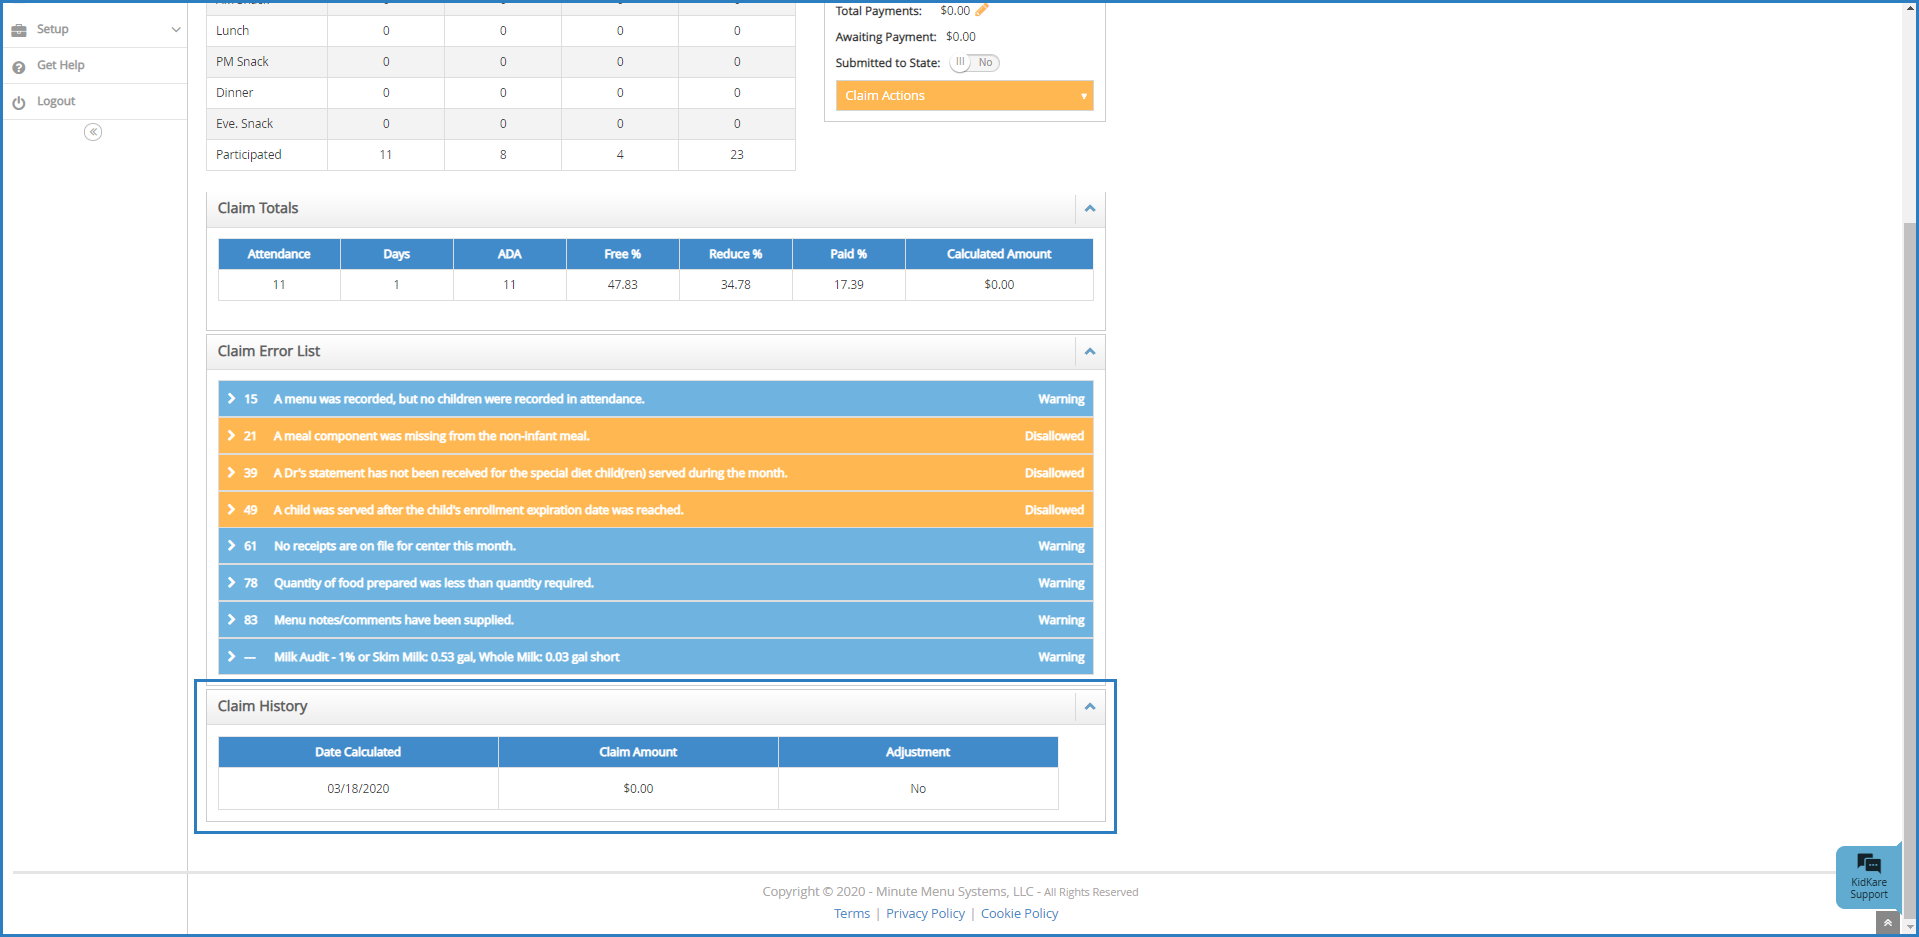
View Claim History
The Claim History section of the Claim Details page displays all claim activity for a selected claim.
- From the menu to the left, click Claims.
- Select List Claims.
- Click the claim to view. the Claim Details page opens.
- The Claim History section displays at the bottom of the page. Click
 to expand it, and click
  to collapse it again. The following information displays:
- Date Calculated: This is the date the claim was calculated/recalculated or the date of the manual adjustment for the associated row. This table is sorted in date range from oldest to newest. The original calculation always displays first.
- Claim Amount: This is the claim amount when the claim was calculated/recalculated, minus any previously calculated amounts.
- Original Claim Calculation: This is the calculated amount.
- Recalculated Claims: If there is a difference in the claim value, this is the new calculated amount minus the original calculated amount. This can be a positive or a negative amount.
- Adjusted Claims: This is the impact of the adjustment. This can be a positive or a negative amount.
- Adjustment: This indicates whether the row is an adjustment. If this column is set to Yes, you can click
 to remove the adjustment. At the confirmation prompt, click Delete.