At-Risk/SFSP Claims Process
In This Article
For closed enrolled ARAS/SFSP sites, the claims process will be the same as it is for Childcare Center Claims.
For open enrolled ARAS/SFSP sites, the process is slightly different. These claims do not need to be processed. Once they are retrieved from the site, they will show up in List Claims ready to review and send to the state.
Review Send Monthly Claims to Your Sponsor to learn how sites will submit their claims to their sponsoring organization at the end of the month.
How to review At-Risk/SFSP claims
To view claims that have been submitted by the site:
-
From the menu to the left, click Claims.
-
Select List Claims. The List Claims page opens.
-
Use the filters at the top of the screen to view All Centers for the desired claim month.

-
Click Go. The claims received load.

-
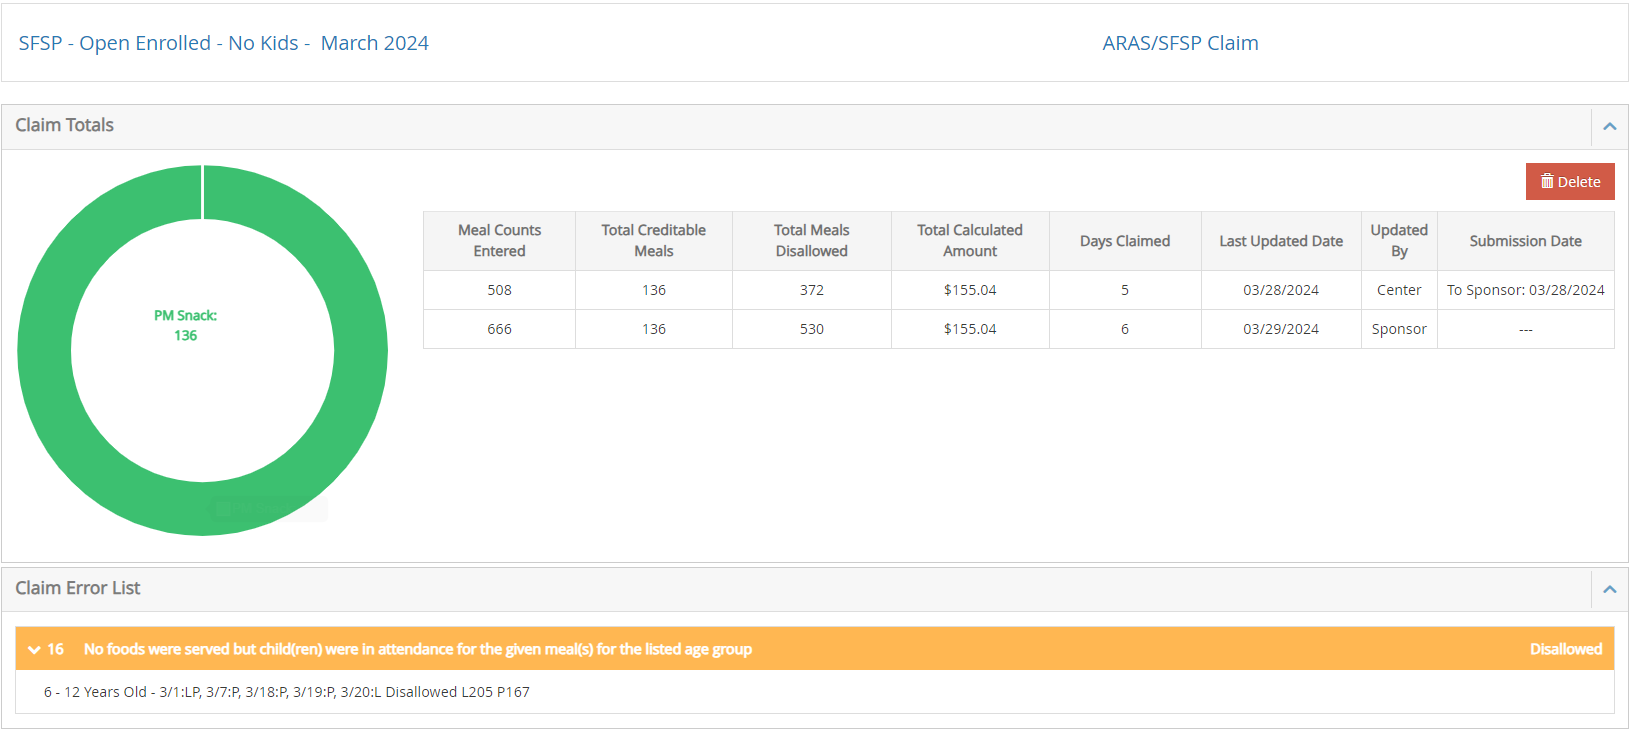
Click on the month column for the site you want to review. The Claim Details page opens.
-
This screen shows meal count totals, any changes made on Bulk Attendance since the claim was submitted, any menu errors (if menus are being used). This screen reflects totals that will be submitted to the state.

-
If menu changes are required, these changes can be made from Menus/Attendance > Center Daily Menus. After changes are made, they will reflect on this screen and update the Claim Details.
-
Once this screen looks correct, repeat these steps for each site.
-
Once all sites have been reviewed and look correct, you can proceed to Submit to State. Steps are shown in the section below.
How do I submit my claims to my state agency?
After claims are processed and reprocessed as needed, and the claims are ready to be submitted, you can use either an upload file (only available in some states) or access claim reports that will help you enter the data into your state website.
To access the upload file and/or to view claim reports:
-
From the menu to the left, click Claims.
-
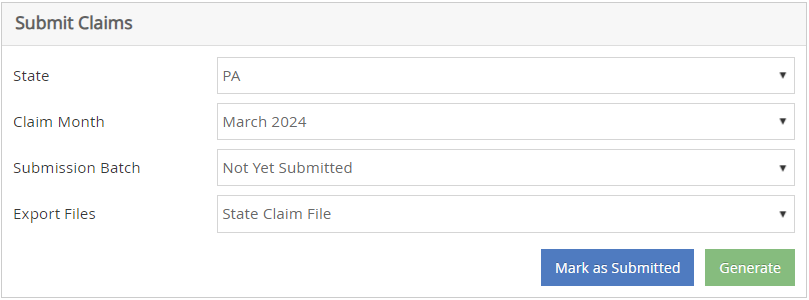
Select Submit Claims to State. The Submit Claims to State page opens.
-
Ensure that the correct state and claim month are selected. Choose Not Yet Submitted in the submission batch drop down.

-
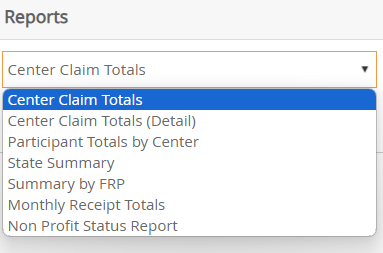
Once these fields are filled out pull the Center Claims Total report from the section to the right.
-
Click Run. The report prints.

-
If this report does not have everything you need for your state site, try the other report options and use the report that works best for you. The most commonly used reports are the Center Claim Totals report and the State Summary Report.

-
If an upload file exists in your state, click Generate.
-
If you do not see this option, an upload file does not currently exist in your state.
-
If you do see this option and this is your first time generating an upload file, contact Support, as some setup is required before you can successfully upload your claim.
-
-
The file generates and shows up in your Downloads folder. You may see the filename in the upper right corner the file is ready. DO NOT click the filename in the list. Go to your downloads folder and get the file from there to upload to the state.
-
If you generated an upload file, log in to your state agency's website and upload it.
What if sites don't send their claim?
If a site does not submit their claim at the end of the month, the sponsor can go in and retrieve it.
-
From the menu to the left, click Claims.
-
Select Mark Center's Claims for Processing. The page loads.
-
In the top right corner, select the center/site that you are wanting to retrieve.
-
Select the Claim Month in the drop down.
-
Once the claim month is selected the Total Meals, Days Claimed, and ADP will automatically generate. If these numbers look accurate, click
 .
.
-
Once the green banner appears stating the claim has been submitted, it will show in List Claims.

What if sites send their claim on accident?
If a site submits their claim on accident, or the sponsor needs to send it back to the site to make adjustments to the menu or any daily totals, the claim can be deleted.
-
From the menu to the left, click Claims.
-
Select List Claims.
-
Choose All Centers and select the correct claim month in the filters at the top. Click Go.

-
Click on the claim month for the site who's claim needs to be deleted. The Claim Details page opens.

-
The claim is removed and the site can now make adjustments and resubmit the claim once finished.
Advance Claim Month
KidKare tracks claim month-specific information independent of your computer’s date. This should be the month immediately before the calendar month (in most cases) and is the claim month on which you are working.
Only one person needs to advance the claim month for each account. Once the month has been changed in the account, other users must log out and log back in to the software before they see the change.
-
From the menu to the left, click Claims.
-
Select Advance Claim Month. The Advance Claim Month page opens.

-
Click
 to advance the claim month, and click
  to move the claim month back.
 -
Click Save.
