Validate Online Reviews
Monitors can record reviews online with any Internet-connected device while present at the provider's home. Once these reviews are completed and finalized, they appear in your Minute Menu HX database at Pending status. The next step is to validate the review. Reviews must be validated before they are classified as the provider's review.
You can view validated reviews in the List Reviews window. Validated reviews are also included in the Review Reports.
-
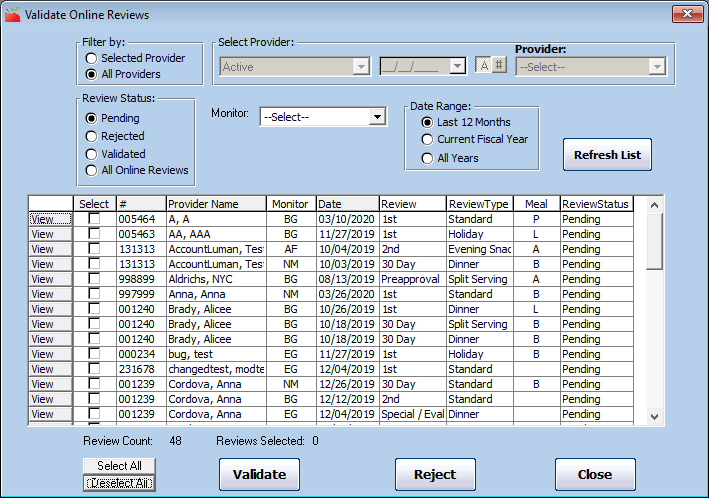
Click the Tools menu and select Validate Online Reviews. The Validate Online Reviews window opens.
-
Filter the reviews that display.
-
In the Filter By section, select the All Providers option or the Selected Providers option. If you choose Selected Provider, use the options in the Select Provider section to locate the provider to view.
-
In the Review Status section, select the status to view: Pending, Rejected, Validated, or All Online Reviews.
-
Click the Monitor drop-down menu and select a specific monitor to view.
-
In the Date Range section, select one of the following options: Last 12 Months, Current Fiscal Year, or All Years.
-
When finished, click Refresh List.
-
-
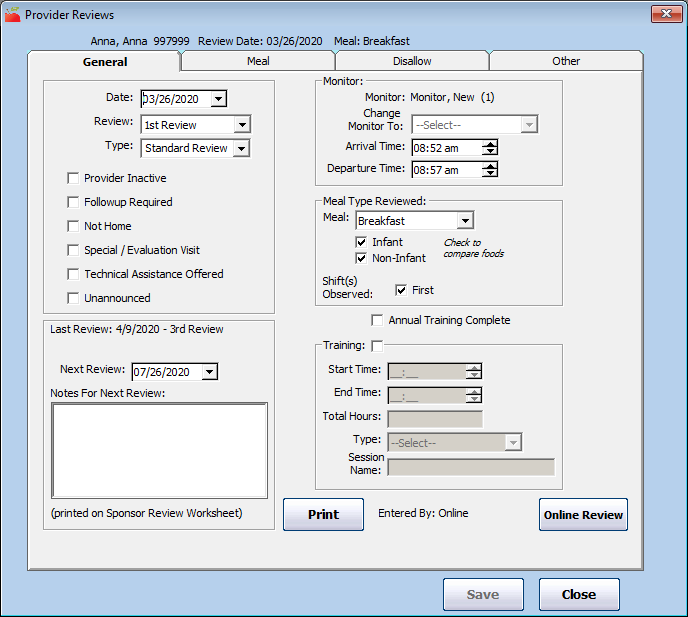
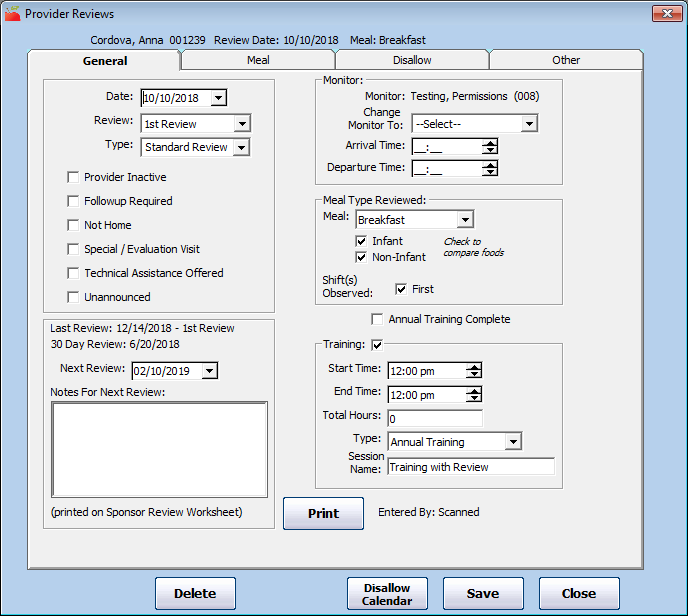
Click View next to a review to review it. The Provider Reviews window opens. You can click Print to print this information. You can also click Online Review to open a report for this review. When finished, close this window.
-
Check the box next to each review to validate.
-
Click Validate.
Rejecting Reviews
If there are reviews that were entered in error, entered for training purposes, or are otherwise not valid, you can reject them.
-
Check the box next to each review to reject.
-
Click Reject.
List Reviews
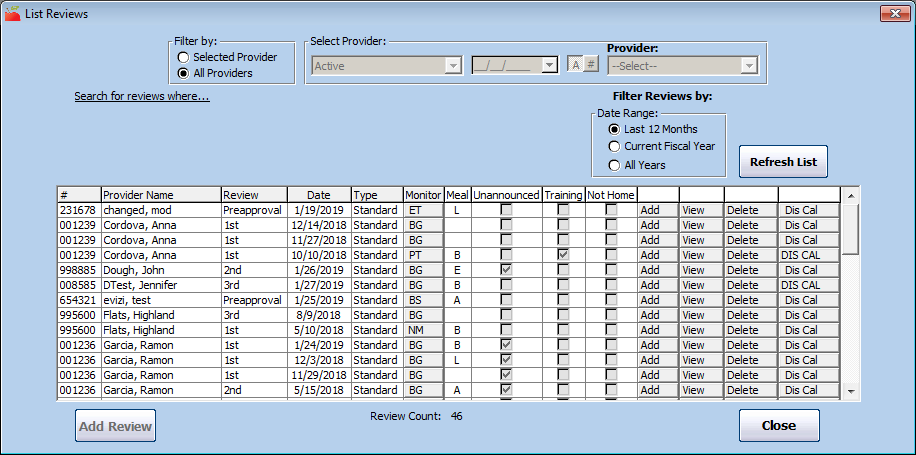
The List Reviews window lists all validated reviews in your system. Note that Pending and Rejected reviews are not included in this window.
-
Click the Providers menu and select Provider Reviews. The List Reviews window opens.
-
Set filters, as needed.
-
Filter By: Select Selected Provider or All Providers. If you choose Selected Provider, click the Provider drop-down menu and select the provider to view.
-
Filter Reviews By: Select the date range for which to view reviews: Last 12 Months, Current Fiscal Year, or All Years.
-
Search for Reviews Where: Click this link to use additional search options, such as Monitor, Review Class, Meal, and so on. Click
 to clear the values you entered in these boxes.
-
-
Click Refresh List. Reviews meeting the limits you set display.
Note: You can also access the List Reviews window from the Provider Information window. To do so, click Reviews (to the right). The List Reviews window opens and displays reviews for the provider.
-
Click each column to sort the displayed information in ascending or descending order.
-
Click View next to a review to view the review details. When finished, click Close.
-
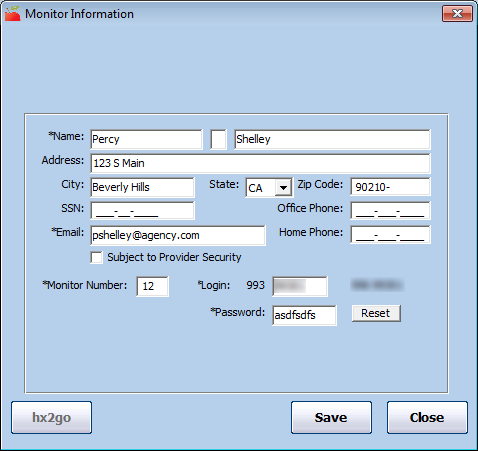
Click the monitor's initials in the Monitor column to view monitor information. You can update the information in this window, if needed. Click Save to save your changes. Click Close to close this window.
-
You can also do the following in this window:
-
Delete: Click Delete next to a review to remove it from the provider's record. Respond to the confirmation prompt.
-
Add: Click Add next to a provider to add a review for that provider. This option is only available if you filtered to All Providers in Step 2.
-
DIS CAL/Dis Cal: Click DIS CAL/Dis Cal next to a review to open the Review Disallow Calendar for that review. If this button is labeled in all caps, disallowance calendar information has been entered for that review. If it is in lower case, no meals have been disallowed on the Review Disallow Calendar for that review.

-
Click Add Review to add a review for an individual provider. This button is only available if you filtered to a singe provider in Step 2.
-
Edit Reviews
You can make changes to existing reviews, if needed.
-
Click the Providers menu and select Provider Reviews. The List Reviews window opens.
-
In the Filter By section, select All Providers or Selected Providers. If you choose Selected Providers, click the Provider drop-down menu and select the provider.
-
Click Refresh List.
-
Click View next to the review to edit. The Provider Reviews dialog box opens.
-
Change the information in each tab, as needed. You can also use the Disallow Calendar to add or remove disallowances. For more information, see Add Reviews and Disallow Meals with the Disallow Calendar.
-
When finished, click Save.
-
Click OK at the confirmation prompt.
Delete Reviews
Warning! Deleting reviews can affect the way a provider's claim is processed. Only delete reviews that were entered in error.
-
Click the Providers menu and select Provider Reviews. The List Reviews window opens.
-
In the Filter By section, select All Providers or Selected Providers. If you choose Selected Providers, click the Provider drop-down menu and select the provider.
-
Click Refresh List.
-
Click Delete next to the review to delete.
-
Click Yes at the confirmation prompt.
You can also delete reviews from the Provider Reviews window. Click View in the List Reviews window. When the Provider Reviews window opens, click Delete.
Disallow Meals with the Disallow Calendar
When adding reviews manually, editing reviews, and viewing reviews in the List Reviews window, you can disallow meals on the Disallow Calendar. You can use this calendar to disallow meals in the month of the review or one month prior to the review. To record disallowances for the previous month, click ![]() to move one month back.
to move one month back.
-
Click the Providers menu and select Provider Reviews. The List Reviews window opens.
-
If you are adding disallowances to an existing review, click Dis Cal next to the review for which to add disallowances. The Review Disallow Calendar window opens.
-
If you are adding a new review, click Add or Add Review (depending on your filter options). Then, click the Disallow tab and check the Use Calendar To Disallow box. In the Reasons section, check the box next to the disallow reasons. Then, click Disallow Calendar at the bottom of the window. The Review Disallow Calendar window opens.
-
-
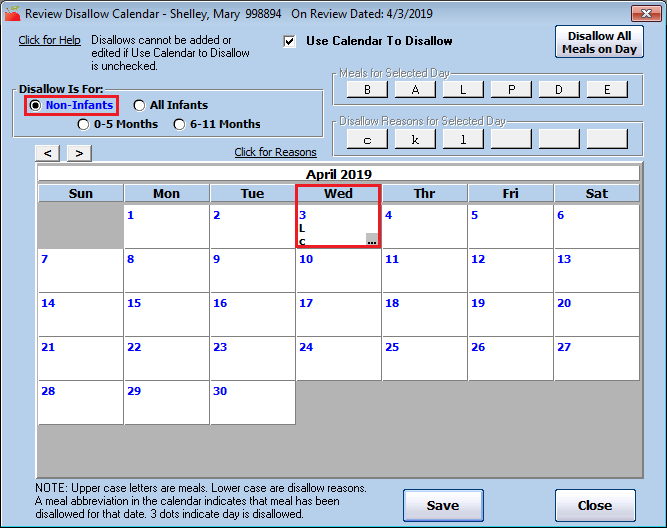
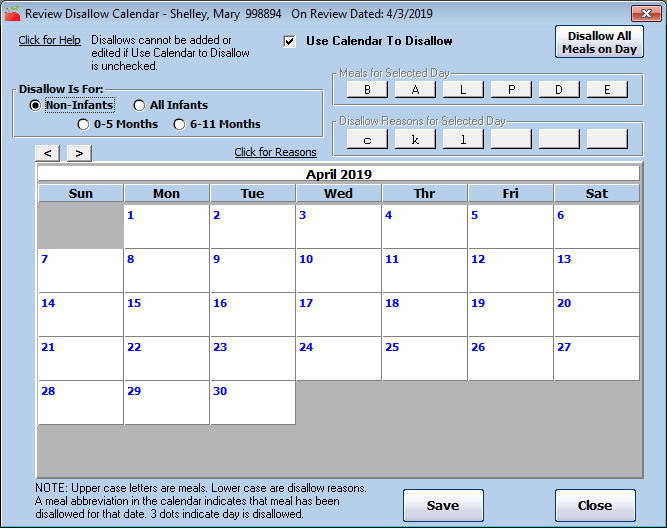
In the Disallow is For section, select the age group to which the disallowance applies. If you need to apply a disallowance to both infants and non-infants, you must first record a disallowance for infants and then record a disallowance for non-infants.
-
Click the date for which to disallow a meal.
-
In the Meals for Selected Day section, click the meal to disallow. The abbreviation for the disallowed meal displays on the date you selected. For example, to disallow Lunch, click L. To disallow all meals on a day, click Disallow All Meals on Day.
-
In the Disallow Reasons for Selected Day section, click the reason for this disallowance. To check what disallowance reason applies to each abbreviation shown, click the Click for Reasons link. Selecting a reason is optional and does not affect claims processing.
Note: You must select disallow reasons when entering the review and save before the disallowance reasons display in this window.
-
Click Save.
-
Click OK at the confirmation prompt.
When you save disallowances in this calendar, each meal disallowed for a given day for a given age range displays according to the filter set in the Disallow is For section. For example, if you select Non-Infants, disallowances for non-infants display.
Each disallowed meal displays in capital letters on the calendar, any disallowance reasons display as lower-case letters below the meal.
To clear a disallowance and reason, double-click ![]() . Respond to the confirmation prompt.
. Respond to the confirmation prompt.