Add Messages
Minute Menu HX allows you to record any communication your personnel has with any provider. This means that other agency personnel can review that information. This is especially useful when central office staff process claims, and Monitors stay out in the field performing home visits and training.
The Provider Messages function is designed to function much like a call log so you can track all incoming provider communication. You can also use this function to send messages to providers using KidKare (on an individual or broadcast basis).
-
Access the Provider Messages window. You can do this two ways:
-
Click the Tools menu, select Messages, and click Provider Messages. The Provider Messages window opens.
-
Click Providers and select Provider Information. Then, click the Provider drop-down menu and select Provider. Click Messages (from the right). Go to Step 3.
-
-
Click the Provider drop-down menu and select the provider to view.
-
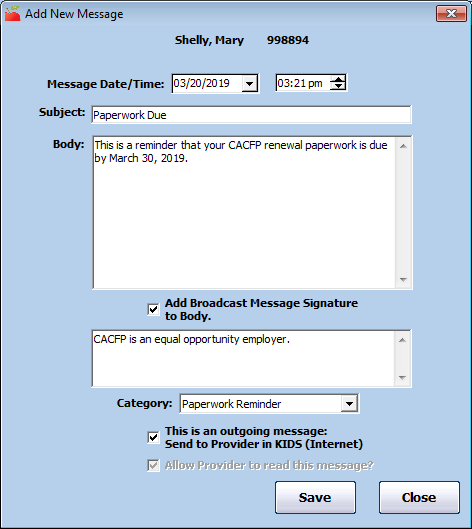
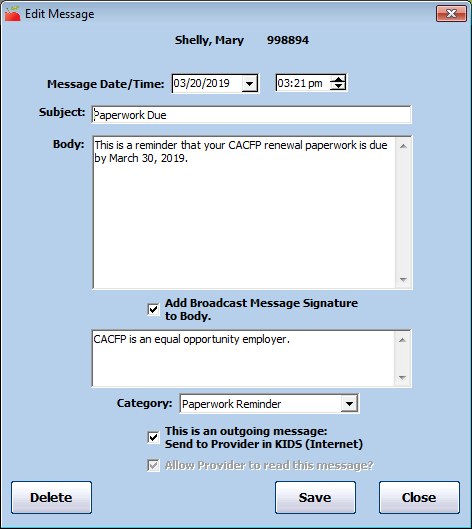
Click Add Message. The Add New Message dialog box opens.
-
Click the Message Date/Time boxes and enter the date and time the message is being recorded. These boxes default to your computer's current time.
-
Click the Subject box and enter the message subject.
-
Click the Body and enter the contents of the message. You can use HTML to format the message.
-
Check the Add Broadcast Message Signature to Body box to attach your broadcast message signature to this message.
-
Click the Category drop-down menu and select the category to which to assign this message. You create categories in the Message Categories dialog box. For more information, see Manage Provider Message Categories below.
-
Check the This Is An Outgoing Message Send to Provider box to send this message to providers using KidKare.
-
The Allow Provider to Read This Message box is checked by default if you checked This Is An Outgoing Message Send to Provider box. Clear it to hide the message from providers. Leave it checked to allow providers to read it on the Sponsor Call Log page in KidKare.
-
Click Save. You can add another message, if needed.
Manage the Broadcast Message Signature
You can attach a standardized signature when you send messages to your providers.
Including this signature is optional on individual provider messages. However, it appears at the bottom of all outgoing broadcast messages.
To create a signature:
- Click the Tools menu, select Messages, and click Broadcast Message Signature. The Message Signature dialog box opens.
- Click the text box and enter the text for your signature.
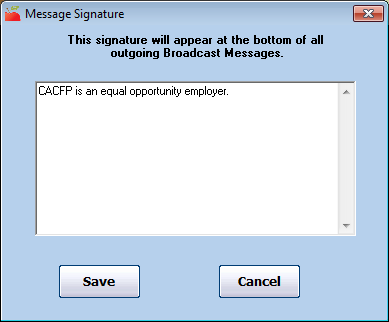
- When finished, click Save.
Send Broadcast Messages
You can send broadcast messages to all providers in your system. Providers receive these messages in KidKare.
-
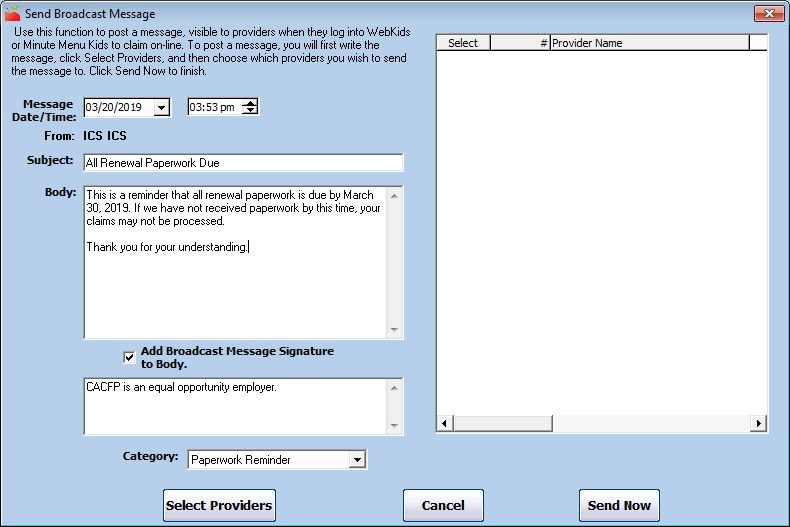
Click the Tools menu, select Messages, and click Send Broadcast Messages. The Send Broadcast Message window opens.
-
Click the Message Date/Time boxes and enter the date and time the message is being recorded. These boxes default to your computer's current time.
-
Click the Subject box and enter the message subject.
-
Click the Body and enter the contents of the message. You can use HTML to format the message.
-
The Add Broadcast Message Signature to Body box is checked by default. Clear it to omit your broadcast message signature. For more information, see Manage the Broadcast Message Signature above.
-
Click the Category drop-down menu and select the category to which this message belongs. You create categories in the Message Categories dialog box. For more information, see Manage Provider Message Categories below/
-
Click Select Providers. The Provider Filter window opens.
-
Check the Claim Source box.
-
Select Online.
-
Click Continue. The Choose Providers dialog box opens.
-
Check the box next to each provider that should receive the message. You can also click Select All to select all listed providers.
-
Click Continue.
-
Click Send Now. The message is sent.
Send Messages with Links
The Minute Menu HX Messaging feature does not currently allow you to send attachments. However, you can still use it to send links to content hosted elsewhere, such as newsletters. To do so, embed a link in the message body. This requires very simple HTML code:
<a href="URL">linked text</a>
Here's an example of what this would look like in practice:
Dear Providers,
Our latest newsletter is available! You can read it <a href="https://www.website.com/newsletter/latest">here</a>.
Sincerely,
Your Sponsor
Before you send messages with links to your providers, send one to your test provider first. Then, log in to KidKare and make sure the link works properly.
Manage Provider Messages
You can view all messages previously recorded for a provider in the Manage Provider Messages window.
-
Access the Provider Messages window. You can do this two ways:
-
Click the Tools menu, select Messages, and click Provider Messages. The Provider Messages window opens.
-
Click Providers and select Provider Information. Then, click the Provider drop-down menu and select Provider. Click Messages (from the right). The Provider Messages window opens and displays messages for the provider you were viewing in the Provider Information window.
-
-
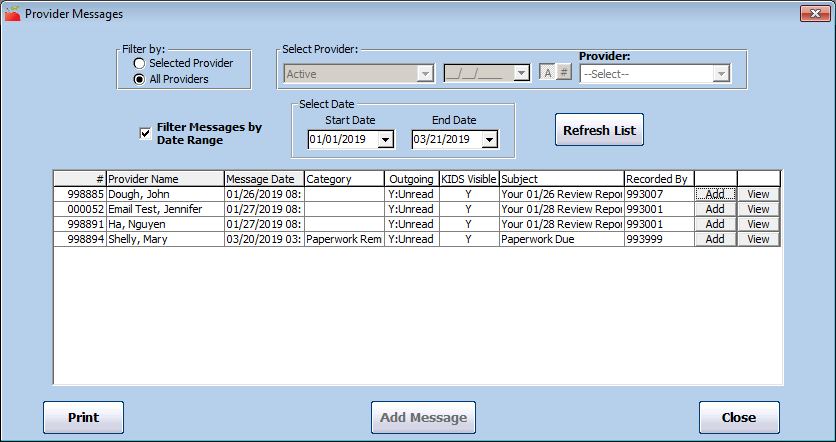
In the Filter By section, select All Providers or Selected Provider. If you plan to add a message, you must select Selected Providers and then select a provider from the Provider drop-down menu.
-
Check the Filter Messages by Date Range box to filter messages by a certain set of dates. Then, enter dates in the Start Date and End Date boxes.

-
Click Refresh List. Messages that meet the limits you set display.
-
Click the column headers to sort information in ascending or descending order.
-
Click Add to add a new message for a listed provider. For more information, see Add Messages at the top of this screen.
-
To edit an existing message:
-
Click View next to the message to change. The Edit Message dialog box opens.
-
Change the date/time, subject, body, and category, as needed.
-
When finished, click Save.
-
Click Close to return to the Provider Messages window.
-
-
To delete an existing message:
-
Click View next to the message to delete. The Edit Message dialog box opens.
-
Click Delete.
-
Click Yes at the Are You Sure prompt.
-
-
Click Print to print the message list.
Manage Provider Message Categories
You can assign provider messages to specific categories, if needed. Setting up and assigning categories to your messages allows you to review messages by category in the future. While this isn't a necessary step, it helps you manage data if you record a large amount of provider messages. For example, when you use the Message List Export File, you can filter to messages related to a certain category.
Examples of categories you could create include:
-
Paperwork Requests
-
Claim Questions
-
Payment Questions
-
Nutrition Questions
-
Complaints
Adding Message Categories
To set up message categories:
-
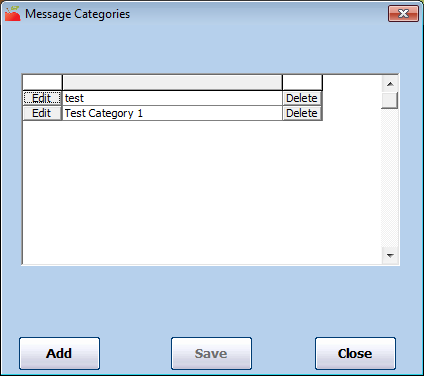
Click the Tools menu, select Messages, and click Message Categories. The Message categories dialog box opens.
-
Click Add. The Add Message Category Code dialog box opens.
-
Click the box and enter the category name.

-
Click Save.
Editing Message Categories
-
Click the Tools menu, select Messages, and click Message Categories. The Message categories dialog box opens.
-
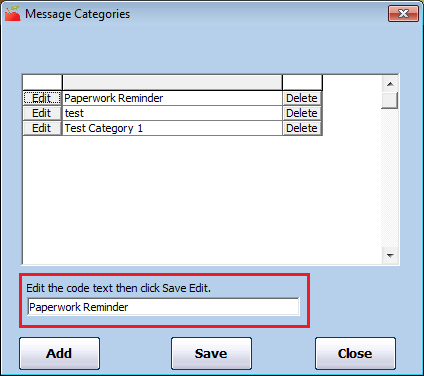
Click Edit next to the category to change.
-
Click the Edit Code box and update the category text.
-
Click Save.
Deleting Message Categories
We strongly recommend that you do not delete categories to which you have previously assigned messages.
-
Click the Tools menu, select Messages, and click Message Categories. The Message categories dialog box opens.
-
Click Delete next to the category to delete.
-
Click Yes at the Are You Sure prompt.