Customize the Review Questionnaire
The questionnaire used for online reviews is stored in the Admin Review site. We provide an initial questionnaire, but you can customize it to fit your agency and state's needs. Updating this questionnaire updates the final review form your Monitors complete in KidKare.
Click the link below to view and print the Admin Review site Getting Started Guide!
-
Log in to https://reviewadmin.minutemenu.com/Account/LogOn. Your account must have administration permissions before you can access this website. For instructions, see Add Admin Review Site Users.
-
Click the Design tab.
-
Add review sections, as needed:
-
Click Add Section. The section details open.

-
Click the Category drop-down menu and select the category into which to place this section.
-
Click the Name box and enter the name of the section.
-
Click Save.
-
-
Click
 . The question details open.
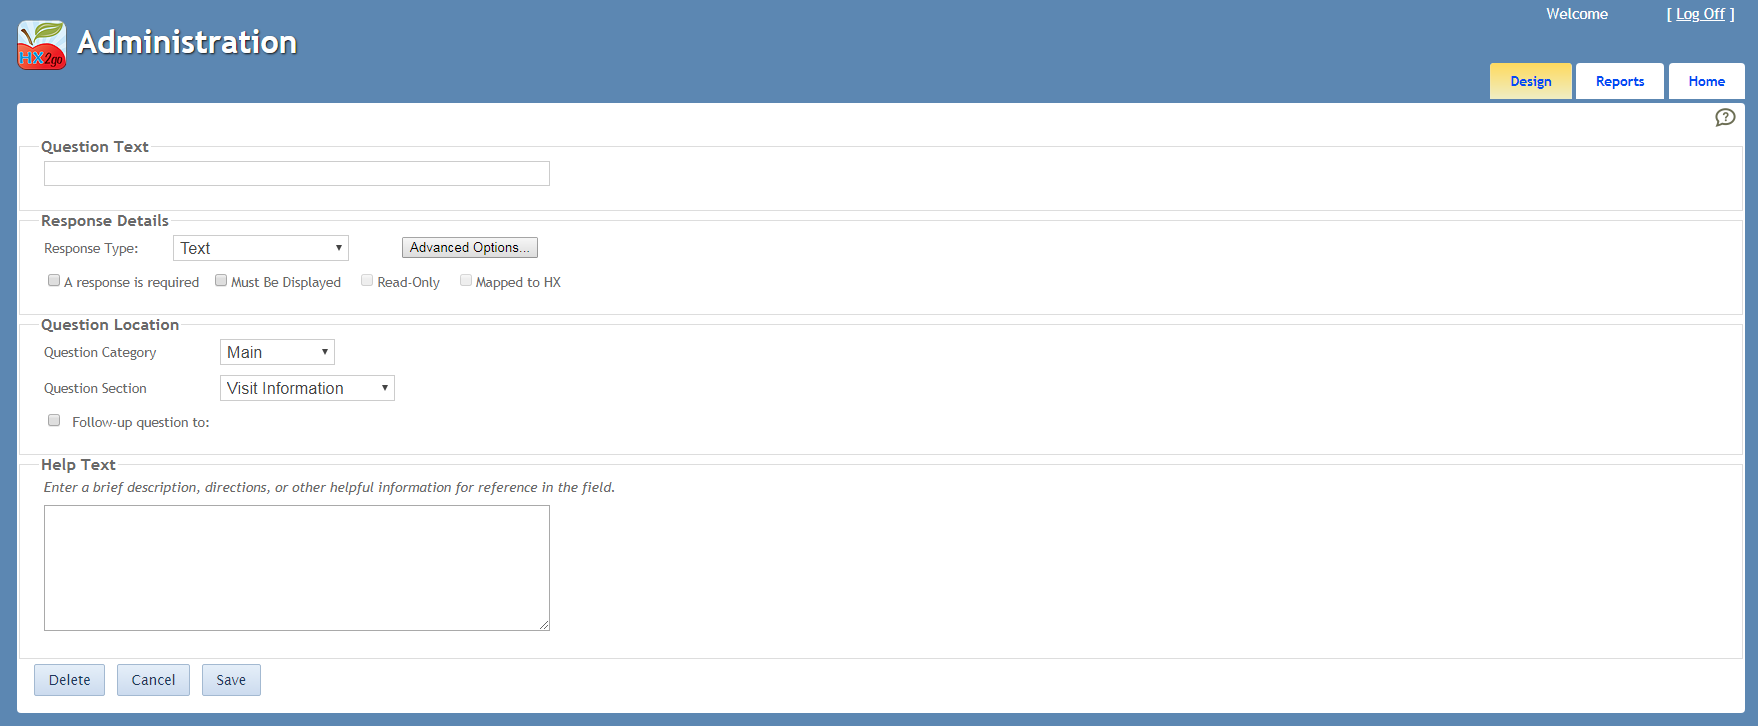
-
Click the Question Text box and enter the question.
-
In the Response Details section:
-
Click the Response Type drop-down menu and select the question type. For more information, see the heading Question Types and Layouts, below.
-
Check the A Response is Required box if this question is required.
-
Check the Read-Only box if this question is read-only.
-
-
Click Advanced Options to specify additional question requirements. For example, you can hide certain questions from the provider's copy of the review. The available options vary between question types.
-
In the Question Location section:
-
Click the Question Category drop-down menu and select the category in which to place the question.
-
Click the Question Selection drop-down menu and select the section into which to place the question.
-
Check the Follow-up Question To box to mark this question as a follow-up question. If you select this option, a drop-down menu displays. Select the question/situation on which to follow-up.
-
-
Click the Help Text box and enter useful information for the end user.
-
When finished, click Save.
Question Types and Layouts
Click here for a printable version of the table below.
|
Question Type
|
Response
|
|---|---|
| Text, Email, Phone, Temperature, or Number | This is a single line text box that allows Monitors to enter their response.
|
| Date | This is a date picker. |
| Yes/No | This is a button selection. Monitors can only select one option (Yes or No). |
| Yes/No/NA | This is a button selection. Monitors can only select one option (Yes, No, or N/A). |
| Single Choice, Single Child Picker, Meal Picker | This is a single select drop-down menu. |
| Multiple Choice, Multiple Child Picker | This is a multiple select drop-down menu. |
| Time/Duration | This is a time picker. There are no restrictions for past, current, or future times. |
| Date and Time | This is a date picker and a time picker. The time picker does not have any restrictions for past, current, or future times. |
| Memo |
|
| Signature | This box is used on the Finalize page. You cannot configure it on the Admin site. Users can sign their name with a mouse, finger, or stylus. |
Identify Who to Visit and When
Use the reports listed on this page to help plan home visits.
Providers Due Reviews Report
The Providers Due report lists all providers who must be visited, as well as the days and meals you should visit.
-
Click the Reports menu, select Reviews, and click Providers Due Reviews Report. The Provider Filter window opens.
-
Check the Review Due By box, and enter a date in the corresponding box. This is typically the end of the month, but you can set any date that meets your business needs. This ensures the report includes those providers who were scheduled for a visit before this date. You could also check the After box and set a date after which reviews are due. This allows you to swap visit schedules.
-
Set additional filters, as needed. For example, if your agency is larger and you have multiple Monitors, it may be useful to check the Monitor box and filter by specific Monitors.
-
When finished, click Continue. The Provider Nested Sort Order dialog box opens.
-
Click the First Sort By drop-down menu and select the first sort for the report. This defaults to Name. It may be useful to sort primarily by Zip Code or Map Location Identifier. Then, click the And Then By drop-down menu and select a secondary sort. For example, if you sorted by Zip Code, you can then sort by Name.
-
Click Continue. The report is generated (PDF).
This report contains the following information:
-
Last Claim Received: The last claim you have on file for the given provider. If the month listed here is several months old, then the provider is not actively claiming with your agency, so there is no need to visit the provider.
-
Last Review Date: The date on which you last conducted a home visit to the provider. If this date is very recent, this may be a sign that the provider required a follow-up visit for some reason. The Sponsor Review Worksheet should provide more information on this subject.
-
Review Due Date: The date from the Next Review Req box in the Provider Information Other tab. Note that the month is generally the important part of this date (instead of the actual day). Plan your visits in such away to make them convenient based on the geographic distribution of your providers. In some cases, you can plan around whether weekend or holiday visits are allowed.
-
First, Minute Menu HX looks at the last four (4) months of claim data. Each meal claimed by the provider is then added to this report. As long as you have attendance data in the database, this report also checks to see if Saturdays or Sundays were claimed. If no claims exist for a provider, this report looks at the provider's meal approval schedule in the Provider Information Meals tab.
-
Next, Minute Menu HX looks at the last 12 months' worth of reviews for each provider included in the report. Any meals that have been visited are crossed off the list an removed from the output. Additionally, if a provider claimed a Saturday or Sunday and a visit in the last 12 months was done on one of these days, that is removed from the report, as well. You can also set this to review only meals visited in the current fiscal year (Preference R.032).
-
The result of this analysis displays in the Review Type Needed column so you know exactly what meals should be seen, and whether you need to make a Saturday or Sunday visit. You would then locate other providers in the same geographic area who have meals that must bee seen. This allows you to plan your days more efficiently.
-
Providers Claiming Special Days Report
Special visits are needed for certain cases. This includes visits on weekends, holidays, dinners, evening snacks, and visits specifically designed to see when a provider serves a meal in two shifts. To help determine when these special trips are needed, print the Providers Claiming Special Days report. This report identifies all providers who are claiming any of the special situations noted above for a given month.
This report runs based on meal and attendance data in your database. This means that manual claims cannot be analyzed with this report.
To print this report:
-
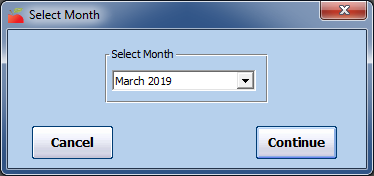
Click the Reports menu, select Reviews, and click Providers Claiming Special Days Report. The Select Month dialog box opens.
-
Click the Select Month drop-down menu and select the month for which to run the report.
-
Click Continue. The Provider Filter window opens.
-
Set filters, as needed. For example, if your agency is larger and you have multiple Monitors, it may be useful to check the Monitor box and filter by specific Monitors. You could also filter by providers who must be visited in the next month.
-
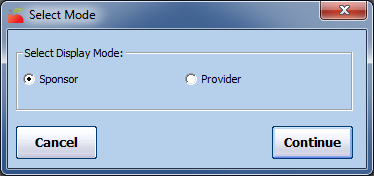
When finished, click Continue. The Select Mode dialog box opens.
-
Select the Attempted by the Provider option or the Paid to the Provider option.
-
Click Continue. The Provider Nested Sort Order dialog box opens.
-
Click the First Sort By drop-down menu and select the first sort for the report. This defaults to Name. Then, click the And Then By drop-down menu and select a secondary sort, if needed.
-
Click Continue. The report is generated (PDF).
This report's output shows each day a provider claimed given the special situation. For example, a provider who consistently claims on Saturday has each Saturday in the month listed. Any time the special situation is being claimed, and three (3) or more day care children are present, the date is noted with an exclamation point (!). Use this report to further refine the visits you plan on conducting in the coming month.
Track Your Caseload
There are five additional reports that are particularly useful in keeping track of your home visit caseload.
Home Visit Status Report
This report lists providers and provides a 12-month picture of visits.
When generating this report, choose the last month of a 12-month window to examine. That could be the current calendar month, or it could be the last month in the current fiscal year, current calendar year, or any other month you choose. The provider filter also displays, so you can limit the output of the report to focus on one subset of your providers (such as a Monitor's caseload), if needed.
Each review is noted in the calendar on the report, and a key displays at the bottom to help you better interpret the results. If there were two or more visits completed in the same month for a provider, the last review displays.
In addition to other information, visit counts are listed in the following columns:
-
#U: The number of unannounced visits that were completed within the last 12-month window examined. The provider was actually home for these visits.
-
#S: The number of successful visits, meaning that the provider was home.
-
#T: The total number of visits attempted.
The last page of this report provides summary counts of each of these three columns, which should help you determine whether you are meeting the minimum review requirements, especially in light of review averaging regulations.
Providers Not Reviewed Report
The Providers Not Reviewed report lists all providers not visited within a specific time frame. Federal regulations require that you visit all providers no less than once every six (60 months or once every nine (9) months, if your agency averages reviews. Use this report to ensure that providers are being visited often enough. When filtering providers for this report, you should typically choose a start date about six months before the current date and set an end date in the current month.
The following fields in the report are of some importance:
-
CACFP Start Date: A Provider whose CACFP Start Date was in the last 30 days might not have been visited yet. If a provider appears on the report but this date is very recent, that is probably not an issue.
-
Last Review Date: This shows when the provider was last reviewed, prior to the start date specified when generating the report. If this is blank, the provider has never been visited (according to the data in the Minute Menu HX database).
-
Next Review Date: This notes when the provider was supposed to have been visited next.
-
Last Claimed Date: This notes the month of the last claim. If this is several months in the past, the provider has gone inactive, and it probably okay that the provider has not been visited. If this is blank, the provider has never claimed (based on the data in the Minute Menu HX database).
Claim and Review Comparison Report
This report helps you ensure that you remain in compliance with your requirement to monitor meals and weekends in the same proportion that they are claimed. It is designed to compare the percentage of meals your providers have claimed with the percentage of those meals that are seen at home visits. Likewise, the report show cases the percentage of meals claimed at a weekend or holiday with the percentage of visits done on a weekend or holiday. Skip to the end of this report to ensure you are generally consistent in total. Remember that while you do not need to be exact, the percentages should be relatively close.
You may wish to filter this report to look t it for only one monitor, your own caseload, or the entire agency.
Projected Visit Dates Report
In most cases, planning an entire year's worth of visits is not a good idea, as visit schedules must be changed due to various discoveries you make during a home visit. However, it is still useful to help plan upcoming visits, especially when trying to ensure that visits to a specific geographic area are all done at roughly the same time. Print this report to list all reviews coming in the next 12 months, so you can make any necessary broad adjustments to the provider's scheduled reviews.
Children Not Seen at Reviews Report
Many sponsors want to know about children who are enrolled in a provider's home and are consistently missed during a home visit. Print this report to list all children not seen at a certain number of visits over a certain date range. When generating the report, choose the starting date for analysis. The ending date should be the current date.
Every review between the date selected and the current date is analyzed. You can then set the review count threshold (it defaults to two). If less than two (2) reviews are conducted for a provider during this period, the provider is ignored. For any provider that has at least two reviews, any child that is not seen at two or more reviews is listed in the report. An asterisk (*) displays for any child actually claimed during that month (but this is only known on automated claims from KidKare, scannable forms, or Direct Entry).
Schedule Provider Reviews
Minute Menu HX stores a next review required date for each of your providers. This is the date by which the next regularly schedule review should occur. This information is stored in the Next Review Reqd box in the Provider Information Other tab.
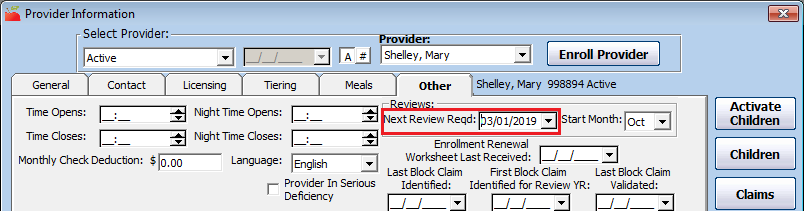
Each time you add a review (no matter the method you use), the system automatically calculates the provider's next review required date. This determination is made based on the type of review conducted and the review frequency required by your state. For example, if you conduct four (4) reviews per-year, the next review required date will be set to three (3) months after your current review. If you conduct three (3) reviews per-year, the next review required date is set to four (4) months after the date of the current review.
There are a few exceptions to this schedule:
-
If you record a Pre-Approval Review, the next review date is automatically scheduled for 30 days from the date of the Pre-Approval Review.
-
If you conduct a review and no one is home, the next review date is a follow-up scheduled for 15 days after the first review date.
-
If you indicate that a follow-up review is required for the review, the next review is scheduled for 15 days after the initial review date.
If your agency performs visits to providers each year as part of an annual provider renewal process, you may have enabled the Current CACFP Expiration Date field in the Provider Information General tab.
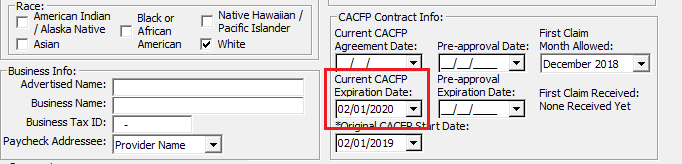
You can configure Minute Menu HX so this date takes precedence when scheduling upcoming reviews. This means that the next review due date is either earlier than the CACFP expiration date or the next review date that would have otherwise been scheduled. You can change this setting in the Sponsor Preferences window. For more information about setting preferences, see Set Preferences.
If you add a review in Minute Menu HX and note that the review type is a Special/Evaluation visit instead of a normal/follow-up review, that review does not affect the provider's next review date. This allows you to ad a record for a home visit, even though you may not want to change the currently scheduled visit date for that provider.
Understand Review Averaging
Per USDA regulations, sponsors must review home care providers at least three times per year, and no more than six (6) months can pass between reviews. However, many sponsors have updated their management plans to handle review averaging. This means that sponsors can review some providers only twice a year, as long as the agency visits providers an an average of three (3) times per year and no more than six (6) months passes between each visit.
To effectively implement review averaging:
Identify no more than one-third of your providers as in-good standing. These are those providers you are confident offer a high quality of care to the children in their home, always comply with Food Program regulations, and have never been put on corrective action. To make this determination:
-
Print the Review List Export File.
-
In the Review Filter window, check the Meals Disallowed box and select the Yes option.
-
Sort the report by provider name.
-
Remove any provider who has had a meal disallowed during a review.
-
-
Print the Serious Deficiency List.
-
Filter this list to specifically look for providers who have not been in serious deficiency in the last three (3) years.
-
Those providers who have been in the serious deficiency process should be removed from your list.
-
-
If you have one-third or more of your caseload in the resulting list from Step 1, manually review this list and remove any provider you do not feel should qualify until you reduce it to about one-third of our caseload.
Once you have your list, update review schedules. Minute Menu HX stores a next review required date for each Provider stored in the system. This is the date by which the next regularly schedule review should occur. This information is stored in the Next Review Rq box in the Provider Information Other tab.
To override this setting:
-
Click the Providers menu and select Provider Information. The Provider Information window opens.
-
Click the Provider drop-down menu and select the provider to change.
-
Click the Other tab.
-
Click the Next Review Reqd box and enter the next review date for this provider.

-
Click Save.
If you do this once or twice a year, you will visit these good-standing providers less often. Because many visits result in a required follow-up (especially for providers placed on corrective action), you should easily remain above the three (3) reviews per-year average. To ensure you are staying above the required average, run the Home Visit Status report.
Some agencies are required to specifically assign providers to a particular review cycle—two, three, or four reviews—as part of state agency requirements related to review averaging. If this is necessary for your agency, contact Minute Menu Support to enable a custom field to track the type of schedule a provider has.
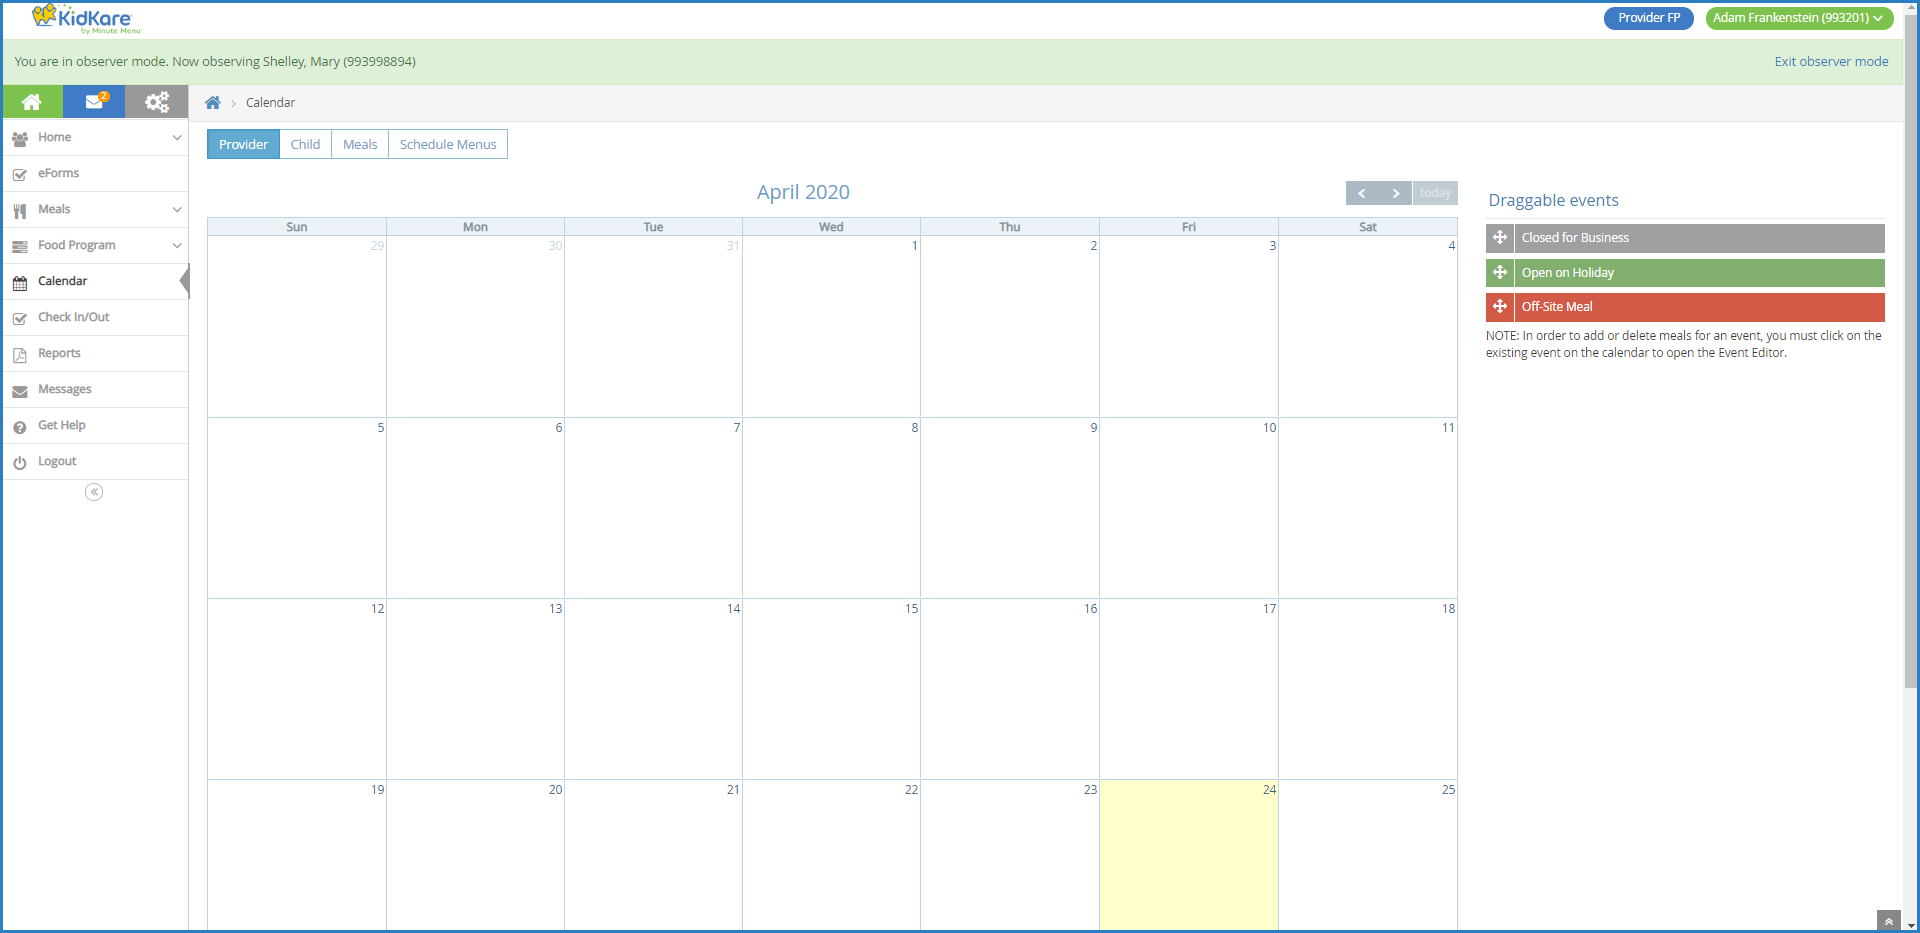
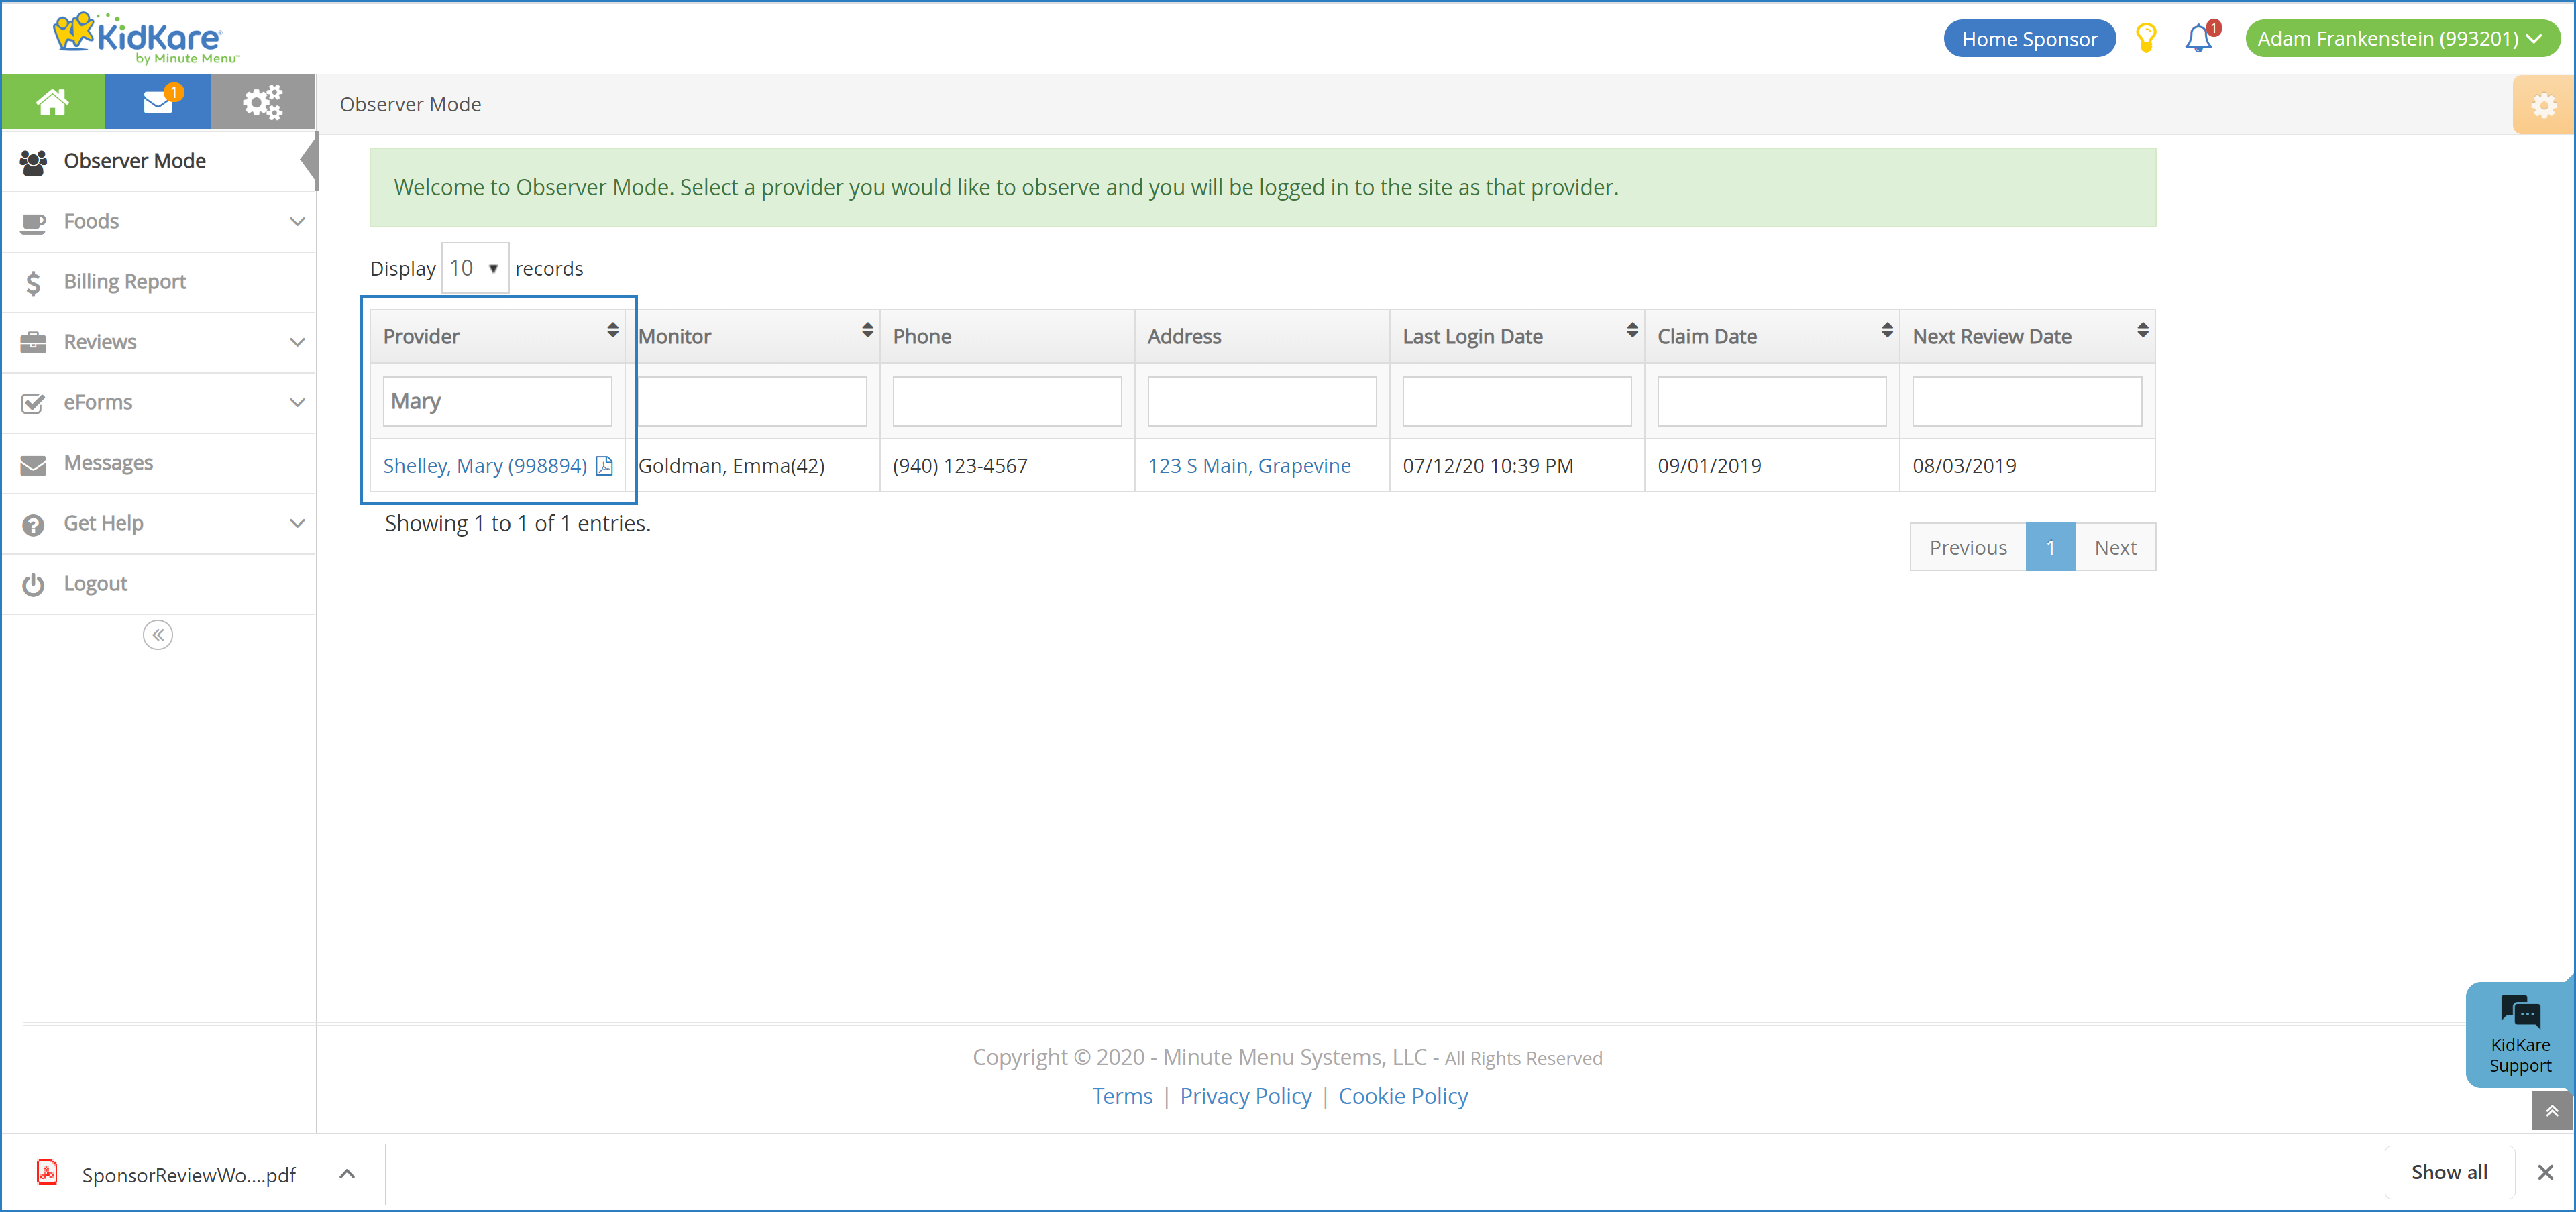
Prepare for Reviews with Observer Mode
You can view meals, attendance, and reports in Observer Mode. It can be helpful to review this information before or during a home visit.
-
Log in to app.kidkare.com with the same ID and password you use to access Minute Menu HX. A list of your providers displays.
-
Click a provider's name to view that provider's account in Observer Mode. The account opens.
-
To see which meals have been recorded:
-
From the menu to the left, click Calendar. The Calendar page opens.
-
Click the Meals tab. Any day with a meal abbreviation has menus, meal counts, and attendance.
-
B: Breakfast
-
A: AM Snack
-
L: Lunch
-
P: PM Snack
-
D: Dinner
-
E: Evening Snack
-
-
Click the meal abbreviation to view meal details.

-
-
To print the 5 Day Attendance report:
-
From the menu to the left, click Reports. The Reports page opens.
-
Click the Select a Category drop-down menu and select Meals and Attendance.
-
Click the Select a Report drop-down menu and select 5 Day Attendance.
-
Click the Select Day box and select a date to view. The day you select and four previous days with meal counts are included on the report.
-
Click Run. Each child claimed and the meals for which they were claimed display. Totals display on the last row.
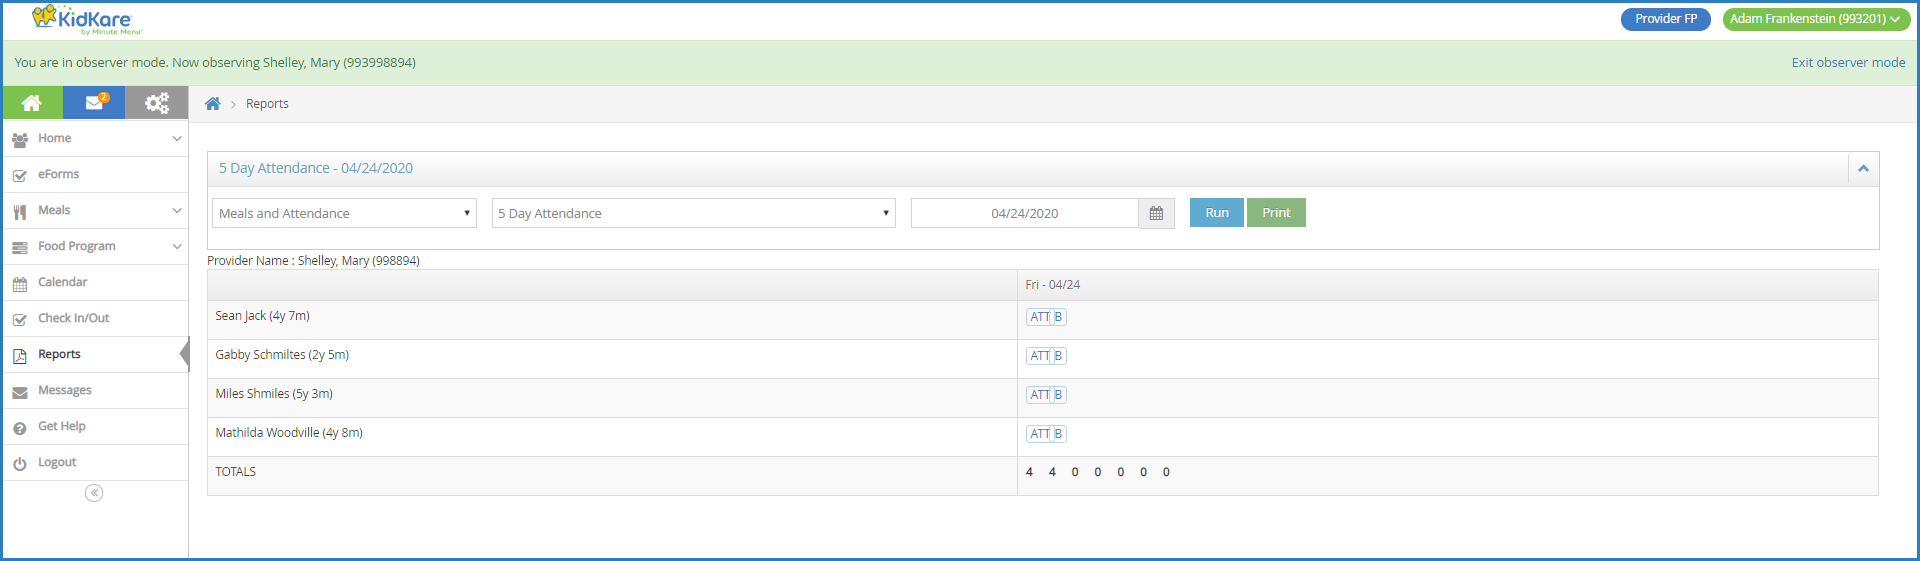
-
Click Print to print the report.
-
-
To view served and whole grain-rich foods:
-
From the menu to the left, click Reports. The Reports page opens.
-
Click the Select a Category drop-down menu and select Meals and Attendance.
-
Click the Select a Report drop-down menu and select Foods Served.
-
Click the Select a Month box and select the month to view.
-
Click Run. The food served for the month displays. Any food marked with (WG) is a whole grain-rich food.
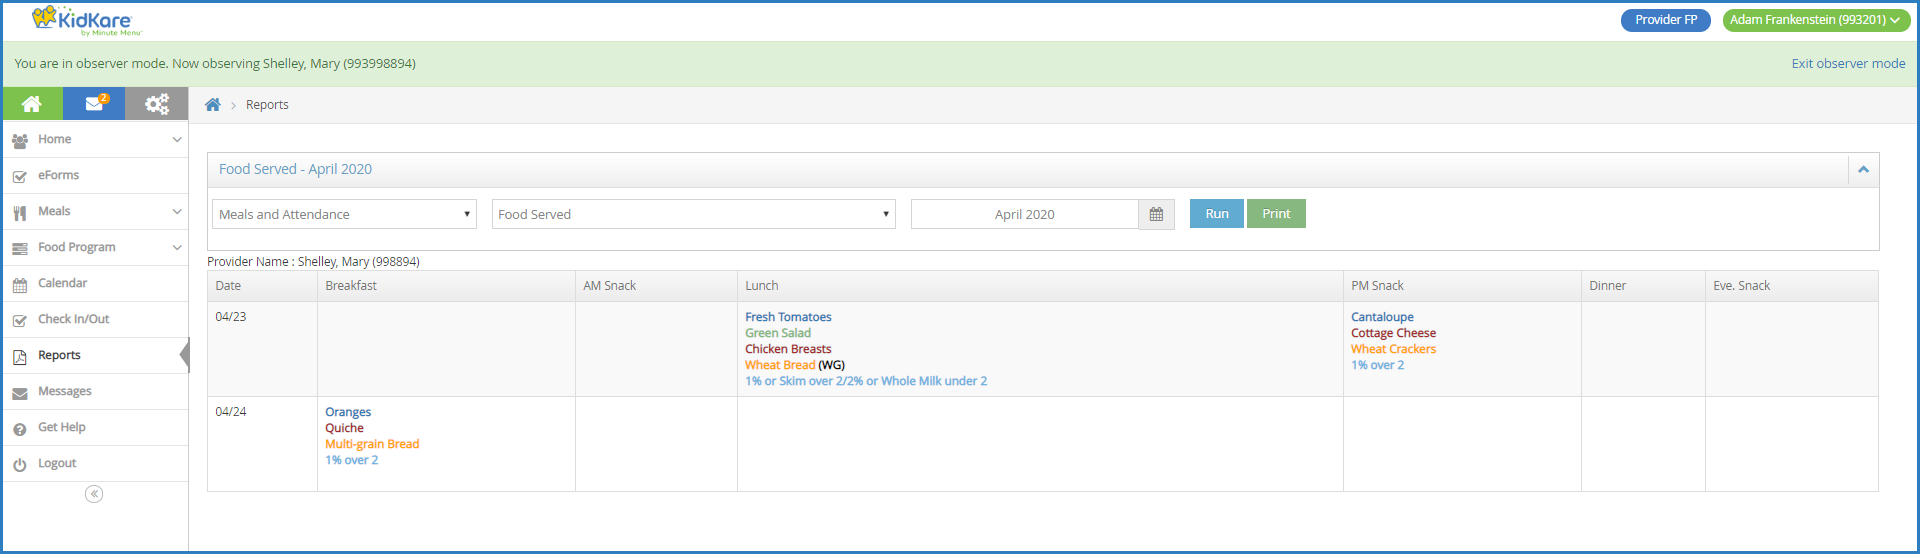
-
Click Print to print the report.
-
-
When finished, click Exit Observer Mode.
Click here to watch a recorded webinar that walks you through using Observer Mode.
Print the Sponsor Review Worksheet
When you conduct a home visit, you typically need to take a large amount of information about the provider with you so you know how to conduct the visit. Print the Sponsor Review Worksheet for your Monitors so they have a quick reference sheet of a provider's relevant information. You can print this report in both KidKare and Minute Menu HX.
Printing the Sponsor Review Worksheet in KidKare
-
Log in to app.kidkare.com. Use the same credentials you use to access Minute Menu HX.
-
On the Observer Mode page, use the Provider box to locate the provider to review.
-
Click the link in the Provider column. The Sponsor Review Worksheet downloads.
Print the Sponsor Review Worksheet in Minute Menu HX
-
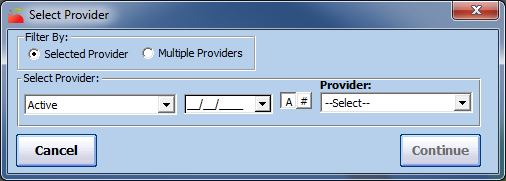
Click the Reports menu, select Reviews, and click Sponsor Review Worksheet. The Select Provider dialog box opens.

-
In the Filter By section, select Selected Provider or Multiple Providers.
-
If you select Selected Providers, click the Provider drop-down menu and select the provider for whom to print the report.
-
If you select Multiple Providers, click Continue. The Provider Filter window opens. Set filters, as needed. Continue to Step 3.
-
-
Click Continue. The Select Month dialog box opens.
-
Click the Select Month drop-down menu and select the month for which to print the report.
-
Click Continue. The Select Mode dialog box opens.
-
Select the Sponsor option. This ensure the report includes important information, such as messages, documentation, and the user who enrolled the sponsor into Minute Menu HX.
-
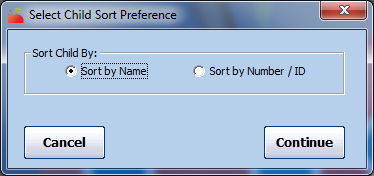
Click Continue. The Select Child Sort Preference dialog box opens.
-
Select Sort by Name or Sort by Number/ID. If you are using scannable review forms, you may find it easier to list the children by child number so it is easier to fill-out the scannable review forms.
-
Click Continue. The report is generated.
This report shows all aspects of a provider's file relate to the home visit. This includes the following (and more):
-
Claim History: This is the last three (3) months' worth of claims received. The claim source indicated here is SF (Scannable Form), WEB (KidKare), or MAN (manual form). This lets you know what kind of form supplies to bring with you and what to expect in the way of paperwork. If the provider has started claiming on KidKare, follow the pre-visit procedures for KidKare providers. If these claims have meal and attendance data, this section also notes what days of the week the provider actually claimed.
-
Review History: This is the last 12 months' worth of home visits recorded in Minute Menu HX.
-
Training History: This is the last 12 months' worth of training recorded in Minute Menu HX.
-
Days Closed: This is the days/meals the provider is closed, as noted on the Provider Calendar. This helps you know when to visit the provider.
-
Driving Instructions: This is driving instructions recorded in the Provider Information Contact tab.
-
Comments: These are any comments entered in the Provider Information General tab.
Print the 5 Day Attendance Reconciliation Report
This report provides a chart of each child claimed over any five-day period. Use this report to reconcile the children observed at meals with the children claimed for those same meals (as listed on this report). This report sufficies in many states that interpret the 5 Day Attendance Reconciliation as a comparison of the children in the home at the current meal being observed with the children being claimed at that same meal for the last five days.
However, some states require that you reconcile the schedules of the children from the child enrollment forms with the children that were actually claimed. If this is the case in your state, you should also print the Child Attendance Reconciliation report. For more information, see Child Attendance Reconciliation Report below.
To print the 5 Day Attendance report:
-
Click the Reports menu, select Claim Data, and click 5 Day Attendance Report. The Select Provider dialog box opens.
-
In the Filter By section, select Selected Provider or Multiple Providers.
-
If you select Selected Providers, click the Provider drop-down menu and select the provider for whom to print the report.
-
If you select Multiple Providers, click Continue. The Provider Filter window opens. Set filters, as needed. Continue to Step 3.
-
-
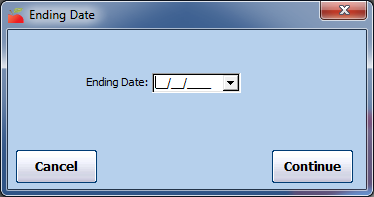
Click Continue. The Ending Date dialog box opens.
-
Click the Ending Date box and enter an ending date for the report.
-
Click Continue. The Select Child Sort Preference dialog box opens.
-
Select Sort by Name or Sort by Number/ID.
-
Click Continue. The 5 Day Attendance dialog box opens.
-
Select Claimed Children Only.
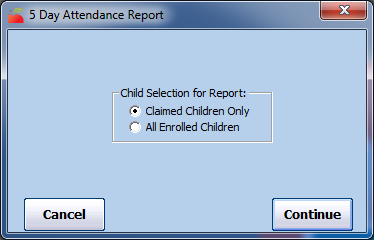
-
Click Continue. The report (PDF) is generated.
Print the Child Attendance Reconciliation Report
The Child Attendance Reconciliation report provides an analysis of a given provider over one week. It compares the attendance supplied by the provider with children that should have been in attendance against the times supplied for the children.
Some states allow you to print this report for a prior month and base your five-day reconciliation analysis solely on its contents. If there are any discrepancies on the report, you must follow-up with an appropriate action, which might include starting the household contact process for this provider to resolve the discrepancies.
Other states require the five (5) day reconciliation be done on the five most recent days claimed. If the provider is claiming via KidKare, you can still print the report to save you the effort of performing the reconciliation manually. You can still print this report for the yet unclaimed week (since the data for the current month would not be in Minute Menu HX at the time of the review) and use it to quickly reference child enrollment schedules with what was recorded by the provider in attendance.
To print this report:
-
Click the Reports menu, select Reviews, and click Child Attendance Reconciliation Report. The Select Provider dialog box opens.
-
In the Filter By section, select Selected Provider or Multiple Providers.
-
If you select Selected Providers, click the Provider drop-down menu and select the provider for whom to print the report.
-
If you select Multiple Providers, click Continue. The Provider Filter window opens. Set filters, as needed. Continue to Step 3.
-
-
Click Continue. The Effective Starting Date dialog box opens.

-
Click the Effective Starting Date box and enter a starting date for the report.
-
Click Continue. The Select Child Sort Preference dialog box opens.
-
Select Sort by Name or Sort by Number/ID.
-
Click Continue. The Child Attendance Reconciliation Options dialog box opens.
-
Check the Print Legend Key box to print a legend key on the report.

-
Click Continue. The report is generated.
This report highlights all children that should not have been claimed but were claimed for a given meal in red. Red over-claims could indicate any of the following:
-
The child's schedule has changed since enrollment information was supplied. The child's enrollment information needs to be updated.
-
The child's schedule varied for one day.
-
In combination with very consistent attendance patterns, this could indicate an invalid block claim. Even without consistent attendance patterns, this could indicate that the provider is claiming children who aren't in the home. Note that if a child's enrollment indicates that their days/times of attendance vary, the report will note that, which can help explain any discrepancies.
If your claims processor is configured to cross-reference the days of a child's enrollment with what was actually claimed, these red highlights should correspond with the following error codes on the Office Error report: 109, 110, and/or 120.
The report also highlights all children that weren't claimed, but should have been claimed, for a given meal in yellow. Yellow under-claims could indicate the following:
-
The child's schedule has changed since enrollment information was supplied. The child's enrollment information needs to be updated.
-
The child's scheduled varied for one day.
-
The provider is attempting to avoid the appearance of being over capacity.
This report rounds to the nearest 15 minute interval when computing meal times or child attendance times (from enrollment form or daily event records). As a result, it can sometimes show over-claiming (red) or under-claiming (yellow) when neither situation happened. For example, if a child leaves at 4:50PM and the next meal starts at 5:00PM, the report rounds the child's departure time to 5:00PM and shows an under-claim.
It also doesn't take into account any buffer times. For example, this report assumes that a child who departs at 5:00PM should be fed the 5:00PM meal because the times overlap, even though the child couldn't have eaten at that meal.