Use Provider Calendar
The Provider Calendar is where you document days you are closed, open on holidays, or serving meals off-site (such as during field trips). It is important to document this information so your food program sponsor is aware that you are closed, serving special meals (holidays), or are serving meals off-site. All closures you add will be logged to the Business Closure section just under the calendar Legend.
-
From the menu to the left, click Calendar. The Provider calendar displays by default.

- Use the
 to select the month in which to work.
 - You can mark yourself as closed, having an offsite meal, or open on holiday. You can also add extended business closures if you plan to be closed for a longer amount of time (go to Step 4 to add one of these).
- Click and hold the draggable event under the Draggable Events section.
- Drag and drop it on the appropriate date. Note that dates that have meals scheduled are highlighted yellow.
- Click the event you added to add details, such as what meals are impacted and any pertinent notes. Your sponsor will be able to see this information. When finished, click OK.
- To add extended business closures:
- Click Add Extended Business Closure.
- Click the Closure Name box and enter a name for this extended closure.
-
- Enter a Start Date and End Date.

- Click Save. The extended closure is added to the calendar, as well as the Business Closure log.
- Enter a Start Date and End Date.
To delete an event you added in error, click the event to open the Event Editor. Then, click Delete. At the Are You Sure prompt, click Delete.
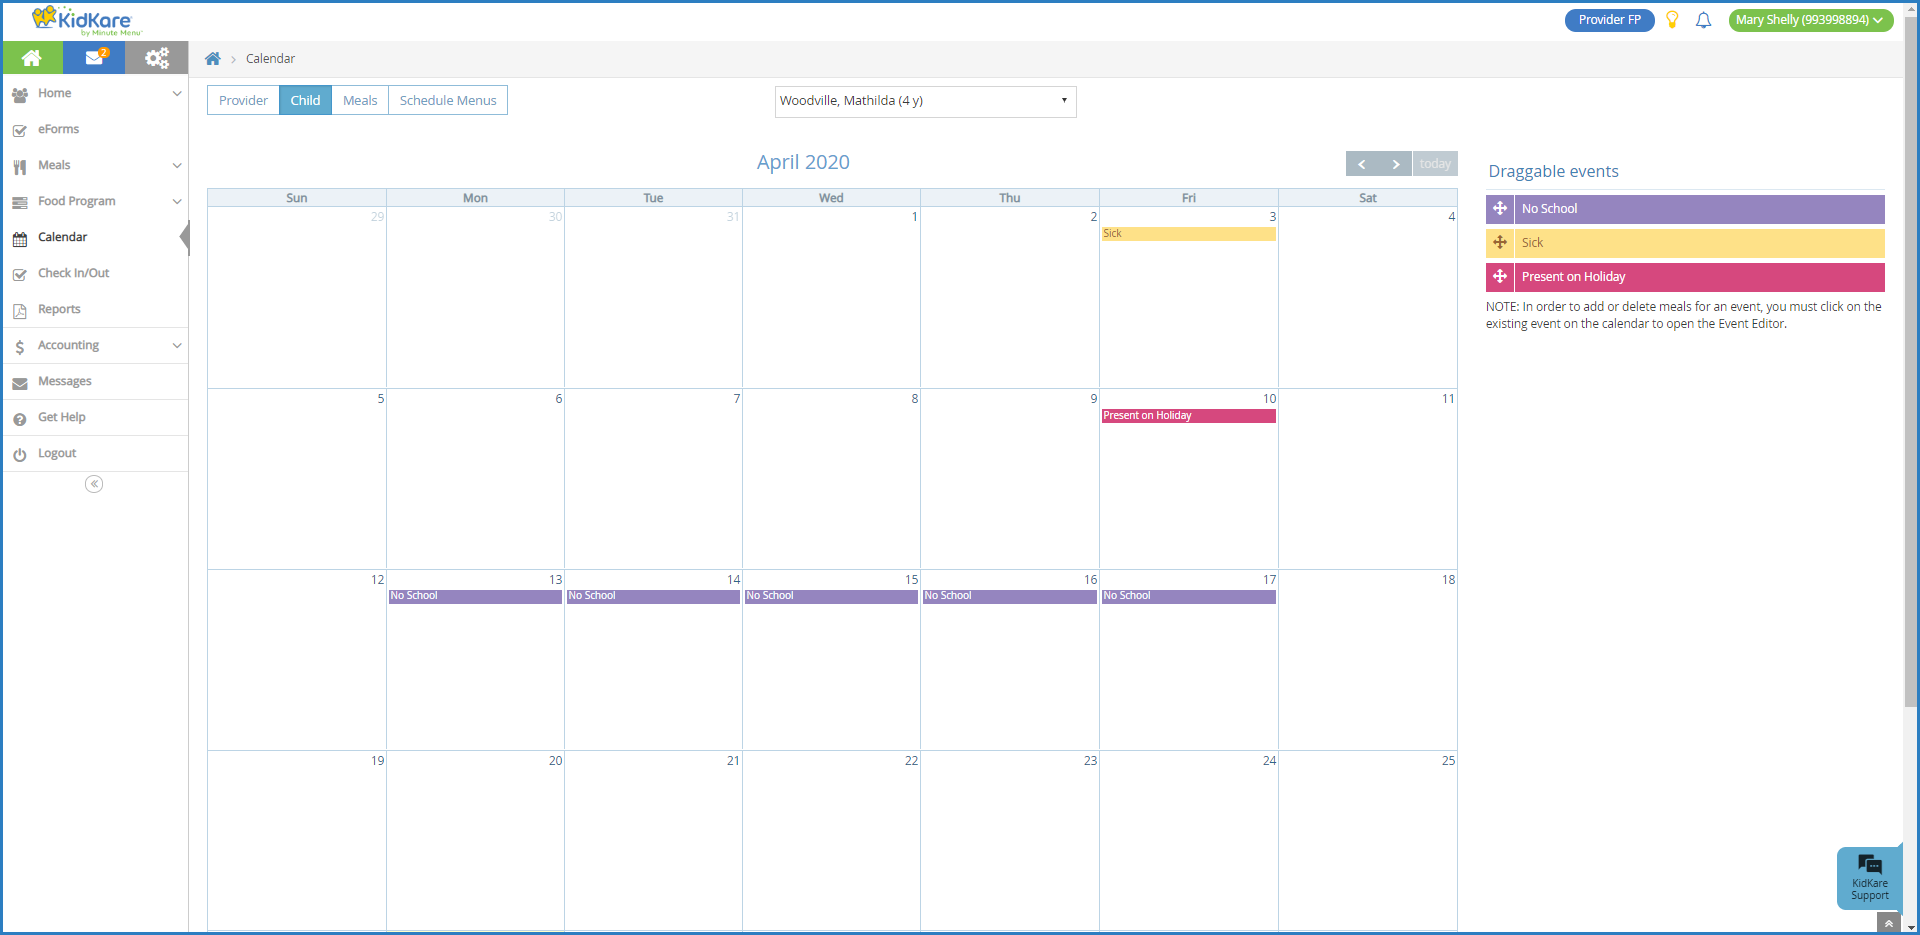
Use the Participant/Child Calendar
Use the Participant Calendar to document participants who are present on a holiday, in your care when school was out, or in your care because they were too sick to go to school. Watch the video below, or scroll down to view step-by-step instructions.
-
From the menu to the left, click Calendar. The Calendar page opens.
-
Click Participant. The Participant Calendar opens. Note that you can have multiple calendars selected at the same time. If you do, events from the selected calendars display.
-
Click the Select Participant drop-down menu and select the child. There are two ways to do so:
-
Expand each category, locate the participant, and click their name.
-
Click the Type to Search box and enter all or part of the participant's name to filter the list. Click the participant's name.
-
-
Drag events from the Draggable Events section to the right and drop them onto the appropriate day on the calendar.
-
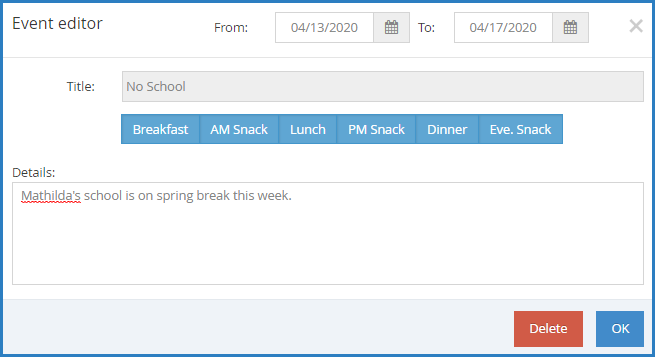
Once you have added an event to the calendar, click it to add details. The Event Editor pop-up opens.
-
Select the meal(s) this event affects.
-
Click the Details box and enter any notes about the event.
-
When finished, click OK.
To delete an event you added in error, click the event to open the Event Editor. Then, click Delete. At the Are You Sure prompt, click Delete.
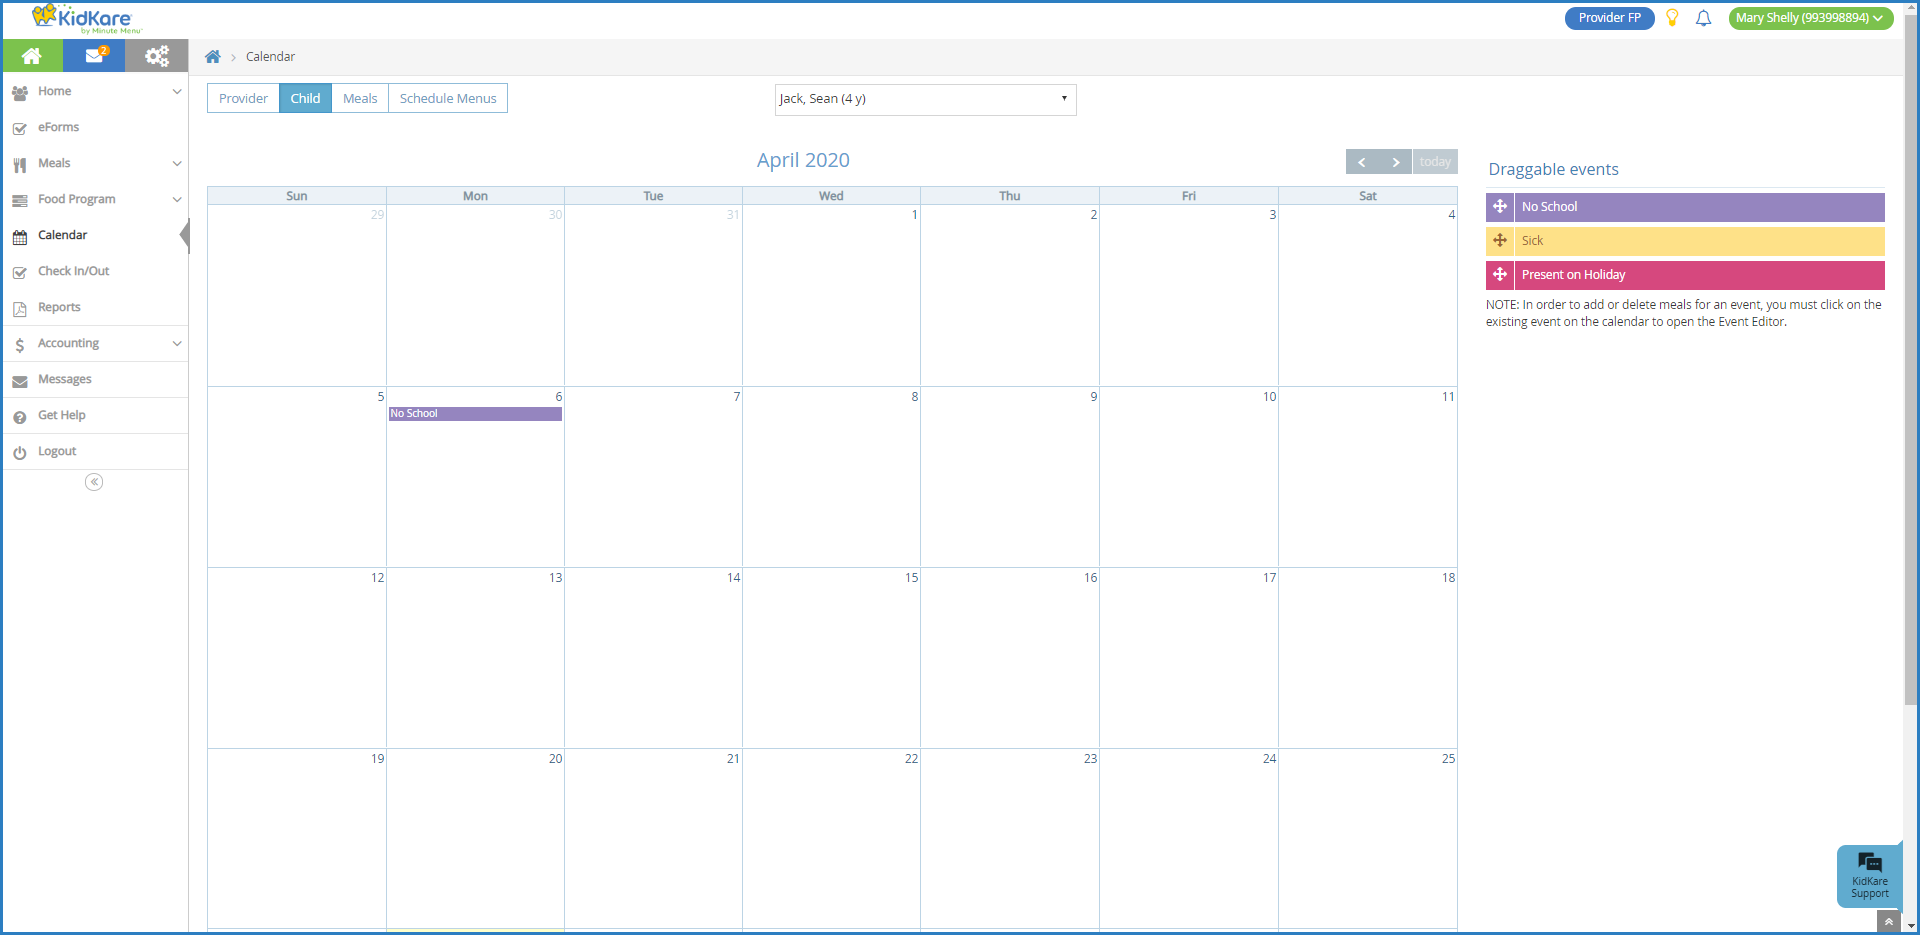
Mark School Out
When school-aged participants are out of school, add the event to the calendar.
-
From the menu to the left, click Calendar.
-
Click Participants. The Participants Calendar opens. Note that you can have multiple calendars selected at the same time. If you do, events from the selected calendars display.
Note: According to your display settings, this option and calendar may be called something else, such as Child and Child calendar. For more information, see Set Display Settings.
-
Click the Select Participant drop-down menu and select the child. There are two ways to do so:
-
Expand each category, locate the participant, and click their name.
-
Click the Type to Search box and enter all or part of the participant's name to filter the list. Click the participant's name.
-
-
Drag the No School event from the Draggable Options to the right and drop it on the calendar.
-
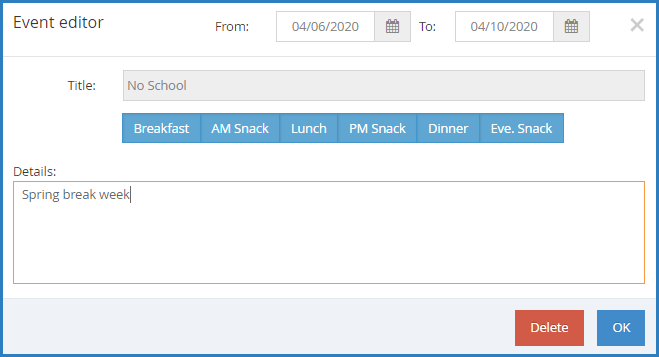
Click the event. The Event Details pop-up opens.
-
Use the From and To boxes to set a date range if school is out for more than a single day. Enter the first day school is out in the From box, and enter the last day school is out in the To box.
-
The Child Calendar defaults to school out all day. If you are entering a partial school out day, click the meals where school was in session to unselect them. Only those meals for which school was out should be blue. For example, if school was in session in the morning during Breakfast and the AM Snack, click Breakfast and AM Snack to clear them. Only those meals for which school was out should be selected.
-
Click the Details box and enter any notes about this event, if needed.
-
Click OK.
Use the Meals Calendar
The Meals calendar shows all of the meals that have been recorded on the Enter Meal screen with children in attendance. Use this calendar to keep track of what meals have and have not been entered into KidKare.
Use the Schedule Menus Calendar
The Schedule Menus calendar shows all of the menus that have been planned in advance or scheduled for a future date. Use this calendar to ensure you have all menus planned and scheduled when you are building your menus in advance.
See more by reviewing the Schedule Menus page.